

Primus Brake Controller Side Lever Adjustment and Light Staying On All of the Time
Question:
It sounds as if you have a Tekonsha Primus brake controller without the boost function built in. Your controller should have a power adjustment wheel on the left side and a manual brake activation slide switch on the right side. If there is a lever on the side it is most likely a leveling lever that needs to be set so that the sensor in the controller is level and will supply the proper voltage with deceleration of the vehicle. The lever for leveling the brake controller is normally pointed on one end or has an arrow on it, that is designed to be pointed straight down at the ground, when the vehicle is level. This allows for installation of the brake controller at varying angles in the towing vehicle. You may find that pointing the lever in the correct position allows the brake controller to go into power saving mode. If you are leaving the trailer connected to the vehicle the brake controller will not go into power saving mode because it detects a complete circuit and remains ready to operate when needed. Other than the lever mentioned above, the installation and setup of your controller should be the same as the installation and adjustment for the Tekonsha PRIMUS IQ , item # TK90160, which I have linked instructions to. At this time we do not have instructions available for the older models of the Primus controller. The display on a brake controller is designed to be used for thousands of hours and typically does not burn out. The amperage draw for the display is so small, as little as 3 miliamps, that the battery will actually discharge faster while sitting than the brake controller can cause it to discharge so, unless your tow vehicle sits for extremely extended periods of time, you will not need to worry about disconnecting the controller, unless you feel the need to. Some older controllers did not have a power saving mode built in.
asked by: JOHN G
Expert Reply:
It sounds as if you have a Tekonsha Primus brake controller without the boost function built in. Your controller should have a power adjustment wheel on the left side and a manual brake activation slide switch on the right side. If there is a lever on the side it is most likely a leveling lever that needs to be set so that the sensor in the controller is level and will supply the proper voltage with deceleration of the vehicle.
The lever for leveling the brake controller is normally pointed on one end or has an arrow on it, that is designed to be pointed straight down at the ground, when the vehicle is level. This allows for installation of the brake controller at varying angles in the towing vehicle. You may find that pointing the lever in the correct position allows the brake controller to go into power saving mode. If you are leaving the trailer connected to the vehicle the brake controller will not go into power saving mode because it detects a complete circuit and remains ready to operate when needed.
Other than the lever mentioned above, the installation and setup of your controller should be the same as the installation and adjustment for the Tekonsha PRIMUS IQ , item # TK90160, which I have linked instructions to. At this time we do not have instructions available for the older models of the Primus controller.
The display on a brake controller is designed to be used for thousands of hours and typically does not burn out. The amperage draw for the display is so small, as little as 3 miliamps, that the battery will actually discharge faster while sitting than the brake controller can cause it to discharge so, unless your tow vehicle sits for extremely extended periods of time, you will not need to worry about disconnecting the controller, unless you feel the need to. Some older controllers did not have a power saving mode built in.


Product Page this Question was Asked From
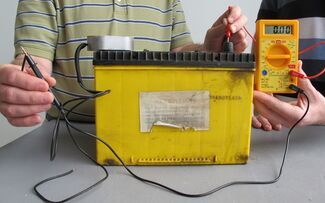
Digital Multimeter with 42" Long Test Leads - LED Display

- Electrical Tools
- Testers
- Multimeter
- Yellow
- Performance Tool
more information >
Featured Help Information
Instructions
Miscellaneous Media

Continue Researching
- Shop: Brake Controller
- Shop: Tekonsha Prodigy P3 Trailer Brake Controller - 1 to 4 Axles - Proportional
- Search Results: prodigy p3
- Q&A: Troubleshooting Trailer Brakes that Surge at Slow Speeds with a Tekonsha Brake Controller
- Article: Wiring Trailer Lights with a 7-Way Plug (It's Easier Than You Think)
- Search Results: coupler lock
- Video: etrailer Trailer Hitch Reciever Coupler Lockset Alignment Collar and Bag Review
- Video: Review of Blue Ox Trailer Hitch Lock - Hitch Receiver And Coupler Latch Lock Set 2" Hitch - BLU36XR
- Shop: Blue Ox Hitch Receiver and Coupler Latch Lock Set - Swivel Design - 2" Hitches
- Q&A: Torque Spec for Tightening Trailer Brake Assemblies to Trailer Spindle
- Q&A: Recommended Torque Value For Installing Brake Assembly to 3500# Axle
- Shop: Lippert Baggage Door Turn Latch - 1-3/8"
- Shop: Towing Mirrors
- Shop: Trailer Wiring
- Shop: RV Exterior Lighting
- Shop: Master Lock Hitch Receiver and Coupler Latch Lock Set - Swivel Design - 2" Hitches
- Shop: etrailer Trailer Hitch Receiver and Coupler Lockset, Alignment Collar, and Bag - 2"
- Shop: Blue Ox Trailer Hitch Receiver Lock for 2" Hitches
- Video: Blue Ox Hitch Receiver and Coupler Latch Lock Set Review
- Video: Anderson Rapid Jack Review
- Video: Hopkins Never Fade Trailer Bubble Level Set Review
- Video: JR Products Deluxe Compartment Door Thumb Latch Review
- Video: Lippert Baggage Door Turn Latch Review and Installation
- Q&A: Graduated Level That Can Stick-On Trailer
- Q&A: What do the Numbers Indicate on Hopkins Graduated RV Levels # HM08525
- Q&A: Is The Camco AccuLevel Measured In Degrees Or Inches
- Q&A: Instructions On How To Install The Hopkins Graduated RV Levels, # HM08525
- Shop: Blaylock EZ Jack and Wheel Chock for Tandem-Axle Trailers - Aluminum - 20,000 lbs
- Search Results: friction sway bar
- Article: Replacing the Bearing, Races and Seals on a Trailer Hub
John
6/2/2011
It sounds as if you have a Tekonsha Primus brake controller without the boost function built in. Your controller should have a power adjustment wheel on the left side and a manual brake activation slide switch on the right side. If there is a lever on the side it is most likely a leveling lever that needs to be set so that the sensor in the controller is level and will supply the proper voltage with deceleration of the vehicle. The lever for leveling the brake controller is normally pointed on one end or has an arrow on it, that is designed to be pointed straight down at the ground, when the vehicle is level. This allows for installation of the brake controller at varying angles in the towing vehicle. You may find that pointing the lever in the correct position allows the brake controller to go into power saving mode. If you are leaving the trailer connected to the vehicle the brake controller will not go into power saving mode because it detects a complete circuit and remains ready to operate when needed. Other than the lever mentioned above, the installation and setup of your controller should be the same as the installation and adjustment for the Tekonsha PRIMUS IQ , item # TK90160, which I have linked instructions to. At this time we do not have instructions available for the older models of the Primus controller. The display on a brake controller is designed to be used for thousands of hours and typically does not burn out. The amperage draw for the display is so small, as little as 3 miliamps, that the battery will actually discharge faster while sitting than the brake controller can cause it to discharge so, unless your tow vehicle sits for extremely extended periods of time, you will not need to worry about disconnecting the controller, unless you feel the need to. Some older controllers did not have a power saving mode built in.