
Summer Starts Here - Save up to 70%

Roof Rack Includes:
Part Numbers: TH53RE,TH79SC,TH145160

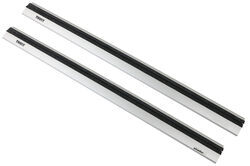
Premium, aerodynamic crossbars attach to Thule Edge feet to create an aftermarket roof rack for your vehicle. T-tracks with dual rubber strips let you easily install awnings, carriers, and other channel-mount accessories - no trimming required.
Features:
Specs:
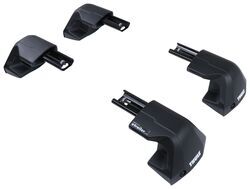
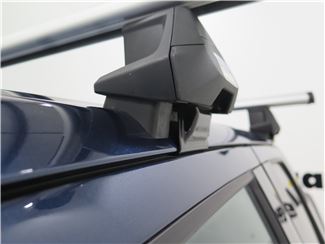
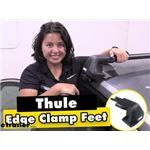
These heavy-duty feet let you install Thule Edge crossbars on your vehicle with a naked roof. Single attachment points let you tighten bars to feet and feet to roof simultaneously with included torque tool.
Features:
Specs:
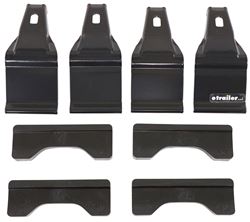
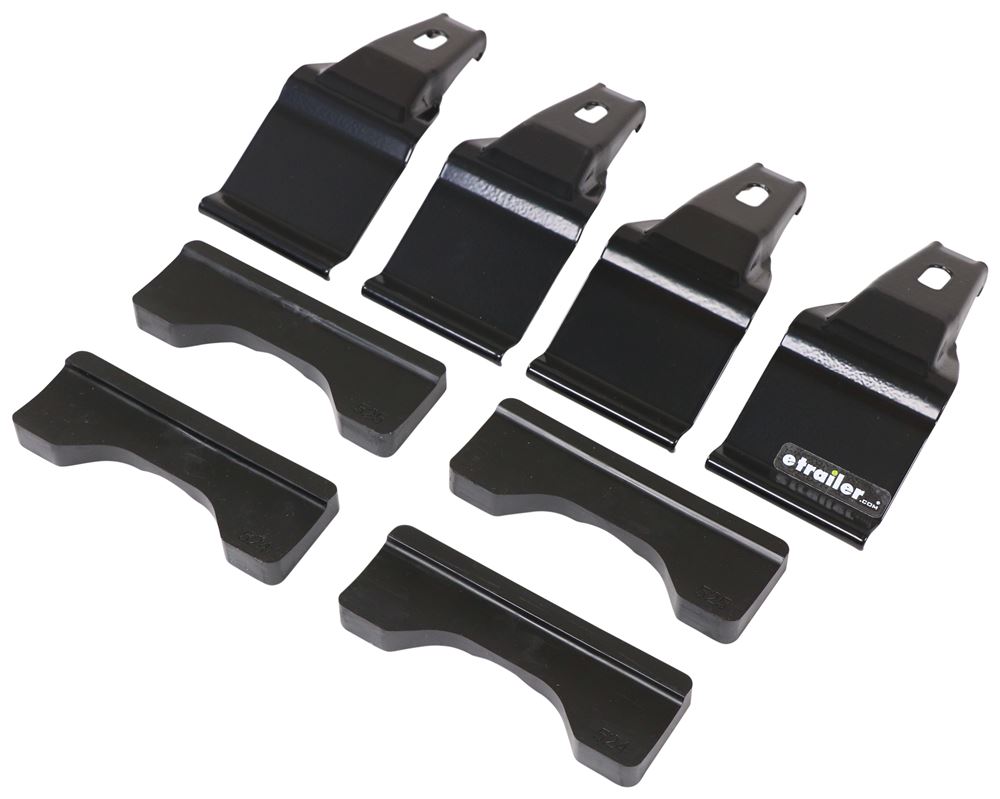
These custom clips and pads let you mount Thule Evo Clamp or Edge Clamp feet on your vehicle with a naked roof. The clips are easy to install - just slide them into the feet until they click. Rubber pads help protect your roof from scratches.
Features:
Specs:
Secure, Click-In Installation

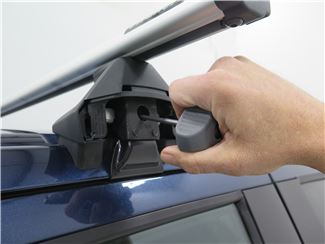
To complete installation, place the fully assembled rack on your roof at the location specified in the fit kit manual. Tighten the rack in place with the torque tool included with the feet. The single attachment point bolt lets you quickly secure the crossbars to the feet and the feet to your door jambs simultaneously. An audible click from the torque tool indicates the rack is secured properly.
Protection for Your Roof
The rubber-coated steel clips and molded rubber pads protect your vehicle's paint from scratches and abrasions. The pads easily slide onto the bottom of each foot, and they are specifically designed to fit the shape and contour of your roof.
Videos are provided as a guide only. Refer to manufacturer installation instructions and specs for complete information.
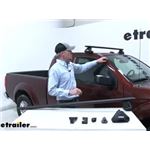
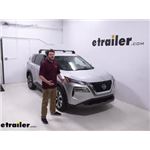
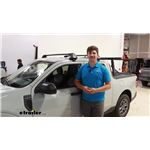
Today in our 2016 Nissan Frontier, we're going to be doing a test fit on the Thule Evo WingBar roof rack system for naked roofs for the Nissan Frontier. This Thule Evo WingBar roof rack system is going to allow you to carry roof mount accessories on your Nissan Frontier. Things like bike racks, kayak carriers, cargo baskets, and much more. That way it'll free up space for our truck bed. It's designed specifically to work with your Nissan Frontiers naked roof. With it in place, you can see that there's no movement so you can rest assured your accessories will be safe.
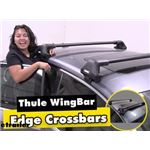
It features aerodynamic aluminum roof bars, you can pick these up on either black or silver right here at etrailer.com. Now these are going to be a lot quieter than your traditional round or square bars. It'll help eliminate some of that wind noise or that drag when we're heading down the road.It'll work with your standard clamp on accessories as well as your T-slot accessories. Will simply pivot that end cap to the side and rather than having to remove that rubber strip or take it out and trim it, we can just slide that inaudible 00:01:10 right through the center and position it anywhere we want inside that bar. The crossbars are held in place by four Thule Evo feet.
These are going to set them up roughly three and an eighth of an inch from the top of the roof to the underside of the bar. That way we're going to have more than enough room for those clamp on accessories to grab a hold of the bar without them making contact with the roof. Now the Evo feet are padded here where they make contact with the roof. That way they won't harm or scratch that finish.If you look underneath the cover here, you can see that it's going to protect our hardware from the elements. It's also going to deter theft.
That way no one's going to tamper with it or try and take it off of our frontiers roof. Now the bolt that tightens it to our frontiers roof is right through here and the tool is included. Now with my door open, you can see how the clip comes down and attaches to the inside of the frame here. Now these clips are specifically designed to work with your frontiers so you can see how they're going to match the molding of the inside of the door and then we can replace our weatherstripping and our doors going to shut this fine. Again, that cover is going to protect all of that so no one can remove it and if we'd like to, we can replace the plastic lock cores with the Thule metal inaudible 00:02:26 cores to add more security.
That way nobody can get it on there and remove that.Now this roof rack system does have a weight capacity of 220 pounds. This is a step up compared to some other roof rack systems. We're going to be able to carry a lot more accessories with this one. You do however want to check with your frontiers owner's manual to see if your roof can support that much weight. I've already got my front crossbar in place. We need to set up the rear. Let's go ahead and do it together. I've got one side ready to go, we just need to prepare the other side. The first thing we'll do is we'll take our Evo clamp foot and we'll assemble this. So what we can do is we can take off the door here, you'll need to make sure it's unlocked first, so the lock needs to be returned to the horizontal position. Then we can just pick up on it slightly and then pull out just like that. We'll set that aside, then we can turn it over and we can grab our rubber pad.Now, they are all numbered. The front and rear pads are different, so you need to look at your instructions and make sure that you have the correct one. For our rear crossbar, we need to be sure we have number five, two, five. Now they only install one way, you simply just line it up with the way it looks on the bottom of the foot and then press it in place. Now surrounding the pad, it just has a little lip that will snap into the bottom of the plastic portion here. So just look over it and make sure that it is clipped in place. Once you think you've got it, give it a good pull, make sure it's not coming off. If it is, just give it another good squeeze and then you should have it. Now from here we can grab our actual clamp. Now these two are also numbered. You can find that right here on the underside. For our rear crossbar, we're looking for 342. It's going to be located again right here. Then we can take it, push it in place, and we're going to be listening for like a slight click.Once it's done that we can pull it out and make sure it's in there. If you have it in there, it shouldn't come out, so you'll be able to move around like this. Now we're ready to slide it onto our crossbar. We can go ahead and turn our crossbar open. Before we actually install our foot onto our channel underneath, we need to set our scale. Per our instructions, we need to set it to 45 so it's numbered. You don't have to worry about seeing this, you're going to be able to see it on yours. I'm going to go ahead and set mine to 45 and the numbers get larger this direction. So just set it to where you can see the 45 and then you're ready to slide it in place. So as I'd mentioned, the foot slides onto the channel here.The way you slide it in place is, you'll need to unlock the brakes on the inside of the foot here. So you can see the two metal pieces here we want to do is take a thumb on both and push. You can see how it moves like this. We'll get it lined up, press in, and then it will allow us to slide it in place. We're going to slide it all the way on until the foot makes contact with the scale here. Then we've got the correct measurement. From here we can install our end cap and we're ready to set it in place on our frontier. Now we want to be sure that our doors are opened up and then we can gently set it in place in the general area. Now for the next part will need to draw down the weather seal around the inside of our doorframes so we can actually just pull down and we're going to be right in this area here, so let's go and do that for both sides.Now the next thing we need to do is take a measurement from the front of our cross bar here to the front of the crossbar here. That will give us our placement for the rear bar. But before we do that, let's talk about how we got the position for our front crossbar. So per our instructions, we take a measurement from our windshield and measure up to the foot pack here. Most of the time you take a measurement from the corner of the windshield, but for the frontier, you need to do it more towards the center of the windshield. You can see how it kind of arches downward. That's going to cause the crossbar to move further forward and that's what we want. We want to take a measurement from more of the center of the windshield that will mark out your line for where your foot pack is going to be. If we we're to measure it from the corner, it would cause it to go back and it would throw off the whole rear bar. So again, just be sure you measure up from the center of the windshield to the end of the foot pack.So now that being said, let's go ahead and grab our measurement for the placement of our rear crossbar. From the front to the front, we're looking at about 27 and a half inches. For our instructions, we'll be sure and do that for both sides. So I'm going to pull down that weather stripping just to make sure it's out of the way and what we want to do is make sure that clamp hooks on to the bottom of the frame here. So I'm actually just pushing up in place with my thumb. I'm going to hold it there. Then I'll take my included tool and take up some of that slack. That way the hook stays there. Now when we feel that resistance, we can stop and then move over to the other side and do the same thing. Once we've taken that slack out of both sides, then we can begin tightening them down. Now as we're doing this, we want to be sure we're alternating side to side. That way it makes it nice and even on both sides.Then once you get it to where it's almost tightened down all the way, our included tool is unique in that it will click when it's properly torqued down. So once we get it to where it's almost tight, just listen for that audible click. Once everything's all tightened up, we can go ahead and put on our cover, make sure it snaps in place, we'll walk it up, and then let's not forget to replace our weather stripping and then we can close up the door and we're all set. With everything installed, we're ready to load up our favorite roof mount and accessory and hit the road. But that's going to complete our test fit of the Thule Evo WingBar roof rack system for naked roofs on our 2016 Nissan Frontier.
Average Customer Rating: 4.6 out of 5 stars (36 Customer Reviews)
Premium, aerodynamic crossbars attach to Thule Edge feet to create an aftermarket roof rack for your vehicle. T-tracks with dual rubber strips let you easily install awnings, carriers, and other channel-mount accessories - no trimming required. These heavy-duty feet let you install Thule Edge crossbars on your vehicle with a naked roof. Single attachment points let you tighten bars to feet and feet to roof simultaneously with included torque tool. These custom clips and pads let you mount Thule Evo Clamp or Edge Clamp feet on your vehicle with a naked roof. The clips are easy to install - just slide them into the feet until they click. Rubber pads help protect your roof from scratches.
One year in, this fit kit and the whole system have worked very well on my Kia EV6.
I miss the simplicity, in terms of cost as well as installation and removal, of the old Thule rectangular-bar racks, but this system looks better, is quiet, won't sag, and seems more robust.
Been a month haven’t received them yet they are in stock but guess we are waiting for one item which it’s in stock date gets pushed back every day. And the company doesn’t let the customer know the date changes or when they will send it.
Great solution for the naked roof on my 2011 Porsche Cayenne S
These themselves seem great and solid - I just don't love the way they look hovering above the fit-kit.
Great instructions on etrailer made installing this roof rack a breeze. Looks and works great on my Nissan Frontier.
The product was easy to install
Works great for rooftop carrier.
This "fit kit" from THULE does not impress me much. It does not sit flush with the roof rails of my 2021 Toyota highlander, doesn't really line up with the openings on the flush mount rails, and only attaches to the vehicle via one bolt at each of the 4 mounting locations. In that sense it's inferior to even the OEM toyota roof rack mount.
Needed the Thule bars fast before leaving for a trip. Showed up right when they estimated it would when I ordered. Tutorial video was super helpful. Thank you!!
Great product, works flawlessly every t ime!
Strong and sturdy and no wind noise. Very satisfied!
Kit fit great. shipping was supposed to be overnight but ups didn’t do their job. Really nice kit easy to install high quality
Ask the Experts about this Roof Rack
Do you have a question about this Roof Rack?
Thule Accessories
Fit to this rack on your 2018 Nissan Frontier
Info for these parts were:
At etrailer.com we provide the best information available about the products we sell. We take the quality of our information seriously so that you can get the right part the first time. Let us know if anything is missing or if you have any questions.


Thank you! Your comment has been submitted successfully. You should be able to view your question/comment here within a few days.
Error submitting comment. Please try again momentarily.