
To see if this custom-fit item will work for you please tell us what vehicle you'll use it with.


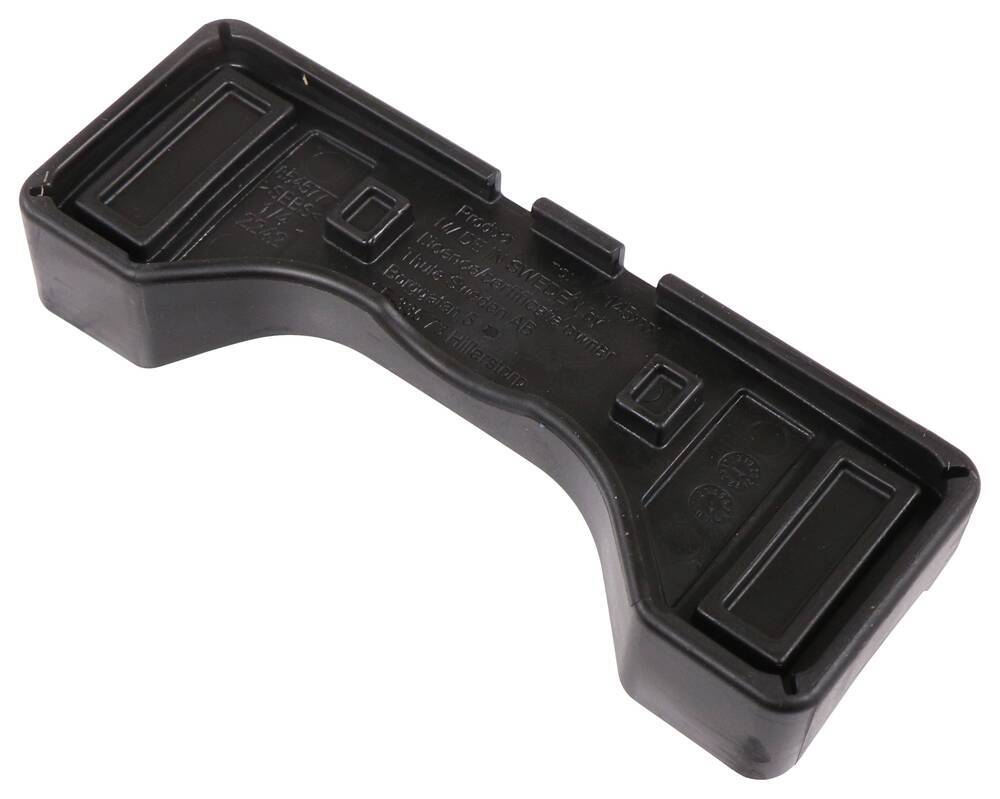


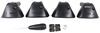
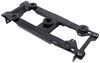
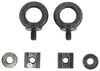
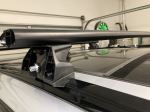
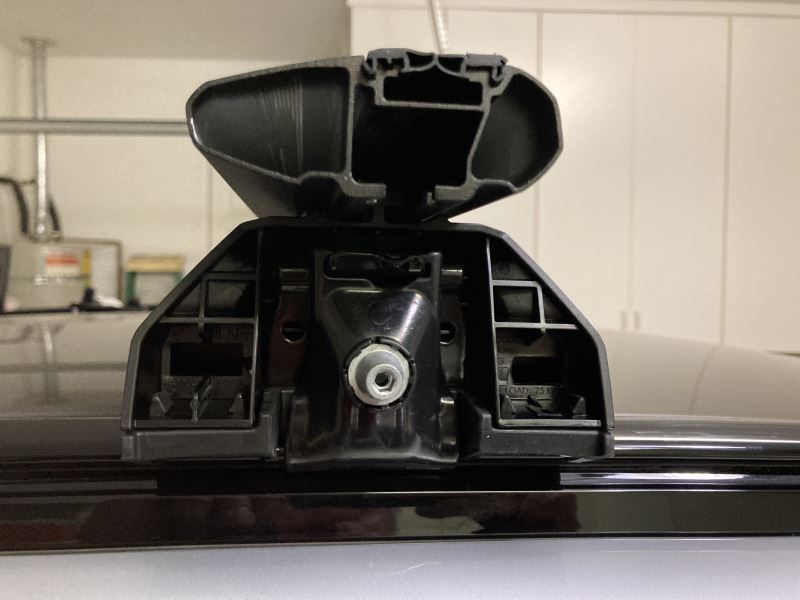
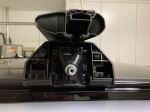
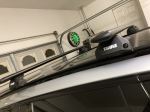
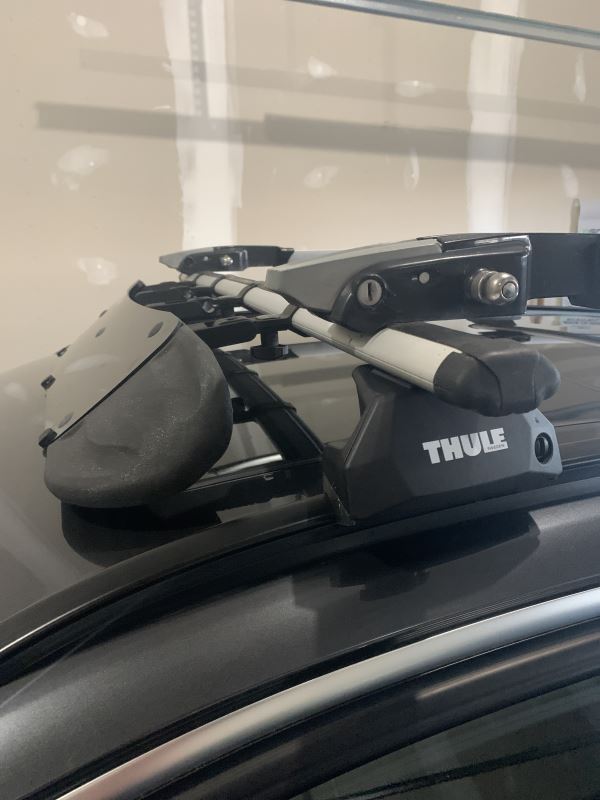
These custom clips and pads let you mount Thule Evo Clamp or Edge Clamp feet on your vehicle with a naked roof. The clips are easy to install - just slide them into the feet until they click. Rubber pads help protect your roof from scratches.
Features:
Specs:
Secure, Click-In Installation
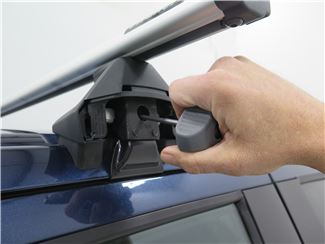
To complete installation, place the fully assembled rack on your roof at the location specified in the fit kit manual. Tighten the rack in place with the torque tool included with the feet. The single attachment point bolt lets you quickly secure the crossbars to the feet and the feet to your door jambs simultaneously. An audible click from the torque tool indicates the rack is secured properly.
Protection for Your Roof
The rubber-coated steel clips and molded rubber pads protect your vehicle's paint from scratches and abrasions. The pads easily slide onto the bottom of each foot, and they are specifically designed to fit the shape and contour of your roof.

Videos are provided as a guide only. Refer to manufacturer installation instructions and specs for complete information.
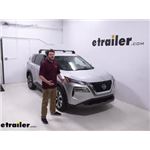
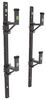
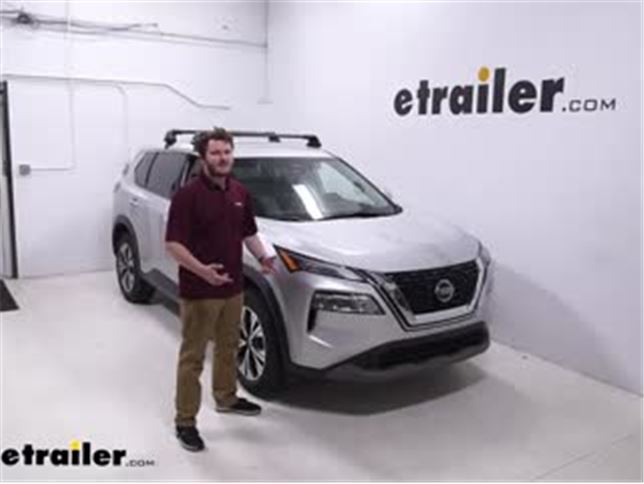
Hey everybody, Cooper here from etrailer. Today we're gonna be taking a look at the Thule WingBar Edge roof rack system on our 2021 Nissan Rogue. Now our Rogue does have plenty of storage space but if you are looking to carry around some of those bigger items like fishing gear, snowboards, skis or even a kayak, the first step is going to be getting a roof mounted system like this one. And since we have no rails, we are going to have to get a fit kit for our vehicle specifically to go with it. Our crossbar is rated for 165 pounds but our roof might have a different weight rating. So it's important to know all of those numbers so that way you're not using too much weight and going by your highest capacity.
We do wanna find the lowest capacity number and make sure you are staying within that range. Taking off our cap let's us get a little bit closer look at our crossbar. We're going to have a really nice aerodynamic design here which tapers off at the end, meaning that we're just going to cut down a lot of that wind noise and drag that comes with putting something on top of your vehicle. Our bars are thin enough that a lot of our clamp on accessories are going to fit it around with that clearance. But if you find yourself wanting a T mounted track accessory, we do have that ability on our wind strip.
Instead of having to cut it up we can go ahead and insert our T-track accessories down into the wind strip itself. The only trade off is if you find yourself taking off and putting on those accessories over time. You do have a chance to win these wear these out a little bit quicker compared to some of the other roof rack systems. Talking about a couple different measurements, we're going to talk about usable crossbar space. We're going to see that our car does taper off and we have a longer crossbar in the front.
So our usable space on our front crossbar is actually 38 inches while our back crossbar has a usable space of 35 and a half inches. Taking a look at the overall height added onto our car we can see that that's just right above three and a half inches and that's just how much height we're adding on to the top of our vehicle. Another measurement to know is how much space do you have from the top of your roof to the bottom of the crossbar to fit any clamping accessories around And looking at that, we can see that we're just barely under two and 347 inch. So that's how much space you're going to have to fit that clamping accessory around the crossbar. Another important measurement we're gonna keep in mind is our crossbar spread.
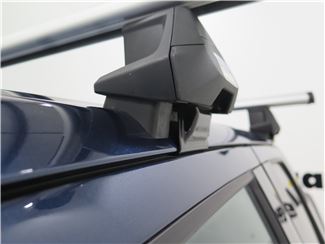
Looking at our crossbar spread looks like it's going to be roughly about 28 and a half inches, which is going to be wide enough for most roof mounted accessories that you're gonna wanna put up there. However, since we did not have any rails this is a fixed point system, so if you have anything above 28 inches, we're not gonna be able to use it on our roof rack. The purpose of our end cap here is just to help secure our hardware underneath to make sure nobody can come up to your vehicle with, let's say an Allen key, undo it all and take it off of your roof. So we took this off earlier to look at the crossbar but now we're going to take a look at some of the other systems. Through this hole we're going to be able to see our Allen key securing point which does tighten down our clamp here, which sits within the door jamb of our vehicle. So this is really the our point of contact that's kind of holding it all together. And looking at our pads here, these are also vehicle specific and all come in a fit kit together to fit your vehicle. Make sure you use our fit guide here at etrailer to make sure you're getting the specific fit kit for your year, make and model. If you're looking for a different type of security feature we can replace these plastic lock cores which essentially just take a flathead screwdriver or key to undo with metal lock cores that use actual keys that can be keyed alike to any other Thule accessory if you buy the correct cores. Our crossbars are going to be made of a really nice lightweight aluminum with a black powder coat finish, which overall just means they're going to be very lightweight and super durable to the weather, which is really nice for something that's going to spend its time on top of your roof out in the elements. The installation process can be a little bit tricky at times, especially because this is a naked roof system. We are going to have to get very specific measurements and only certain pads are gonna go on certain crossbars. So if you need any help with that installation process here's what it looks like. Now start an install like this. I like to lay everything down out on the table to make sure we have all our pieces. We have our crossbar, our two pieces of wind strip, our hooks, our rubber feet, our towers and the covers for our towers. So the first step we're going to do is help determine which side we're going to use for left and right for our crossbar. As we can see, we have this nice tapered design. So this side that's just a little bit on the thinner side is going to be our back side meaning that facing me, we're going to have our right side over here and our left side over here. So when we go to install our feet, that's a very important thing to note and we can actually come in and look at them and tell that they are marked for right and left markings which means that we're going to be able to take them, push them in right over here. We are going to go ahead and have to push this down just a little bit for it to fit in and then we will hear it click into place. And we're just going to repeat that on our left hand side. Taking a look at the top of our tower we can see that there are these markings for letters letting us know the different settings that we can have it on. You'll check your instruction manual to see which one you need to set yours to. Since this is our back crossbar, we are going to go ahead and take our included tool and tighten it down until we get to the letter D. Now that we have this towers tightened down to the letter D, we are going to go ahead and repeat this process for our other side. With our towers installed, our next step is going to be to install our wind strips. Out of the packaging, this will come as one piece, so we'll need to just go ahead and tear it right down the middle. But once you do that, you will take the wind strip with the arrows and you'll make sure that those arrows are pointing towards. They will go on the front of the crossbar and we'll be pointing towards the front of the crossbar as well. And after getting that all installed down, we will go ahead and take our back piece of wind strip and just do that same process but on the other side. When you install your wind strips, you may notice a little bit of overhang on one side, you would go ahead and trim this off but since this will not be a permanent fixture on the car we are not going to do that for ours. Now the instructions may tell you at this point to go ahead and install your clamps. I find it easier, especially if you're doing it by yourself, to go ahead and just set this up on your roof with no clamps attached. That way you can more freely adjust it until you find that correct measurement that you're gonna have to get from your instruction book. Now we're going to go ahead and take our back crossbar and just gently set it up on the top of our vehicle so we can go find that measurement a little bit easier. And you'll find in your instruction manual you're going to have two different measurements. Your first measurement is going to be from the top of your glass to your first crossbar. And then your second measurement is going to be from your first crossbar to your back crossbar. Checking in our instruction manual, we're looking for 28 and three eighths. So we're going to go ahead and put that measurement on the front of our front crossbar and we are going to adjust our back crossbar until the front of it meets that measurement. And then we are gonna go ahead and repeat that on the other side until we find that alignment. Now with our measurements checked on both sides, this is the point where I like to introduce the clamp into the system. Going ahead, opening up our passenger side door. You can fit this clamp right into that hole and we should hear it click right into place. And that will allow our clamp to sit more or less flush right inside our door jamb. Next, you're going to take your included tool here and tighten the tower down. If you're doing this by yourself, about 50% on this side. And then go to the other side and do about 75% coming back and forth until they're evened out 'cause you don't wanna totally tighten down this side and have it essentially pull that roof rack system one way. Now for the final step of our install, once our towers are all tightened in so we're going to go ahead and take our end cap. It should just kind of slide right into place over our tower and then take a flathead screwdriver or any sort of key and then go ahead and just twist it and that'll lock that into place. And then you're all done. And that was a look today at our Thule WingBar Edge roof rack system on our 2021 Nissan Rogue. Thanks for watching.
Average Customer Rating: 4.9 out of 5 stars (189 Customer Reviews)
These custom clips and pads let you mount Thule Evo Clamp or Edge Clamp feet on your vehicle with a naked roof. The clips are easy to install - just slide them into the feet until they click. Rubber pads help protect your roof from scratches.Watched a video and worked through it, went on great and looks awesome on vehicle
I have purchased a lot of items from Etrailer their website is very user friendly, great products, great service! I would recommend them very highly!
Very pleased with order. Shipped fast, not damaged, all parts accounted for. Easy install, very sturdy, and attractive design. Slight wind noise but that was expected compared to not having a roof rack.
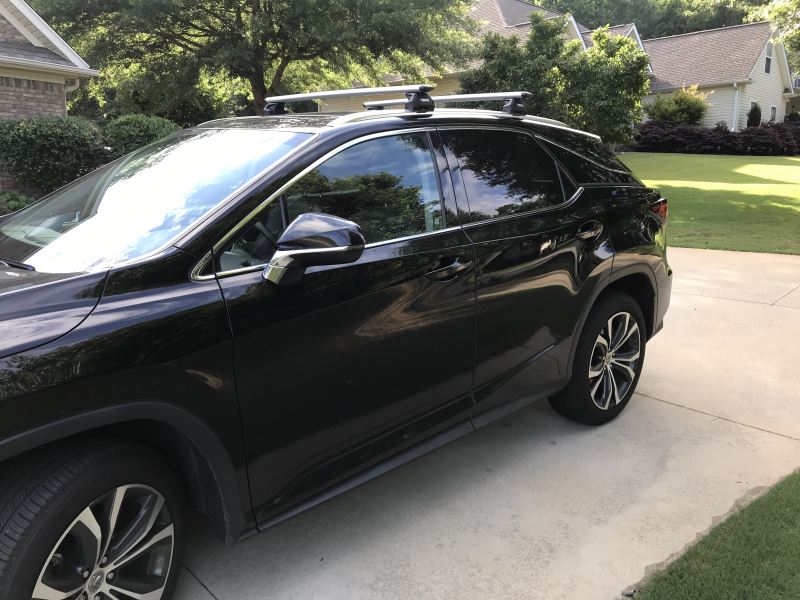
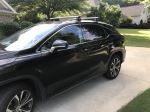
Great roof cross bars for the Lexus RX450h ! Better and beefier than the OEM cross bars. Yes, these are more expensive (wish they weren't! Locks should be included in the base cost) They are solid and planted the XXL roof carrier with ease. Took a bit to center the roof carrier- so we could open the rear door without crashing into it. Only took a 3 mpg hit with the racks and carrier on the roof (@ +5 mph over speed limit on the highway) I really like the way they look on the vehicle. We're probably going to keep them up for snowboarding season. Keep in mind once they're initially installed- they're a snap to take down as well.I made a mark on the inside on the rails to make reinstalling easier.
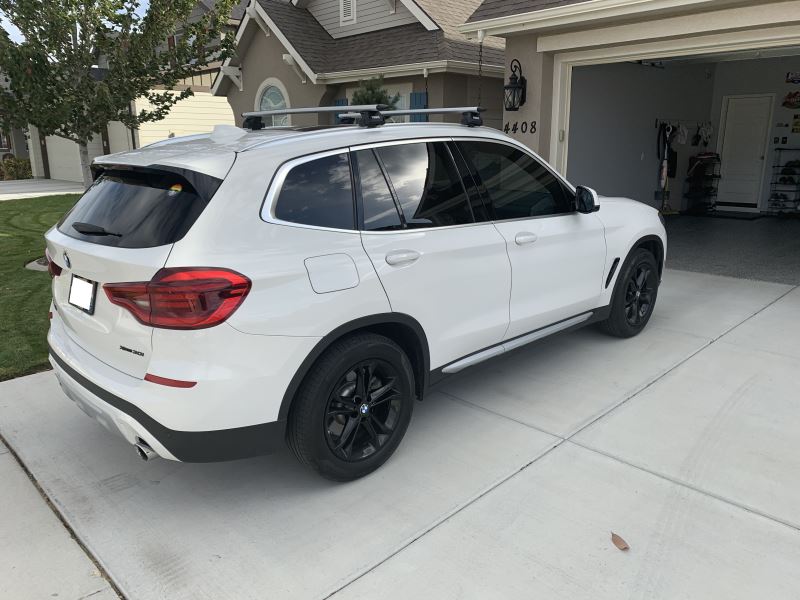
Originally ordered a Yakima system, but availability everywhere was virtually nil. Switched to Thule and ran into some of the same shortages with the supply chain, likely due to Covid. Took about a week to receive and it was the perfect part for my BMW X3.
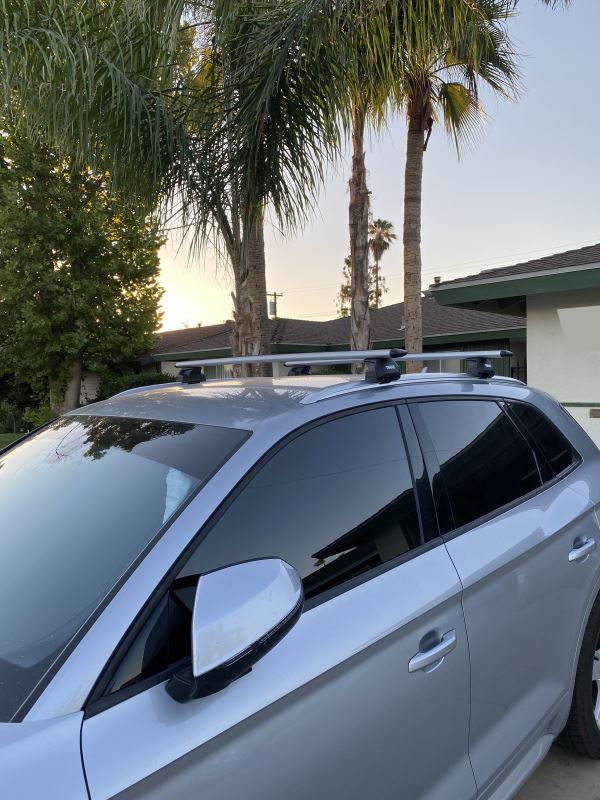
I ordered the Thule WingBar Evo Crossbars - Aluminum - Silver - 50" with the Evo Flush Rail Feet for Thule Crossbars - Flush Side Rails and the Fit Kit for Thule Evo Flush Rail and Edge Flush Rail Roof Rack Feet for my 2020 Mazda CX9. I appreciated the product selector to make sure I was getting all the correct parts. I was happy with the products, but I did run into an issue where 1 of the rail feet had a defective bolt which required a replacement. I was very satisfied with etrailer's customer support, and how well they worked with me to get the part replaced quickly.

One year in, this fit kit and the whole system have worked very well on my Kia EV6.
I miss the simplicity, in terms of cost as well as installation and removal, of the old Thule rectangular-bar racks, but this system looks better, is quiet, won't sag, and seems more robust.
I ordered a Thule rack, including the mounting feet and the cross bars. I then learned, less than a day and a half from our departure for a ski trip, the mounting feet needed a “kit” of hardware in order to function. I spoke with Justin at etrailer who confirmed the kit was in stock. Though it was mid-afternoon, Justin confirmed with etrailer Shipping the kit could go out for next day delivery. The next morning the kit arrived and I successfully mounted our rack system. Clearly my fault for not getting all the necessary components. Still, Justin solved my problem. “Customer Service” is alive and well at etrailer! Thanks, Justin!
Worked as promised. Easy install. We use it for our Kuat bike rack. If you need it for your ID.4 (AWD) get it.
Easy to install, took less than 30 min.
Perfect fit on a Volvo V60 CC.
No issues with a "trunk" mounted bike carrier secured to the rear bar. Yakima Frontloader also fit perfectly.
After searching unsuccessfully for support in the retrofit of my legacy Thule rack to a new car, I was pleased by the excellent support from Bailey B. She was methodical in her query and verification of compatibility in my non-standard application. The rack
Solid roof rack, but get help from etrailer to make sure you get the core feet.
Perfect fit and easy installation. Highly recommend for a lower profile rack. Also allows sunroof to vent on 2016 Lexus RX350. Haven’t driven with them on yet so I don’t know how road noise is at this time.
As always, when I need parts or a new roof rack, I look to etrailer to supply my needs. Fair prices, vast inventory and speedy service.
I got my packages today and had it installed within the hour looks great very satisfied
It took a long time for Thule to make a footkit for the 2021 Hyundai Elantra, but it was worth the wait. The fit on the car, carrying two kayaks, is very secure. We've had it a year with no problems.
E-Trailer was very quick in shipping as always.
Easy set up, great roof rack. One small problem with installing the rubber strips, piece would not lay flush..
Very pleasant experience, end to end. I found exactly what I needed, ordered processed and shipped very quickly.package arrived within 2 days and accurate great job guys. I’ll definitely buy from them again and highly recommended
Colin
Imagine that…. Easy step by step instructions!!! Had it assembled and on the car in under an hour. Great product, great quality!
I just wanted to take a minute to thank Carol C for driving amazing customer service! I ordered a Thule rack system, and the Thule cross bars arrived with the packaging torn partially open, causing some of the cross bar end caps to be lost in transit. Worth noting, the cross bars were in Thule's original packaging, so this was in no way the fault of etrailer. Despite this being a Thule issue, Carol C sent me a new pack of end caps, which I really appreciate...Thanks!
Excellent product. Arrived when promised. Very pleased. Thank you.
Fast shipping, easy installation, excellent quality, highly recommended company and product.
I’m extremely satisfied with the fit kit. Strong and secure mounting, traveled 2300 miles and still tight and sturdy as the day I installed.
These work great on my Jeep Wrangler hard top along with the square cross bars
Info for this part was:
At etrailer.com we provide the best information available about the products we sell. We take the quality of our information seriously so that you can get the right part the first time. Let us know if anything is missing or if you have any questions.


Thank you! Your comment has been submitted successfully. You should be able to view your question/comment here within a few days.
Error submitting comment. Please try again momentarily.