
To see if this custom-fit item will work for you please tell us what vehicle you'll use it with.
This quiet, aerodynamic roof rack with a from-the-factory look lets you carry gear on your vehicle's naked roof. Sturdy, lightweight aluminum crossbars include top channels with noise-reducing Vortex strips. Integrated locks deter theft.
Features:
Specs:
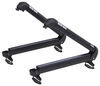
The low-profile, aerodynamic Rhino-Rack ROC25 roof rack lets you carry gear and accessories on your vehicle's roof quietly and with little wind drag. It's designed for installation on a naked roof (a roof without factory raised side rails, flush rails, fixed mounting points, tracks, or rain gutters). The rack's Vortex Aero crossbar has built-in rubber strips that disrupt airflow for a quiet ride, and the bar is constructed of aluminum so it won't rust. This bar blends seamlessly with the support legs to provide a from-the-factory look, and it is custom cut to your specific vehicle so it requires no adjustment during installation. The legs also include built-in locks that protect your gear and the rack from theft.
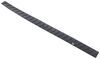
The rubberized Vortex strips in the top channel of the crossbar disrupt airflow with evenly spaced, wave-shaped grooves. This carefully controlled turbulence minimizes wind noise and whistling, so you won't need to add a fairing to your roof rack. And the slim, elliptical Vortex Aero crossbar cuts through the air with minimal drag - even at highway speeds.
The ROC25 roof rack has a flush-mount design so the crossbar terminates at the legs with no overhang. This provides the rack with a seamless, from-the-factory look, and it also helps to improve aerodynamics by reducing drag and wind noise.
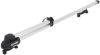
The Vortex Aero crossbar is made of structural-grade anodized aluminum with an H-shaped internal extrusion. This extrusion strengthens the bar without adding a significant amount of weight. And the aluminum bar won't rust so you can leave it on your roof year-round.
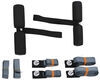
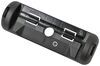
The rack's durable, glass-reinforced nylon legs are designed to stand up to cargo loads and weather extremes. They're also UV treated to withstand long-term exposure to sunlight.
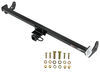
The roof rack arrives at your doorstep almost completely assembled. The crossbar is already mounted into the nylon legs. And the bar is pre-cut to match the width of your vehicle's roof, so you won't need to waste any time centering it. The few remaining assembly steps are straightforward and require only the vehicle-specific fit kit.
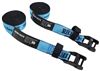
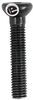
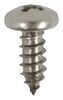
The vehicle-specific fit kit includes pads and clamps specifically designed to fit the contours of your roof. To install, simply attach the pivoting plates and rubberized pads to the bottom of each leg. Then secure the legs to your vehicle with the metal clamps. Decals inside the legs and a diagram in the instructions help you to orient the crossbar on your roof.
Once the crossbar is properly positioned, use the included Allen key to tighten it in place. The Allen key is designed to serve as a simple torque wrench. The curve in the blue plastic handle straightens when you've applied enough torque to each bolt.
The crossbar has a built-in C-channel so you can carry channel-mounted accessories such as bike racks, watersport carriers, and ski racks. The Vortex strips in the top channel come in 3 pieces, so they're easier to adjust than a single long, continuous strip. You can remove, trim, and re-insert the Vortex strips around the mounting hardware of your accessories to keep the crossbar channel capped and quiet. Replacement strips (sold separately) are also available if you remove your accessories or switch to clamp-on accessories.
You can also attach most clamp-on accessories to the bar, and the Vortex strips provide a shock-absorbing, no-slip cushion for any accessories that rest on it.
Locking covers on each support leg let you secure accessories mounted in the crossbar top channel. These sturdy nylon covers give the rack a finished look and also help secure the rack to your roof. The cover locks are keyed alike, so a single key opens all locks.
 Alternate Instructions
Videos are provided as a guide only. Refer to manufacturer installation instructions and specs for complete information.
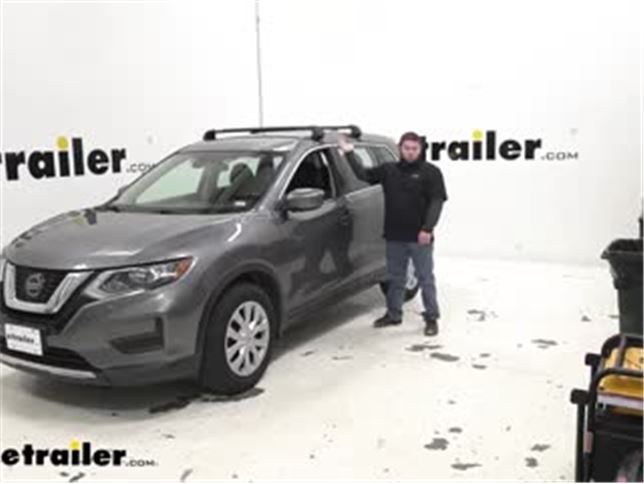
What's up everybody. It's A.J. with etrailer.com. Today we gonna be checking out the Rhino-Rack ROC25. And what this is, is a roof rack system for the naked roof of your vehicle. So it's gonna be a complete system.
You get the bars, the feet, the pads, and the clamps that are specific to your vehicle. Each one's made a little bit different. Each roof is a little bit different. So you wanna make sure you get the right fit. This is gonna have all of it.
You don't have to buy anything extra. Now what the roof rack is gonna do for you is help you carry something like, let's say you don't have a hitch on the back of your vehicle like this one, you don't wanna get a bike rack. You wanna haul your bike on your roof. You can do that. You can get a cargo basket, a roof box.
You can carry your skis up here. There's plenty of options to use this roof rack on top of your vehicle. Taking a closer look at it I just wanna show you what I mean by custom design. This rubber pad is what the custom part is for this roof rack. So it's made specifically for this 2019 Nissan Rogue.
You can see how the rubber pad goes down into this groove and catches it here and it's flat. So it goes and conforms to the shape of the roof. And everyone is gonna be different for every vehicle, that's why you get the kit specific to your vehicle. But they're all gonna function the same way, they're all gonna grip on that roof and catch it. You'll see that there is no overhang with this roof rack system. And that goes with how custom it is to your vehicle. So it's made specifically, with the right size bars, and actually on this one, the front bar is longer than the rear bar. You can see that by looking at 'em. So that's how it's just designed for the roof, the roof tapers in a little bit, and there's pros and cons to that. So one of the pros is you're not gonna hit your head when you're getting in and out of the vehicle. Sometimes that overhang can be a little bit of a burden. I know Zach, who does videos here too, complains about sometimes he forgets, he hops out of his vehicle and hits his head. I'm not that tall so it's not really a problem for me, but this would be eliminated for everybody. So when they get out of the car, it's not a worry. A negative would be, there's not as much space. Sometimes that overhang lets you add that one more accessory that you couldn't fit when the bar stop here. But overall, I think it's more of a positive than a negative. You can put your thing on here just fine, and then get out of your car without ever worrying about it hitting your head. While we're up here might as well look at the bars themselves. They're made out of an aluminum, black coated. It's a black matte finish, sorry. And it's got reinforced on the inside. So it's not just the aluminum, like a soda can, it's got reinforced. And they said it's like an H design in the middle of it. And that's helps give them the strength so that it's not gonna budge when you load it up with your gear. Now it does have a weight capacity of 165 pounds, so I would not exceed that. On these bars there's a weather strip, which covers up the T track channel. This is a great option to do those T-track accessories that are gonna slide in here and go where the weatherstrip goes. That way you don't have to use a clamp, that's gonna go around the whole bar because as you can see on this vehicle, it comes pretty close to the roof, a little bit there in the middle, more so on the back. So if you don't wanna use those clamp on accessories or you just don't have the room to use them, I suggest using the T-track up top. Or you can just cut this to length wherever you want. So let's say that your bike rack slides in here, you would just cut this off and the bike rack would take up the space, that way it's still got the weather strip. It's not gonna make noise when you're going on the road. And it just slightly makes noise, it's not very loud, but it could still get annoying over time. Now we'll move on to the foot. It's glass reinforced nylon, and it's also UV treated. So you don't have to worry about the sun, breaking it down, making it look bad, or even the elements. If you wanna leave it on your roof all the time, it's not gonna bother, it'll be just fine. That's this foot part, which is gonna be separate from the foot down here. This is another plastic part, same material. And then the rubberized cover that goes on the foot is specific to your vehicle. So like I said in the beginning, there's a bunch of different kits and this is the part that's gonna be made specifically to fit your roof and the contours that are on it. Along with that custom rubber pad is the clamp. Now these clamps are gonna be even the same, but they all have a rubberized inside. So you don't have to worry about them scratching the inside of your door jamb, or the side of your roof here. That way, if you take them on and off, you don't have to worry about damage over time or anything. It's not gonna happen. It'll be fine. Now it does fit and tighten up to your door jamb, so it pulls this clamp up the more you tighten this bolt down and that's what keeps it in place. You see there's no movement whatsoever. So you don't have to worry about anything bad happening when you go down the road. Now there is a cover for this. So this isn't exposed all the time. And another cool thing that Rhino-Rack included is a lock. They don't all come with locks and locking caps, so it's nice that they have that and you get two keys with it. That way you can keep one in your vehicle and one on your key ring, and then nobody can tamper with your roof rack when it's installed. So I've gone over how great this roof rack is and what it can do for you. How does it install It's not that bad. You just follow along with me as I do it, and you'll see, it's pretty easy. The only thing that's different is the foot pads. They may change from roof to roof, but that's the only thing that changes. Assembling it is gonna be the exact same. You're gonna measure from the same points. Now the numbers might be different because your roof and your vehicle are gonna be different, but still the same. So let's check it out. We're gonna install our weather strip. I've already done it on this bar and most of this bar, but I wanted to show you how it works. You just put this part that's a little bit more in than the top. Just work it into the center, it'll pop into place. It's probably better to get one side down, see how it's tilted and then push in. That's usually how I do it. And then it goes into place pretty easily after that, you just got to get started. You can hear a little pop every time I push it into place and come back on the other side, and do the same thing, so it can sit nice and flat. Gonna pull it back a little bit so it's even. Looks pretty good right there. Now I'm just gonna cut off the access. Gonna use my flat side of this, that way you got a nice even cut. So not as even as I had anticipated, but I'll come back and fix it up. Now we're gonna attach our feet to our crossbars. You just slide them in the ends here. We're gonna eventually put a screw in through there. Now it might fight you a little bit. I'm gonna strike it like this. Kinda use the table to push it down in that last spot, because this plastic kind of sticks out a little bit and you put your palm on there, it doesn't exactly feel good, so you can't get a good shove on it. But if you just use the ground and push a little bit, it should slide right into place. Don't slam it on there or anything like that, you'll damage it. But just use that to help push it into place. Now we're gonna peel back a little bit of the weather stripping. You see it looks like the hole lines up just fine. So we're gonna add a screw in there. Put that in place, now you can't pop that foot back off. We gonna repeat that process on the other three sides. Next we're gonna assemble our footpads. You're gonna get these in a different kit and you wanna make sure you look at 'em, and you see the number here, it's gonna tell you where they go. So this is the front left and front right. Stickers do come with them. I've already added the sticker, So it was easier to explain to you which one's, which, but you can look at the number and it'll tell you exactly where it's supposed to go. And these gonna be the rear ones, so you can see they already look way different than the front ones. They're specific to your vehicle. And again, just look at the number and it'll tell you where to put 'em. When you go to add your rubber pad make sure the arrow is facing out, when you go to snap into place and kinda just push on the rubber part and you'll feel it snap in several parts right into place. A good way to tell is that the rubber part of the cover is up here through the center hole, you know that it's installed. We gonna attach it to our assembly. It just pops into place. There's like a bar here at the bottom, there's spaces to clip this plastic part into and just push it, and you hear it snap into place, and it's all in there. And again, you wanna look at the bottom, make sure you're putting the right one on the right side, arrows facing outward. And the arrow on the rubber is facing forward. And one other thing to note is that your crossbars are gonna be different lengths, so the front one is gonna be longer than the rear one. That's how you can tell the difference between 'em. You might be able to see on the table here that this front one is a little bit longer. And that's how I know that that one's the front one. I set the front crossbar on the roof already. And what we're gonna do is get our measurement to see where it needs to be on the roof. Now it's gonna be different for every vehicle. So these measurements probably aren't for you, but we go from the center of the door jamb to this arrow. And on this particular one, it's gonna be a little bit before six inches. So about there looks right on this side, And I'm gonna go over to the other side and adjust it over there too. Now we set the rear one on, we'll get that measurement too, again, it's gonna be different for you, but what they want you to do is measure from the center of the front crossbar. Now that you've got that in the spot it's supposed to be to the center of this one. And those measurements will be in your instructions. And ours looks to be right there, we gonna move it just a little bit and let's get it right there. That's where they said to have it. So now we know it's on there, right Another thing that'll be helpful is they got these little stickers that are arrows and you can put them exactly where your crossbars are and like the door jamb, so you can't see 'em. But that way you don't have to measure every time, if you plan on taking these off and putting them back on. If you gonna leave them on, you're probably not gonna need these. If you don't wanna put them on the car, you don't have to, just measure again the next time, not a big deal, it's really up to you. Now we're ready to add our clamp. This is gonna attach here, and this is what actually holds the roof rack to your roof. So first we're gonna remove this center bolt. Then we'll bring our clamp up, line it up, you see how it sits right here in the door jamb, like it's supposed to, it's also rubberized. So don't have to worry about scratching anything, kinda align that upright, put our bolt through and get it started by hand. Now you might have to hold it, put your hand behind there to hold this up, 'cause it falls back pretty easily, you see that So you can put one hand back there and then get the bolt started that way. It looks like the trick might've been is to tilt it towards you. That way it's at an angle, and then the bolt went in way easier. I got the clamps sitting in the doorframe where it's supposed to be. And I'm slowly tightening it into the place. I'll come back with the tool that comes with it and continue to tighten it down. On the passenger side we do the same thing. But don't fully tighten it, just kinda jump back and forth and tighten it evenly, that way one side doesn't pull it up off the roof. Now just something more I wanna point out about the tool, a good way of seeing if it's tight enough, you're gonna hear some creaks and cracks and stuff as you go, but this part is angled. And you'll know when it's tightened, you go to tighten it, as you push on it, it flattens out. So I'll try and do it this way. You see how it's flat now. That means it's tight enough and that you can stop tightening here. Last thing we've got to do is put our covers on. You just slide them into the groove pushes in there really easily then you use your one of your two keys to lock it in place. Now you're good to go. As you saw, it wasn't too bad to get installed. Some roof racks can be a little complicated with a bunch of moving parts and a lot of going back and forth. That was probably the hardest part of this one is probably the measurements and that's just, you know, setting this one in place, measuring, going the other side, doing the same thing, then doing the same thing for the rear bar, but really in the grand scheme of things, it's not that big a deal. They installed pretty easily, they're on there nice and tight. They're not going anywhere. I'm fully confident that they're gonna stay there for as long as I need them to be. So now you can carry a roof box, a roof basket. You can even carry your bikes up there, skis, whatever, you have all those options with those bars on your vehicle. Well, thanks for hanging out and I hope this helped..
Average Customer Rating: 4.7 out of 5 stars (3123 Customer Reviews)
This quiet, aerodynamic roof rack with a from-the-factory look lets you carry gear on your vehicle's naked roof. Sturdy, lightweight aluminum crossbars include top channels with noise-reducing Vortex strips. Integrated locks deter theft.Great addition to the bed track of my 2022 Hyundai Santa Cruz! I got these for my rhino rack rod holder since they made such noise on the oem roof rack. So happy I went with rhino rack. You can't beat the price and the quality is as good if not better than Thule or Yakima. Highly reccomend.
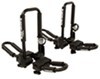
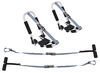
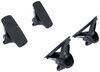
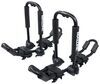
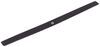
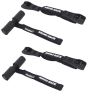
I wanted to share the items I used to be able to haul two Wilderness Systems Tsunami 145 kayaks on my 2006 Scion xB. This may help others who struggle with deciding what to use. I am pleased with my purchase and hope this helps. I originally thought I wanted the Thule Hull-A-Port Aero, but they discontinued making the fit kit for their roof rack systems and I ended up going with the Kuats. I am glad that they didn’t make the fit kit for approximately $[XX] and so they missed out on the rest of my business. Here are the items I used for anyone interested – pictures included. Custom DK Fit Kit for 4 Rhino-Rack 2500 Series Roof Rack Legs - Naked Roof #DK138, Kuat Class 4 V2 Kayak Carrier w/ Tie-Downs - J-Style - Folding - 1 Kayak - Black #KU53VR and these are really cool, Rhino-Rack 2500 Series Legs for Vortex Aero Crossbars - Naked Roofs or Fixed Mounting Points - Qty 4 #RRRLKVA, Rhino-Rack Vortex Aero Crossbars - Aluminum - Black - 54" Long - Qty 2 #RRVA137-B2. The 54” crossbars fit really well and the perfect length in my opinion and it doesn’t stick out like the longer ones would. Also purchased two sets of these Malone QuickLash T-Style Hood Loops for Bow and Stern Tie-Downs - Qty 2 #MPG308.
I shopped online retailers namely Amazon and EBAY looking for the cross bar setup I would need for my 2012 Toyota Camry LE. My Camry has a naked roof. The whole experience was confusing. None of the needed components were combined together. I found each component listed separately but nothing to indicate they were the correct components for my car. Then ETRAILER.COM popped up in my search. I simply entered my car’s year, make, and model, and answered the question about the car roof (being naked with no factory installed cargo bars) and suddenly I had a list of the available cross bars for my vehicle with all the necessary components to install them. One or two clicks put the whole thing in my cart for purchase. ETRAILER .COM is your one stop shop. As a side note I purchased Yakima ski racks on sale to install on these cross bars. Another customer asked if these ski racks would fit his car and I explained yes they will with the appropriate cross bars. I sent him to “ETRAILER.COM” so he could get the correct setup. Pictures forthcoming.
2020 Ford Edge with Vista Roof. Product arrived ahead of predicted delivery date. Very easy to assemble and directions were very easy to follow. Product is very high quality. I found 150mm front and 140mm rear to be the correct dimensions (I read a feedback that said they were not correct). No problems with Vista Roof, legs sit on the metal roof part not the glass. Overall very pleased with my purchase.
Indeed they were the wrong parts in the box marked demo on them.
The new parts came and I was able to
Put it on my car with no problem!!
Thank you for listening to me and helping me problem solve. It looks great on my car and I'm ready to load the kayaks now!!
Kalie is a gal that sent me some return labels so I'm going to put that on the box and send it back to you guys!
The selection process that etrailer uses is top-notch. This really helped narrow down the choices for my 2019 RAM Quad cab. I bought this all kitted together. The assembly process is very straightforward and well-documented. I would highly recommend etrailer as a source for vehicle accessories. I have Yakima bike racks on our Subaru and this is as good if not better.
While these seem very popular and generally well reviewed ( the reason I tried them) I cant see why, generally cheaply made molded parts with a just adequate fit. Most shocking were the pins that hold the towers and bars down to the base being plastic. Im sure Ill find some use for them but it wont be with my carbon fiber canoe on top, I just dont have the confidence in the connection. While they may be aerodynamic they are definitely not quiet on my installation. The locks can easily be defeated with a screwdriver. At this price I would look at other brands that might have a more positive and secure fit from bar to base. The service from etrailer was its usually quick and correct shipment and delivery though!
Look great, and function great. Just make sure you find all the parts packaged inside the rails themselves after you open the box!
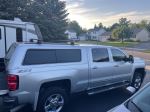
2017 F150 Camper Shell. Nice system and install is pretty simple once you gather your measurements, Luckily, I have a friend with an identical truck, so it didn’t take me very long. I used blue painters take to layout the tracks and drilled my holes. System is nice but does whistle at 70 mph.
UPS destroyed the first rack system that came but etrailer sent a second one very fast. Zero complaints

Nice rack. Has performed as advertised… I carry canoes and kayaks around in the warmer months, snowboards in the winter, and cargo boxes at various times all year long.
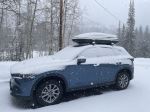
The Rhino Racks Vortex Aero are solid. My first drive with them was to Brighton Utah from Riverside California. They were not only secure throughout the drive and hard winds, they were also reasonably quiet. On top I attached a Thule Force L 628 roof box and it fits perfectly. The only complaints I have are how difficult it was to install the racks to my fixed points. It took several friends, a mechanic, and two days to get everything right.
Product fits the Thule rails on the Leer camper shell on my 2019 Tacoma. Had to remove the back mount end to get the rail nuts on as the rails did not have a slot to fit the nuts in. One nut that attaches the feet to the crossbars was machined wrong but there were enough extra parts to get around the problem. Shipped via USPS which was slow and hard to track. I live in rural Iowa and had to go to town to pick up as the carrier just left a note saying it was at the post office.
Great strength and look. I love em. About to put on the kayak racks and get some fishing going.
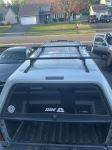
Very nice rack package. Everything was complete, and install was easy 4/10. I had used another review for the hole spacing, as it was easier. Holes at each end 5/8 in then at 9, 18, 27, 36, 45, 54, for a total of 8 on each rail. I bought the heavy duty set, that’s why there’s 8. The standard has only 6/rail. I marked a centerline on the cap, and put the rails at 36” on center. I used painters tape to be sure they were straight. I also measured , and laid out the holes on the cap and drilled a SINGLE HOLE at the 36” mark. Then verified that the end holes would hit the reinforced portion of my ARE cap. Once that was verified, I drilled the rest of the holes. Because of the camber of the cap, a second person is helpful (holding the rail tight to the cap) when tightening up the nuts from inside the cap. After that, the rest was easy. Just center the rail mounts and lock them in. I would definitely recommend this rack set up, Especially since it was half of what my local Yakima dealer quoted me.
This was installed on a 2016 Silverado, 2500.
Tools used- Tape measure, grease pencil, painters tape, 1/4” drill bit and Cordless drill.
Been a year of having and the Product is good ,just make sure to count how many through fasteners that are included. (Or read instructions first and count parts)
The instructions had a measurement as a “drill through” every certain amount of distance note and as it turned out , I had 4 less through fasteners than the measurements alloyed for on my track rails. I happened to find a pack of the fasteners on eBay so it all worked out.
Just learn from my mistake and double check.
Be careful with this system. Our side rail failed on a trip after 2 years of use. The rear right side cracked out while going down the interstate. We lost our kayaks on top. We were under the weight limit and had everything ratchet strapped down to the system. We did contact rhino rack about the warranty, they were less than helpful. They denied our claim based on the fact we did not have the kayak strapped to the front and rear bumpers. etrailer was very helpful getting us all the information we needed to submit a warranty claim.
Normally I never leave a review, but be cautious of the aluminum rails, they did not hold up long term.
The rubber molding easily compressed and served no purpose other than to fall into the channel and thus shred the aluminum gunnels on my expensive Kevlar canoe. I contacted Rhino rack and they were quick to dismiss my information with zero concern or questions. This is a product easily made better with modest changes to improve. Too bad customer service doesn’t exist…
I own a 2013 Honda CRV I purchased a couple months ago. It has a naked roof and no rack or side bars, and I wanted to be able to carry up to three kayaks. I didn't really want to buy and install the side bars, and then the cross bars also. I also needed the cross bars to be a little wider than the vehicle itself, as I own two Ocean Kayak Scupper Pros, and a Venus.
This Rhino Rack package looked like a great option for my needs. Weight wise, the three boats come right to the limit. Other racks had lower weight limits, and wouldn't work.
I had a couple issues with the initial package, but etrailer took care of the problem right away, and sent out what I needed.
Installation was pretty smooth. I recommend reading and rereading the instructions, before you cut anything. The videos on the etrailer website or directly on YouTube are very helpful to see all the steps. I'd like to see more personalized instructions added in the future, just to to make everything even smoother. Make sure you identify your vehicle and the bar you received on the kit instructions before you start.
These bars are so wonderful. The aero bars make no noise when driving and no whistling that I can tell. They don't seem to effect my gas mileage. I made sure the top rubber strips and bottom measurement strips were cut perfectly with no gaps, as this is important to prevent whistling.
They look so stylish. I get complements on them, and people can't believe they are after market, and that I installed them myself. They really complement the vehicle. Once installed the first time, I can take them off or put then back on in about 12 minutes. I don't really plan to take them off though. I don't use car washes, and I like the look of them on my vehicle.
I made sure to not overtighten them, and then tightened them a few times over the next week and with a couple kayaking trips. These babies are strong and I can't make them move when I test them. I still check them regularly to make sure they are secure, for safety purposes.
I highly recommend this Rhino Rack package. They know how to make the perfect roof rack and you can tell the quality and thought that went into them. Look at my photos I have included.
Thank you to etrailer for such great service. You made the whole process so pleasant and easy.
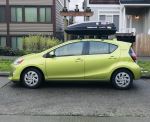
Great option for our 2016 Prius C. Coupled with our roof cargo box also from etrailer, we've already done some epic road tripping with 0 issues.
This review is for the Rhino Rack Vortex Aero Aluminum-Silver crossbars and
associated legs and custom fit kit (RRVA137s-2, DK284, RRRLKVA) necessary for a naked roof installation on a 2018 Honda CR-V. Just enter the model and year of your vehicle and etrailers website will tell you exactly what additional items are necessary to complete the install. etrailers installation instructions and videos are very helpful. The installation document provided is for more than one vehicle and for more than one style rack, so take your time to understand witch measurements apply to your installation and refer to the installation video if necessary. ON that note: The measurements given for front rack did not fit as nicely on the roof as the rear rack, I adjusted the the front rack measurements slightly. I would suggest trial fitting on your vehicle before cutting the metric rulers to final length. Stick On tags are supplied to indicate front, rear and the location to install on your vehicle. Once the rails are adjusted and tagged you can remove and reinstall the racks very quickly. Korren was very helpful in keeping me informed as to availability of items in stock and email shipping tracking. I am very satisfied with etrailers customer service and happy with the appearance and functionality of the Rhino racks.
We had the challenge of how to carry 2 kayaks this summer in addition to hauling a 30 foot gooseneck horse trailer. We have F450 crew cab with custom truck bed. We hoped to use the "head ache" bar on the truck bed to support the rear sets of Swagman Rincon supports and purchased a single Rhino Vortex bar for the forward sets on top of the cab. We have 10.5 and 12 foot kayaks and this looks to be an excellent solution. The kayaks are clear of the gooseneck trailer even in a "jackknife" position. Please note the truck bed is extra long therefore there is plenty of room forward the nose of the trailer. We have not hauled yet but will convey any issues if there are any. eTrailer tech support was excellent. Product shipped as projected. Installation took approximatly 3 hours.
Rhino-Rack installed on my 2022 Jeep Cherokee. There was wind noise (whistling) when all the rubber spacers were not installed, now it’s very quiet. I also installed the Yakima fishing rod//Ski holder. I wound up deviating from the directions and using the third lot, so the clamps would close on the bar. So far so good, without the fishing rod holder it’s low profile enough to get into garages, etc. Fast delivery on the products.
etrailer.com's videos and additional customer support made the purchase of a Rhino Rack system from them for our 2010 Malibu a no brainer. The rack fit the car perfectly, and with the videos and clear instructions that came with the kit, I got it installed on the car with only one misstep. The instructions came the the measurements in centimeters and inches. I didn't have a metric tape measure, and ended up messing up converting fractions to decimal.
My Daughter is going to college 500 miles away and is moving into an unfurnished apartment and needed to pick up some small furniture that wouldn't fit in her Malibu. She purchased several items from Facebook Marketplace and was able to transport a twin bed and mattress, a medium sized desk and some dining room chairs (in several trips) with no problems.
The only thing I can think of to improve the installation would be to have the Inches measurements in decimal or to include an inexpensive metric tape.
These slick looking, quality made, aluminum, aero bars came with the RLCP25 kit, to fit my FJ Cruiser. It didn't have the big, bulky, useless for carrying much of anything factory rack.
I like the look of the full size racks/ baskets, but didn't want to spend $800 + truck freight to get one. These cross bars are perfect for carrying my 14' canoe, plus whatever else with various cargo carrying accessories.
They are light, yet combined carry near 100+ lbs. of gear.
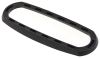
There is a rubber strip in the top slot, bottom slots and plastic strips to seal those, once you slide the feet in the correct distance to be even on both sides for your vehicle, and black, plastic end caps to finish it off.
You'll need a tape measure and 10mm socket wrench to attach to the feet, then re-tighten periodically for safety.
They look great on mr ride, and I can deal with the rubbing/ humming sound, after putting them on, although it does sound like my tires rubbing the fender wells...
I bought these for my 2013 Rav4 primarily to transport wood from home depot. Getting the bars safely installed and latched onto the cars longitudinal bars was pretty simple. The problem was the whistling. The cross-bars having a tee slot will whistle if you don't properly cut and install the 2 types of rubber/plastic tee-slot blocks provided. There is a slot block for the top, and for the bottom. The top one is easy to install since it is just one piece, but the bottom one requires 4 piece of this tee-slot block (2 outer pieces and 2 inner pieces. It took me a while to get the bottom blocks installed, quite a bit of measure, test cut, check, remeasure, cut, insert, recut yada yada.
Once I thought I had everything right, I could still hear whistling on the freeway and had to re-cut some better fitting bottom slot blocks. It turns out the more you tighten the legs, the more of the tee slot is exposed, and you need to have more of the tee-slot block. Having looked at some of the equpipment you can attach to the top of these tee-slot racks, I don't see why the bottom tee slot is even necessary.
Anyway, once installed (properly), these bars work great. I can transport wood Lol
Condition: Surface Scratches
Notes: Bars have minor scratches on the edges and missing 3 little strips, otherwise fine,
Info for this part was:
At etrailer.com we provide the best information available about the products we sell. We take the quality of our information seriously so that you can get the right part the first time. Let us know if anything is missing or if you have any questions.


Thank you! Your comment has been submitted successfully. You should be able to view your question/comment here within a few days.
Error submitting comment. Please try again momentarily.