
To see if this custom-fit item will work for you please tell us what vehicle you'll use it with.
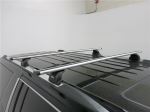
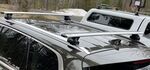
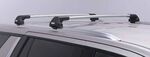
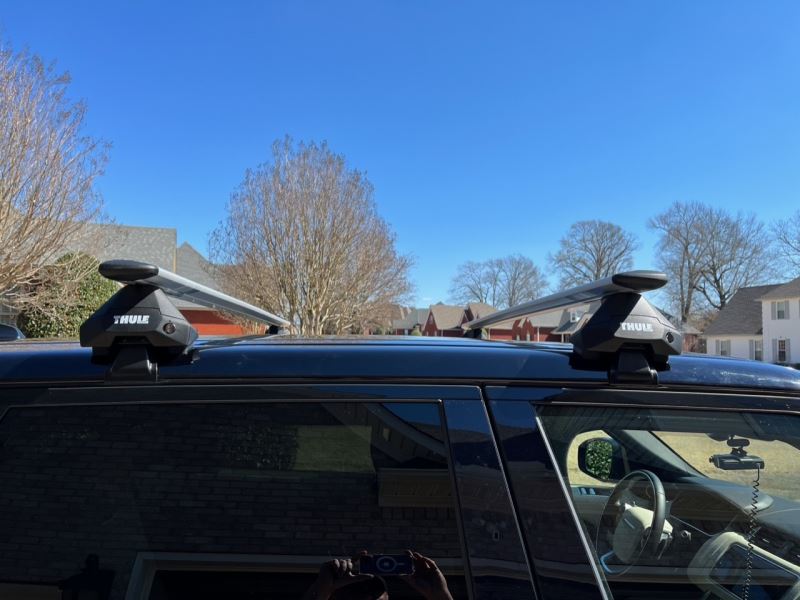
Premium, aerodynamic crossbars attach to Thule feet to create a quiet, stylish roof rack for your vehicle. Dual rubber strips in T-slots let you easily mount accessories - no trimming required. Simple to center and install with integrated scales.
Features:
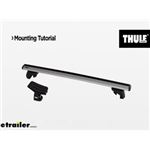
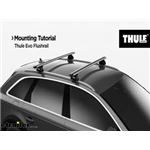
Thule WingBar Evo Crossbars - 60" Long - Silver - Aluminum - Qty 2:Videos are provided as a guide only. Refer to manufacturer installation instructions and specs for complete information.
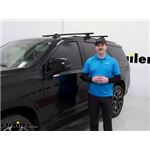
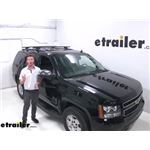
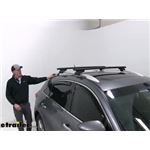
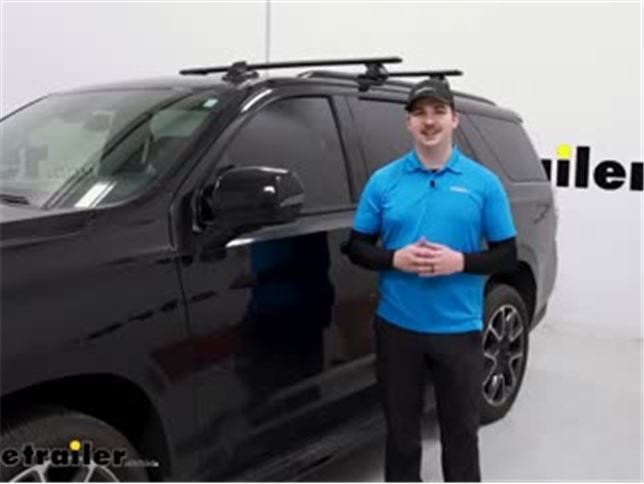
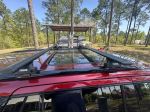
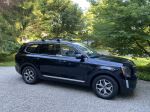
Hi everyone. Aiden here with etrailer. Today, we're gonna be taking a look at this Thule roof rack kit on our 2022 Chevrolet Tahoe. So this is going to attach to these flush rails on our Tahoe. It clamps around them, and gets a pretty strong hold on there. Now roof rack's are really great option, if we're looking to expand the cargo space of our vehicle.
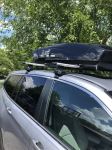
Maybe we've got that third row of seats up, and our cargo space is a little bit more limited. We can put a box or a basket up top, and get a little extra stuff carried in our Tahoe, or we can maybe just get some stuff that's oversized, like a kayak up here, or maybe some bikes that we don't wanna keep in the hitch. We can get that on top of the vehicle, as well. Really, the possibilities with a roof rack are endless. And this one from Thule is definitely a capable one.
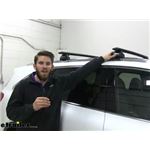
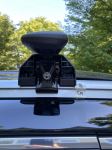
What makes it so capable is the variety of ways you can mount accessories. Now of course, you've got your clamp around that you can just clamp around the crossbars. These arrow bars are pre-accepting for most all accessories, and it's a pretty universal style. But you also have the T track on top. And the T track is really easy to get to, because these end caps, they pop open and we can just slide our accessories in between the two gaps of these weather strips.
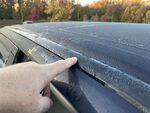
So if we have T track accessories, it's really easy to add them in. We don't have to cut the weather strip to length, because it'll just slide around the accessories we slide in. And then we don't need any tools to get the end caps taken off. They just pop open, slide our stuff in, pop and close, and it's really simple to do. Some other things you wanna think of when you're mounting accessories though is your clearances with your vehicle.
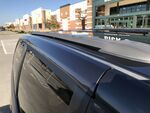
Now from the roof to the lowest point on the bars, we're going to be working with about three and a quarter inches of space. So that's how much room we have for clamp around accessories. I think that's gonna be more than enough for most applications. And then from the roof to the top of the bars, we're gonna be adding four and three quarters of an inch of height to the vehicle. Now obviously, if we add a box or a basket or something on top, that's gonna add even more height to an already tall vehicle. So do be cautious when you're pulling into your garage, or other low clearance spots like a parking garage. The crossbars themselves are 60 inches long, which fits the vehicle really well. It doesn't leave a whole lot of overhang on the sides. So if you wanted to use something like a load assist kayak carrier, you would need longer bars, because those types of kayak carriers need clearance from the side of the vehicle to help you load the kayak. So if that's something you're looking at, maybe look for some longer bars. You can pick those up here at etrailer. But if you're not concerned about that this is gonna work out just fine, and leave tons of room on the roof for different accessories. Now the crossbar spread, it's gonna be your distance from one bar to the other. This is really whatever you want it to be. The way it attaches is very simple. It just clamps around those flush rails, so we can set it to wherever we need it. Ours today, we have set to 26 inches of crossbar spread, because we want it to work with a very specific bike rack that we have. Depending on the accessories you plan on using, you can move this around really simply, or just have it set for the accessories you already have. Now when you're loading up your accessories, you do wanna be mindful of the weight capacity. The crossbars themselves are gonna be rated at 220 pounds, but the feet that come in your kit are only rated for 165. You do wanna go by the lowest rated component in your system. So in our case for this kit, it's gonna be 165. That's pretty standard for most roof racks out there. But you do wanna just factor in the weight of your accessories, plus what you're loading up in those accessories. So if it's a 40 pound rooftop box, subtract 40 pounds from your weight capacity, and make sure you're not overloading anything. Now one thing you might be wondering is if you've got your sunroof, can it still open with the roof rack. And, yes it can. Now if you set your crossbars up really close to the front, where the sunroof first opens up, you might have some clearance issues on that initial tilt to open. But right here you can see it slides under our front crossbar with plenty of room to spare, so you're not sacrificing any of this functionality with your vehicle. One other thing to think of when you're mounting up your roof rack, if you do plan on using something quite large like a rooftop box, maybe shift your crossbars towards the front of the vehicle a little bit, because you do wanna make sure that you have clearance for your hatch to open. Luckily, the Tahoe is a very large vehicle, and you've got tons of roof space to work with. But that's just something to keep in mind, whenever you are setting up your crossbars that you wanna make sure you leave room for the back hatch, so you can still use it. And speaking of that setup process, like I've mentioned a couple times now, it's a very straightforward install. Let's check out how we did it. Starting off the installation, you wanna get your crossbar laid out, and install the weather stripping up top. Now this is gonna come as a single piece that you'll just tear down the middle, and then each side will go on either side of the top track, just pushing it down in place as we go through. Now I find it helpful to kind of get the ends started first, because you can see we have a little bit of overhang, but if I start that end first on either side, we'll kind of shove it all in the middle here. And as this strip up top inevitably shrinks over time in the sun, it'll end up being a perfect fit. So just do that on both sides until everything's laying down flat. Once we're happy with how that's sitting, we can flip the bar over and come to the track underneath. There's going to be a couple pieces for the track underneath. The first one we need to worry about right now is this plastic piece with some measurements. That's just going to slide in the track all the way to the very end. Eventually, once we've got this fully installed, that will help close up this gap on the inside, but we don't need to worry about that yet. We'll just leave it there for now. At this point, we can take our feet. These are gonna come with the caps on. I'm just going to pop that cap off, (cap snap) so that we can get a look at everything inside. This is where our clamp assembly's gonna be. We're gonna start with our A brackets. Those are gonna be labeled with an A, right there. And we'll just attach that with the A facing out. Then, we can take the rubber pads. Those are gonna be labeled B. And those can install on the underside of the foot pack. Just clipping in, you can see there's some rubber tabs will pop up through the foot to hold it in place, and that locks this A bracket in place. Then we can take our C bracket, and get that locked in through that tab on the A bracket. And you can see the threads from our foot pack are poking through that hole, just a little bit. We can take this threaded piece, and just loosely thread it onto there, just about two or three turns, because we wanna leave some room for this clamp to move and open up. Pretty simple process. And now we can take the block right here, and slide it into that track on the underside of our crossbar, where we just we're working at. Whenever we slide this in, make sure that this portion right here is facing towards the outside of the crossbar, so we can get to it with our tool later. And this can really go wherever. It's all loosely in place right now, and we can follow that up with our end cap to make sure it doesn't fall out, once you put this on the roof. Then we can just take our other foot, and repeat that process for the other side before heading up to the roof to get it loosely installed. So then you want to take the whole assembly, once you've got those feet loosely in place, up to the roof. It can help to have an extra set of hands on the other side, but it's not necessary. This isn't super heavy. And we're just gonna get it loosely set in place right now, so that those rubber pads wrap around our rails, and we've got one clamp on either side of those bars. For us, we know what crossbar spread we're gonna be going for here, so I'll get a tape measure and measure it out. But if you're not sure, or you're just looking for a specific accessory, make sure you've got a tape measure to get that crossbar spread set now before we start tightening things up. So for our application today, we know that we're gonna be putting a rooftop bike rack up here, and I'm gonna be shooting for about 26 inches on the crossbar spread. As a general rule of thumb, 24 to 36 inches is a really good range that'll work with a wide variety of accessories. We're doing 26 today. So I'm just gonna measure from the center of one clamp to the center of the other. Get it adjusted on this side. So I've got that 26 inch spread. And then I'll repeat that measurement on the other side to make sure that my bars are running parallel to each other. The other thing we wanna make sure of is our crossbar overhang. I'm just gonna be measuring from the foot to the outside of the crossbar on both sides to make sure that it's even. While it's loose right now, this crossbar can freely slide side to side. And we wanna make sure everything is looking nice and even up here. So that's a good way to check. When you're happy with how everything's positioned, we can get those clamps tightened down. You've got one tool that comes in your kit. And as we're tightening it down, it will apply the proper torque setting, and start skipping once it's properly torqued. So we'll just use that on either end. That will secure the clamps, but also lock in those crossbars to make sure that nothing shifts around. (tool snap) And once we hear that click, we know it's properly torque down. We can repeat that on the other side. With everything tightened down, we can come back to those plastic pieces we installed before the feet, and slide them out to close the gap underneath. And for the gap on the outside of the foot, we're actually going to take the provided weather stripping in our kit. I'm just gonna get it loosely set into place, and see about where it ends off. And just make a mark with my fingernail here, take it out, and make a cut where that fingernail mark is to cut it to length to fill that gap on the outside. (scissors snap) That will then fill up this space underneath the bar, and make sure that we don't get any annoying whistling when we're going down the road. Repeat these steps on the other side. The last piece of our puzzle is those foot covers that we removed at the very start of the install. These are gonna come with these plastic locking cores. Not my favorite thing in the world, but it'll do the trick. And they are side specific. So I'll hold it up to the camera here, so you can kind of see. There's a little tab on top. That's going to be facing towards the Thule logo, whenever we put it in. We'll pop the cover on and twist it to lock it. (cover snap) And that's about it for the install. Overall, it's a very simple process. The clamps are super easy to put together, being numbered A, B, and C, and then there's only one tool that you need to get the whole thing installed. They're really easy to adjust. And the overall fit and finish is really solid on the roof here. So I think it's gonna be a really solid option for a roof rack on your Tahoe. Thanks for watching.
Average Customer Rating: 4.8 out of 5 stars (263 Customer Reviews)
Premium, aerodynamic crossbars attach to Thule feet to create a quiet, stylish roof rack for your vehicle. Dual rubber strips in T-slots let you easily mount accessories - no trimming required. Simple to center and install with integrated scales.Easy to assemble and install. Love the way etrailer packages everything you need and they all are correct for the vehicle you are mounting them on. Once installed they appear very strong. Installed on a 2023 Chevy Tahoe and did not interfere with the sunroof.

Very sturdy. Works well. The attachment to the roof rails on my 2023 chevy suburban works well. The "C" clamp design mechanism holds it tightly and securely in place. No fear of anything coming loose and falling off like other racks I have tried to use.
I ordered the Thule WingBar Evo Crossbars - Aluminum - Silver - 50" with the Evo Flush Rail Feet for Thule Crossbars - Flush Side Rails and the Fit Kit for Thule Evo Flush Rail and Edge Flush Rail Roof Rack Feet for my 2020 Mazda CX9. I appreciated the product selector to make sure I was getting all the correct parts. I was happy with the products, but I did run into an issue where 1 of the rail feet had a defective bolt which required a replacement. I was very satisfied with etrailer's customer support, and how well they worked with me to get the part replaced quickly. I'm giving this a 4 start only because of the hassle of receiving a defective one initially
Favorite bar Thule makes. Super solid.
Once the mounting kit was installed, the fit was great. Too expensive though. etrailer ordering and shipping process was fantastic.
Easy to install. Super-fast shipping. Quality product. Glad I shopped with etrailer.
Solid roof rack, but get help from etrailer to make sure you get the core feet.
Very pleased with order. Shipped fast, not damaged, all parts accounted for. Easy install, very sturdy, and attractive design. Slight wind noise but that was expected compared to not having a roof rack.
Excellent product. Arrived when promised. Very pleased. Thank you.
This is the first top of the line roof rack system I have purchased. I never expected to have issues but this thing is so universal, with gaps everywhere, that I can’t get it to stop whistling. I wish I could return and get my money back. I really expected something better from such an expensive system.
Fit my 2015 Kia Sorento perfectly
Website is easy to use & is better at putting together the correct package than Thule’s site.
etrailer had all the parts in stock for my 2020 Kia Telluride.
Payment process was simple.
Received periodic updates from staffer on my order & could actually reply if needed.
Installing the roof rack went well. Estimate start to finish was about 2 hours. Found it best to really examine each diagram in Thule’s step by step instructions to get it all right on the first try.
Hardness part of the installation was getting the crossbars installed at the proper distances. A tailor’s soft measuring tape & some masking were great aids.
It was hard to know what to order. We ordered 2 kits and thought that would hook up to our roof top. But no we needed a 3rd kit. I guess some people only need repair kits. It would be helpful to have one complete kit and then other parts needed for things like a repair job. Was not very had to assemble once we had everything.
Thule Rack looks awesome on my Kia Telluride. Products took a while to get to me because they were on backorder but it's not etrailer, they were on backorder everywhere. I messed up one of the pieces of rubber while installing and etrailer sent me a new one at no charge. Definitely recommend etrailer.
I spent a whole weekend looking for all these parts - no one had the entire kit in stock, they had one but not the other. I stumbled upon etrailer.com and was blown away by how easy they made the shopping experience - entered my vehicles info and they told me exactly what I needed! It doesn’t stop there, they also shipped my items within 3 days of ordering. I will definitely use them again when the time comes and recommend you do the same.
I’ve had it on my 2021 Kia Telluride now for a few months and it works great. When I was mounting the forward bar, I opened the sun roof to make sure I was comfortable with the roof window and bar clearance.
I am very pleased with my purchase, great prices, great quality parts, and excellent customer service.
I’d give a 4, since the rack is great, but the website picture gives the impression that there are core locks.
Thule makes great products
And etrailer makes it too easy to get when needed.
etrailer.com was excellent to do business with. Their website is informative, complete and easy to navigate. Phone service to help confirm availability of my product and their general knowledge of their products was impressive. Product arrived on time and in good shape. Their order tracking system is also very good. I’m very pleased with the Thule Wingbar Evo 135 racks For my BMW X5 with flush roof rails. They are super sturdy, solidly mounted and look good on the vehicle. Mine will be mainly used for surfboards and SUP’s. The assembly and installation was a breeze. The included written instructions would have been sufficient for a seamless installation but I also watched one of many YouTube videos that demonstrated very clearly every step of assembly and installation for this specific set of racks.
Love the racks!! I highly recommend etrailer.com for your roof rack needs.
Not too difficult to put together (1.5 hrs approx. from scratch start to installed). The first time of measurements is a hassle as expected but not too bad. Looks cool and good as expected from a Thule product.
The roof rack fits well on my Honda Pilot. The customer service was exceptional. They were friendly and also professional. The items were packaged very well and arrived on time.
Easy to install. It fit great on my 21 Tahoe. I do wish it came with the locks for the price. I do admit though, a thief would really need to want them to take the time to get them off. It is not a snatch and grab type item. All four clamps would need to be loosened. They are very solid though. I did not notice much extra wind noise either on the maiden voyage.
Quick, easy, and solid installation.
I only received on of the 3 orders


Do you have a question about this Roof Rack?
Info for this part was:
At etrailer.com we provide the best information available about the products we sell. We take the quality of our information seriously so that you can get the right part the first time. Let us know if anything is missing or if you have any questions.


Thank you! Your comment has been submitted successfully. You should be able to view your question/comment here within a few days.
Error submitting comment. Please try again momentarily.