
Summer Starts Here - Save up to 70%
To see if this custom-fit item will work for you please tell us what vehicle you'll use it with.
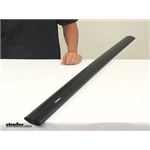
Low-profile, aerodynamic crossbar lets you build an aftermarket roof rack for your vehicle. Aluminum bar has a T-slot that lets you mount channel-mounted carriers and accessories. Rubber strip in T-slot keeps out dirt and won't need trimming.
Features:
Inno Aero Crossbar - Aluminum - Black - 57" Long - Qty 1:Videos are provided as a guide only. Refer to manufacturer installation instructions and specs for complete information.
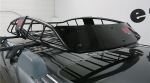
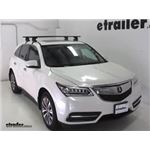
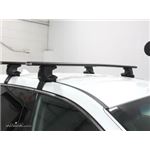
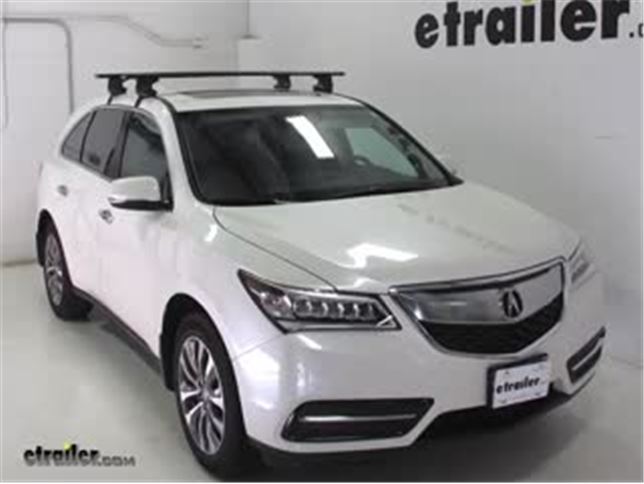
Speaker 1: Today on our 2016 Acura MDX we'll be taking a look at and showing you how to install the Inno Roof Rack System. This is going to consist of the Inno Aero Crossbars measuring 60 inches long, with part number INXB153-2, the Inno Through Feet for Aero cross bars, part number INXS250 and the custom fit kit for our MDX, part number INK656.The Inno roof rack system, like most others, allows you to carry bike racks, kayak carriers and cargo baskets on your roof, and still have that aerodynamic shape that helps to reduce wind noise and drag. The Inno bars are also going to have the weather strip like most other cross bars. The only difference is that this one will push down and work with your channel mounted accessories, where others you actually have to remove that weather strip and cut it down. This is going to be easy to install. It's going to clamp around our door frame and lock into place.
This roof rack system has a 120 pound weight capacity, though you do want to double check your vehicle's owners manual to make sure your roof can withstand that much weight. It's also going to come with an easy install. We'll show you how to do that now.Now, everything on our table is what we will need to install our roof rack system. We already have our front bar installed and half of our back bar here. We're going to provide our own flat tape measure, but everything else will come in our kit.
We'll have our end caps for our feet, as well as the keys to lock everything down. The end caps for our crossbars, the tool to tighten everything down, the tool to tighten down our feet as well as the adapter to secure our feet to our crossbar, our feet themselves, a foam block which will go inside our weather channel at the bottom to prevent any wind noise or drag, and then our fit kit, both the clamp as well as the pad. We'll start by flipping our crossbar over.We'll be working on the driver's side of the crossbar. We'll start by taking the inside portion, and we're going to slide that all the way out to the end. We're going to take our adapter piece and line up this notch with the notch on our crossbar.
Place it in, and we can slide it back in. Slide it all the way in, push on the button, and slide it in the rest of the way until it hits the stopper here. We'll line up the small notch and the large notch with the two holes on our adapter. We can measure out the distance between our two feet. We're going to measure this out to 43 3/4 inches.
We're going to tighten down the bolt on the inside here, and this will secure our foot in place to our adapter. Now we'll take the pad from our fit kit. We're going to place it onto our foot. We want to line up the indentions with our bolts on the bottom and we'll just push it into place until we have a nice, secure fit. You do want to double check your instructions to make sure you use the correct pad for our front bar as well as our back bar.Now we can take our clamp. We're going to start by removing our bolts her on on our foot pack. Take the clamp and place it just over where our bolt was, and then tighten it back down enough so that it holds our clamp into place. We don't want it too tight. Now we'll take our foam spacer, place it inside the end of our crossbar until it makes contact with our foot pack. We'll take a knife, and we're just going to mark where the end of our crossbar sits, and we can cut off this excess here. We'll take our knife and we'll just cut right along that line. We can take the piece that we cut and place it back into the channel. Lastly, before we place this on to our vehicle, we'll take our end cap for our crossbar and push it into place.Before we load up our crossbar we want to open our doors, and we can gently place our crossbar onto our vehicle. To measure out our crossbar spread, we're going to measure from the center of our front clamp to the center of our back, and that's going to be 59 centimeters. Make sure we do the same measurement on the other side so that the other side is sitting 59 centimeters away as well. Now we'll take our included torque tool and tighten down this bolt here. We want to make sure we that we tighten down each side evenly so we have a nice, secure fit. Once we hear that click, that's when we know we have enough torque behind our bolt. Now we can take our end cap, place it onto our foot, lock it into place, and we're ready to load up our accessories and hit the road.That's going to be our completed look at the Inno Roof Rack System on our 2016 Acura MDX.
Average Customer Rating: 4.8 out of 5 stars (125 Customer Reviews)
Low-profile, aerodynamic crossbar lets you build an aftermarket roof rack for your vehicle. Aluminum bar has a T-slot that lets you mount channel-mounted carriers and accessories. Rubber strip in T-slot keeps out dirt and won't need trimming.Waste of money. Most annoying couple hours spent in a long time. Extremely disappointed. Does not fit well. Not exactly a cheap option, but a cheap option in terms of fit and engineering. The instructions online and in the kits do not agree. But there is no helping the design. Plus there are no universal set of instructions--they are all individual items for the fit kit, the bars, etc. But a reasonably inclined person can figure it out so no big deal, but the engineering design is garbage--requires precise measurement yet the design is such that exact measurement is impossible due to the design.
Additionally, the parts are low quality Either low density plastic or easily stripped bolts. Even when as precise as possible, I wouldn't trust it with my kayak. What a mistake. Do yourself a favor and get a Yakima trailer or similar. It isn't that much more money in the scheme of things and then it isn't tied to your car. Can add a hitch to most vehicles anyway.

Racks were perfect for my Acura MDX. They fit like a glove and I have used them several times.
Has worked great for transporting my fishing Kayak as well as small loads of lumber. It has worked fine for about a dozen and a half boards at a time or a couple of sheets of plywood. Just make sure that you have a good way to strap them down as well as maybe a rubber mat to help hold everything in place. The noise from it on the high way can be a lot but certainly not as bad as some that I have heard. I figure that anything on the outside of a vehicle like that will produce some noise.
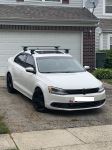
worked as expected, I used them to carry my hobie outback kayak (about 100lbs) on my Honda Civic 2016 Coupe (2 doors). They worked with no problem so far (1 year) even under high speed like 70mph.
We recently purchased 2 kayaks & Thule roof racks from our local outdoor store.
After waiting 2 weeks for our roof racks and J bars to come in we found that the Thule racks did not fit our 2017 Lincoln MKX and they didn't make any racks that would. The vehicle does not have roof racks and has a moon roof.
After a couple of days searching the internet we discovered etrailer.com. We found the Inno roof racks, but still was not sure they would work. We spoke to a repesenative and he assured us that the racks we chose would fit and the Thule J bars we did return would also work. As you can see by the photos 2 days later we were happy Kayakers.
This kit does not fit well. All measurements have been double and triple checked down to the millimeter. The lock on the covers interfere with the hooks. You have to apply so much pressure to get it to close that it makes the rack come loose. Not very satisfied
I bought these as part of a kit with 60" Aero bars and the appropriate kit for my 14 Flex. I spent probably an hour and a half double checking my measurements and getting them torqued down properly. I spaced the bars on top of the car just a little wider than proscribed because I was planning on carrying 4x8 plywood, and it looked better to my eye. One thing to watch for: The instructions for the car-specific kit (in my case INK263) show the foot spacing measurements for a square bar, and the measuring point for these feet and Aero bars is different. That measurement point is indicated in the instructions for the feet, not the kit. Same numbers, just different reference point. Otherwise, they look good and are rock solid.
I did a lot of searching before selecting this rack for my Durango RT (no factory roof rails). It is easy to reinstall once the initial process is followed, I marked my doorjambs with a sharpie and it is easy to set up. Great product!
Great racks. High quality parts. Fit perfectly. Went together easily.
I was trying to put a roof rack onto a Dodge Durango SRT...not a typical vehicle for this accessory! I looked everywhere for a suitable roof rack and thought I was settling by ordering the Inno kit from etrailer. I could not have been more wrong! I am so happy with the purchase! I was shocked that my partner and I had the whole system installed in less than 30 minutes in the dark! I couldn't wait to try the install once I received the package. I even did a test drive to see if the aero crossbars made noise, but no issues there! They are very quiet (unlike a ladder rack I had on a truck before this). 10/10 recommend this to others.
Packaging and shipping great....arrived a day earlier. Instructions were just ok. Had to figure out a few unclear steps. Front fit was perfect....the rear would not snug up and i went 1/4” measurements either way to eliminate any possibilities. Had to add about a 1/4” thickness to the rubber stay base in order for it to stay tight
Started assembly last summer and finally completed installation this spring. Directions took a lot of attention to detail but were adequate. Rack went on car securely and looks great. Have attached kayak rack and a roof pod and both worked flawlessly. Would definitely recommend.
I have had countless bike racks over the years and this is by far the best system I have ever had. Fits like a glove on my F150. Easy to install, looks great and the bikes do not move when on the roof.
Noticed box was taped up more then usual, found other manuals that was not specifically for this, and also found one of the feet already had been mounted as there was scratches on the plastic and metal parts
Installation went pretty smoothly. The trick is to fully understand each step before moving to the next. There are a lot of small parts which at first was a little intimidating, but soon I was able to "get with it". I love the finished product and think you helped me get a good deal. Thank you for that
Installed incredibly quickly on my 2014 Prius V with some of the best instructions I could have ever asked for. Used the video as well in tandem and got it on the car in about an hour and a half with my partner. It was a lovely experience, which is sometimes difficult for couples to say in situations like this!
There work great and were easy to install. e-trailer rocks and so does Justin.
Installation was a little tricky but once the "feet" were attached to the roof and the bars properly spaced, everything wrapped up very well.
There is no noticeable wind noise with these installed.
Product is great. Fits perfectly with some minor measurement adjustments. Can be assembled by one person, but helps to have two. Bought the complete roof kit and well as the Inno 80 basket for a Mazda CX3, took about two hours to assemble everything.
Easy to install. Instructions are almost perfect. Watching the video really helped, especially the tip of laying the rails down and then marking the trim. I used a hacksaw to cut the trim, really easy. Thank you guys for an awesome product. I hope it is durable, it feels solid, but only time will tell.
It was an easy install with instructions. The rack has held up well so far and looks good on the car.
Instructions were a bit tough at first as each box had their own instructions and you needed all 3 boxes to complete the setup, yet after over coming that, it was a breeze to put together and they are wonderful. Well worth the money.
One was extremely hard to get on compared to the others (not sure if it had some rough machining or something), but once all we’re on, all was good
thanks to Adam for help and competent approach. Adam listened impeccably and in the shortest possible time helped to deliver the goods I needed
Easy to mount and use. Very sturdy aswell. Measurements are a bit off on width adjustment.
Do you have a question about this Roof Rack?
Info for this part was:
At etrailer.com we provide the best information available about the products we sell. We take the quality of our information seriously so that you can get the right part the first time. Let us know if anything is missing or if you have any questions.


Thank you! Your comment has been submitted successfully. You should be able to view your question/comment here within a few days.
Error submitting comment. Please try again momentarily.