
To see if this custom-fit item will work for you please tell us what vehicle you'll use it with.
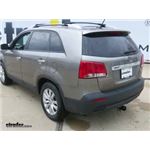
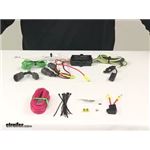
Quickly and easily install a 4-way trailer connector on your Kia Sorento with this custom harness. T-connector plugs directly into existing wiring. Powered converter reduces strain on wiring system.
Features:
This custom-fit T-connector plugs into your vehicle's wiring harness, which is located behind the driver's-side and passenger's-side tail lights. You will have to remove the tail light assemblies to access this harness. Once you've plugged in the connector, run the red hot lead up to your car battery. Connect the included fuse holder, and then connect the fuse holder to the positive terminal on your battery.
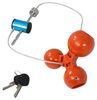
Once installation is complete, the 4-way connector will be stowed beneath your vehicle, near the trailer hitch. A mounting bracket (sold separately) is recommended to keep the connector secure.
It is recommended that you use a small amount of grease on all electrical connections - the plugs on your automobile and the 4-pole connector itself - to help prevent corrosion.
A tail light converter is built into this T-connector. This converter is a battery-powered unit that bypasses the electrical routes that are used by a basic wiring harness. As a result, there is virtually no draw on your tail light circuits.
Because most trailers run on a two-wire system - wherein the brake and turn signals are carried on one wire - the separate brake and turn signals from your vehicle's three-wire system need to be combined so they are compatible with the wiring system of the trailer. This converter combines the brake and turn signal functions of your automobile so that they run on one wire to properly activate your trailer's tail lights. Note: This will not affect how the tail lights on your vehicle operate.

California residents: click here
Videos are provided as a guide only. Refer to manufacturer installation instructions and specs for complete information.
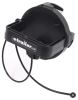
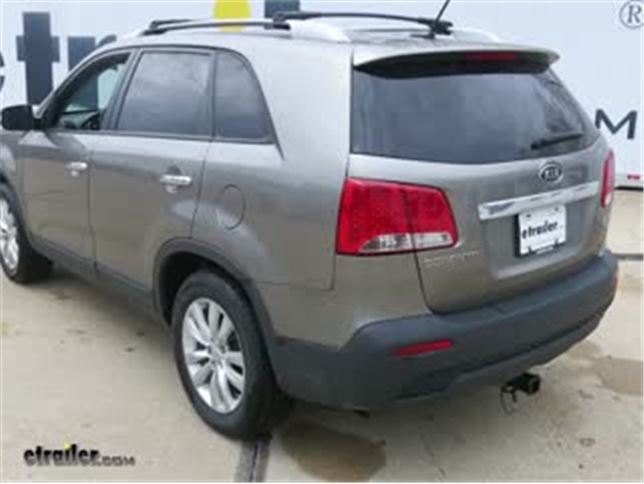
Speaker 1: Today on our 2011 Kia Sorento, we're going to be taking a look at and I'm going to show you how to install the Hopkins Plug-In Simple Vehicle Wiring Harness with 4-Pole Flat Trailer Connector, part number HM11143914. This is what our wiring looks like when it's installed. This is going to provide you with all the proper lighting function you're going to need for your trailer. Brake lights, both turn signals, running lights and your ground. It's going to come with an included dust cap to help protect your connections from any dirt and debris and to help keep a little bit of moisture off of them. What you can do with this is you can double it as a holder when you're not using the connector, and it will keep it from dragging the ground.Now your wiring's going to come with a convertor box, and what that convertor box is going to do, it's going to protect your vehicle wiring from any back feed from your trailer.
Now as far as the installation goes, it is a very simple installation. It can be done in the garage or in your driveway. Your wires are going to connect directly to your factory plugs on the back of your taillights. You're going to have a power wire that's going to run from your convertor box up to your battery. Now what's good about having that wire is you're not drawing any power from your taillights, you're just getting the signal.
All your power's being drawn from the battery itself. This kit is going to come with all the necessary hardware to get it installed. The only hole that's going to have to be drilled is to mount your ground wire. Now that we've gone over some of the features, let me show you just how easy it is to get it installed.To begin our installation what we need to do is remove both of our taillights. To do that, you need a Phillips screwdriver.
We're going to have two screws. We're just going to pull on our taillight just like that. You're going to have a plug. You're going to push on this black tab and pull out. Like that.
We'll set this aside to be reinstalled.Now we're going to take the red wire coming off of our convertor box, and you're going to have a butt connector on there that comes pre-installed. I would suggest replacing it with a heat shrink butt connector. If you don't have a heat shrink butt connector, you can find some on our website. The reason I suggest the heat shrink butt connector is because this is going to be living outside the vehicle. You're going to take the red wire power wire that you're going to be running to the battery, it comes in your kit, and you're going to strip one end back and put it in the other end. Then we'll take a heat gun or some kind of heat source and we'll go ahead and shrink that up.Next thing we need to do is we need to get the end with the yellow wire on it up behind our bumper so we can plug it in to our existing wiring. Now we have two ways to do that. You can take all of this and you can drop it down through there, or you can use a wire hanger, something a little stiffer, or you take a string, put a knot on it, a bolt, anything like that, something with a little bit of weight, and actually drop that right down there and make it come out the bottom. Take a little bit of electrical tape, just going to tape this on. You can also actually take this wire like this and just feed it through and do it just like this. Then we'll pull the whole thing up just like that. Then all we're doing is matching up our plugs.Now what we need to do is we need to get our convertor box up through the hole because we need to mount it. We can't let it hang loose. Right along the bottom where our taillight sits on our bumper fascia you're going to have two plastic Phillips screws. Take a Phillips screwdriver, put it on there and just barely turn it and it will raise that up and then you can pull these out. You're going to have two of those. One here and here, then you're going to have a metal one right here. That'll give you enough that you can pry this out, go ahead and push that back down inside, and it's secure right there. Just make sure you don't have any wires pinched. Now we can go ahead and put our push pins back in place. Now we can put our taillight back in place.Now we're going to do the same thing on our passenger's side. This time we'll be using the green wire. We're going to take the green wire and right along the back of the bumper fascia there's little plastic brackets. What we're going to do is we want to run it behind those brackets, because when we get over to our passenger's side here, we have our exhaust. We want to make sure we stay away from that. Where I ran my green wire there's some existing wiring right here on the passenger's side. Now what I did is I actually pulled that up and ran my wire behind it, so when I run the rest of it up to my passenger taillight, this will keep it away from the exhaust.We're going to use the same method we did on the driver's side. Just drop it down. I'm going to go ahead and connect this to the existing wiring here that my taillight was plugged into, then I'm going to pull the rest of it down, now I'm going to take my extra and I actually pulled it tight where my exhaust is and I'll zip tie it right up here in the center of the vehicle. Now your kit's going to come with some zip ties. I'm going to take my 4-pole end, I'm going to route it the same way only I'm going to drop it down right here next to the hitch. It's going to go back behind those two brackets that are holding our bumper fascia up just like that.Next we need to mount our ground wire. You're going to have a self-tapping screw in your kit. Use a 1/4" socket and we want to make sure that this is going on metal. This is actually part of the frame right here so we're just going to mount it right there.Next we're going to run our power wire to the front of the vehicle. Let me get that done real quick and I'll show you how I did it. I ran my wire, zip tied it right to this existing wiring. It's on this one here. We want to stay away from moving parts or anything hot so I zip tied it on that. Went over top of this cross brace right to this existing hard line, zip tied there over top of my fuel tank pipe there and just followed the line down, zip tied it along the way, right to here. We're just going to do the same thing we did with our taillights, just like that. Now we'll go up top and pull this up.Then we'll need to route this or get this to the positive side of our battery, which is right here. In your kit you're going to have a fuse holder like this. It's going to have ring terminal and a heat shrink butt connector. It's also going to have a fuse in it. What you want to do is you want to take that fuse out when we make this connection. You need to cut this down to length or somewhat where we can work with it. Just strip the end and then we'll add the other heat shrink butt connector. Again we'll take our heat source, go ahead and shrink up our butt connector. Make sure you're not pointing it at anything that's going to catch on fire or melt other than the butt connector.I'm going to take a 10mm socket or wrench, either one, and we're going to remove this nut right here on the top, go ahead and add your ring terminal, replace the nut. Go ahead and tighten that down into place. Once you make that connection you can go ahead and reinstall your fuse. I'm going to put one more zip tie right there.Now we'll test out our wiring using part number I26. Left blinker, right blinker, brake lights, running lights. That'll do it for a look at and installation on the Hopkins Plug-In Simple Vehicle Wiring Harness with 4-Pole Flat Trailer Connector. Part number HM11143914 on our 2011 Kia Sorento.
Average Customer Rating: 4.1 out of 5 stars (10 Customer Reviews)
Quickly and easily install a 4-way trailer connector on your vehicle with this custom harness. T-connector plugs directly into existing wiring. Powered converter reduces strain on wiring system.
Sorry to say, it failed in less than a year. Not only did the module fail and was stuck with left brake on mode, but I covered the contacts with a little dielectric grease and had the cover capped on the connector all winter and salt and cold weather still got in and corroded it! Not impressed. So I just ordered another manufacturers wiring kit and hope to have better luck.
What a pain! Instruction #5 is wrong. You can't fit the black box down from the tail light because it is too large to fit past the supports. Also, there is nothing to secure it to. We had to undo everything and thread it up from the bottom. We bought velcro and used it to attach the controller to the inside of the bumper. The wire that goes across to the right rear light is too long and must be cable tied.
This harness was a perfect match and all the parts were included. The only thing that kept this from being a 5 star review was that the connectors that intercept the drivers side tail light harness were short. If they were as long as the ground wire (approximately 24 inches) then the unit could have been screwed in place under the bumper rather than squeezed in behind the fender below the tail light.
Everything went together perfectly I ran my Hotwire through the interior, keep it away from the elements, and put the rest of hardware and connector in the storage bin. So nothing's ever outside.
This product was easy to install. May have taken 30 minutes to install. Would be easier on a rack to run power wire. The product fits perfectly. I do advise you to watch the installation video. I Will purchase this product for my other car. I recommend this.
The product came as described. The instructions on how install this product was straightforward. I recommend it to anyone wishing to get one.
Very Satisfied
Great product works fine easy to install
Very good
Easy to order, fast shipping.
Info for this part was:
At etrailer.com we provide the best information available about the products we sell. We take the quality of our information seriously so that you can get the right part the first time. Let us know if anything is missing or if you have any questions.


Thank you! Your comment has been submitted successfully. You should be able to view your question/comment here within a few days.
Error submitting comment. Please try again momentarily.