


Threads into 3/8" NPT female cooler fitting to attach transmission line.
Features:
Specs:
Videos are provided as a guide only. Refer to manufacturer installation instructions and specs for complete information.
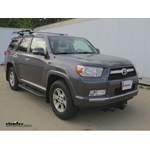
Today on our 20174 Toyota 4Runner, we'll be installing the Derale Combination Cooler. Part number D15902. Now, to begin out install, we'll first go ahead and open up the hood. We've got remove the top fascia cover that will go between the fascia and core support. This says multiple push pin fasteners will need to be removed. To remove these push pin fasteners, we'll simply pry up on the center of the fastener and then remove it completely. Next, we'll start removing the multiple fasteners to undo the front fascia. They'll be fasteners that secure the top of the fascia inside the wheel well and underneath. Once we remove all these fasteners which will be bolts and push pin fasteners, we'll then go ahead and pull out on the wheel well to release the fascia from the fasteners underneath, slightly pull back on the fascia enough that we can reach inside and release the manufacturer's electrical wiring that runs to the fascia. We'll remove the fasteners to secure the lower rock guard. Once we removed the fasteners, we'll swing the rock guard down and remove it from the vehicle.
This will expose the lower engine compartment. Now we'll go ahead and set the cooler in place using the bracket and self-tappers provided with the install kit, we'll go ahead and set out cooler to position and make where we'll need to secure the brackets, then we can use the self-tappers to secure the tappers directly to the cooler. Then we'll take the self-tappers and secure the bracket to the core support. Now with out upper 2 brackets holding the cooler in place, we'll need to modify the lower 2 brackets using the simple pair of pliers, we can go ahead and modify and bend the bracket as necessary so we can secure the cooler. Then secure them to the cooler and front bumper structure. Now with the transmission cooler mounted, we'll need to check the inlet and outlet of the manufacturers cooler lines as it runs into the radiator. Once we locate the manufacturers transmission lines that will go into the radiator, we'll locate the return side. The return side will be cooler than the pressure side.
We'll use the return side to run in line with our new Derale cooler. With this application, we're also going to be using the Derale fluid control thermostat kit part number D13011. This will allow for a standard vehicle warn up up to 180 degrees before the fluid will start routing through the new Derale cooler. Let's go ahead and set up the new fluid control kit. With the kit will be an install bracket. We'll go ahead and mount the bracket directly to the control thermostat.
We'll go ahead and find a suitable location and the mount it. Some applications, it may be necessary to pre-drill the holes before securing it. We'll go ahead and pre-drill our holes and then use self-tapping screws to secure it to the back of the bumper structure next to out new Derale cooler. Now with the thermostat control mounted, we're ready to start routing our lines. To make it easier to install, the new hoses over the cooler nipples, we'll go ahead and take some transmission fluid and coat the end of the nipple for lubrication, then we'll work the new hose onto the nipple. To secure each one of the hose ends, we'll use the worm gear clamp provided. We'll slide it up into position and then tighten it down. Quick tech tip. Note to be careful not to over tighten the clamps as you can break them, then we'll take the other end of our hose and cut it as necessary before we route it into the thermostatic control kit. The thermostatic control kit.
We'll have a threaded end with a barb fitting, the barb fitting will go into the new hose, then we'll thread it into the thermostatic control. Now once we have it tighten down, we'll go ahead and secure with the worm gear clamp. We'll repeat the same process with the other side of the 3As fitting for our transmission line. we'll cut our hose to length, then repeat the same procedure for securing it to the thermostatic control. Next we'll install the barb fittings on the other side of the control. We'll install the new line onto the thermostatic control and route it to the manufacturer's line, mark the length and cut to fit. Now we have both hoses ready, cut the length, we'll go ahead and install the clamps. We'll go ahead and remove the manufacturer's transmission line as it comes out of the radiator. We'll pull the manufacturer's line off and slide the new hose on. Once we work the new hose into place, we'll go ahead and repeat the same process with the side of the line, pulling the old hose off and sliding the new hose on. Once we have both in place, we'll go ahead and tighten them down. Now with both lines installed, we'll go ahead and secure them as necessary with zip ties. Checking all of our clamps, make sure they're tight. Next, we'll go ahead and start routing our hoses to connect to the power stirring system. We'll install the lower hose first and then tighten it down. To make room for our hose, we'll go ahead and use a rotary cut off tool, cut out a section of the plastic so that we can route through the plastic to make the connection with the manufacturer's power steering cooler line. We'll be using the second half of our Derale combination cooler in line with the manufacturer's power steering cooler system. The second half of our Derale cooler has half inch fittings. However, the manufacturer's side is a 3As fitting. Using the Derale 3As NPT male half inch barb fitting, part number D15713 in conjunction with and the Derale 3As NPT female 3As barb fitting, part number D98105. We can reduce the size of the line coming from the cooler matching with the manufacturer's 3As line. Let's go ahead and put our fittings together first. Once again, we'll use thread tape to seal the 2 fittings together. The thread tape will go over the threads to help mesh the 2 threads together for a nice and tight seal. This well help to assist prevent leaks. Then we'll take the half inch side of our new fitting, put into the half inch hose and secure it. Next, we'll take a piece of 3As line install into the other side of our new fitting, secure with the hose clamp and then route the hose over to the manufacturer's power steering cooler. Next we'll go ahead and repeat the same process with the other half in nipple coming from our combination cooler. Once again, we'll take the half inch line, slide it onto the cooler and then secure it. We'll route the line through out cut out and then cut the length. Here we can go ahead and install the second fitting that we just created with the 2 Derale adapters. We'll then again use the worm gear clamp to secure the fitting to the hose. Using our power steering fluid as a lubricant, we'll put it onto the end of the fitting and then slide the fitting into the hose. We'll go ahead and check the length of our 3As line that we ran previously to match up to the manufacturer's cooler line and prepare to install it. Mark the length and cut to fit. We'll remove the clamp from the manufacturer's line, slide it down and out of the way. We'll then go ahead and remove the line and install the new 3As line into the manufacturer's fitting. We can go ahead and take the manufacturer's line, remove the clamp and install a new hose clamp, the the manufacturer's line and route it directly into the 3As fitting we've just installed on the new cooler. Then we'll go ahead and tighten down the clamp. Next, we'll to back and secure the new hose onto the manufacturer's fitting with the worm gear clamp. Then we'll go ahead and secure out lines as necessary with the black zip ties and cut off the excess from the zip ties to clean up our install look. Now with all our lines installed and secured, I recommend to go ahead and start the vehicle, bring up the upper temperature and check for leaks. Once you verify there are no leaks, you're ready to reinstall the underbody, front fascia and panels. And that will do it for the install of the Derale Combination Cooler. Part number D15902 in conjunction with the Derale fluid control thermostatic kit part number D13011 and our barb fittings part number D15713 and D98105 for your 2012 Toyota 4Runner. .
Info for this part was:
At etrailer.com we provide the best information available about the products we sell. We take the quality of our information seriously so that you can get the right part the first time. Let us know if anything is missing or if you have any questions.


Thank you! Your comment has been submitted successfully. You should be able to view your question/comment here within a few days.
Error submitting comment. Please try again momentarily.