

Routing Power Wire for Hopkins Insight Brake Controller on 2015 Subaru Outback
Question:
1st- Thanks for being so awesome!! I am installing the wiring for 7 pin EBC on my 2015 outback. The youtube tutorial clip i watched was great. My question is- I watched another youtube clip by someone else about what not to do... he mentions running the wires INSIDE instead of under the car. Utilizing the present Factory wiring harness along drivers side thresholds up under dash/firewall through already provided firewall access grommet. I have been unable to follow up with this guy to find the tutorial..... which he may not offer because he mentions "do yourself a favor and hire a professional...." There is also a square indent/access on rear bumper like if you chose an option just left of center that i cant figure out what it would be used for.. And wondering if it is dedicated to where the 7-pin connector would go if factory installed??? wish I had picture- its dark out now- will send later...
asked by: Michelle D
Expert Reply:
Thank you for the compliment; it was our pleasure! Our goal at etrailer.com is to provide exceptional service to our customers.
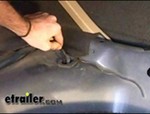
I see from your order that you purchased the Hopkins Insight Proportional Brake Controller for your 2015 Subaru Outback. I've attached a link to our video of this brake controller being installed on a 2016 Outback, which should be very similar to your 2015. In this video you will see how Randy (one of our installers) routes the power wire to keep it best protected.
The video you mentioned makes some very good points. It is obvious that the person who installed the 4 pole wiring harness on the 2014 Outback in that video did not use a custom plug-and-play harness like # 118467, but instead decided to hardwire a 4-way harness. You always want to use a custom harness if one is available for your vehicle. Also, the wiring in the video did not use jacketed wire or any wire loom to protect the wiring under the vehicle. With that being said, there are much simpler ways of protecting the wiring from the elements than running the wiring through the interior of your vehicle. I agree with the man in the video, if you want your power wire routed through the interior of your vehicle, you should probably have a professional do the work because this is a much more labor-intensive installation than routing the power wire via a more traditional method. And, you should also be prepared to pay for the additional labor charges.
I am assuming that you have a factory-installed 4-way wiring harness since you did not purchase one. So, you won't have to worry about running the wires to the tail lights since the factory 4-way has already taken care of this. You will just need to tap into the wires from the existing 4-way, connect your ground and run the power wire to the battery.
When routing wire, there are 3 methods you can use. The first and easiest method is to route the wire under the vehicle, following along with the existing factory wiring harness or the frame rail towards the front of the vehicle. The second method is to to route the wire through the frame of the vehicle. This can be tricky because every frame is different and some frames are not completely open, so you may have to find an alternate route at some points. The final method is to route the power wire through the vehicle. You'll have to route the wires behind trim panels, over or under the doors and possibly under the door jambs. Unless the battery is located in the interior of the vehicle, we do not recommend this method. The benefit of this method is that the wire is totally protected from the elements. The drawbacks are that it is the most time-consuming method of installation, it can be difficult to troubleshoot the wire when something fails, and you may need extra wire to reach the battery.
In regards to the indent on the rear bumper left of center, I would agree with you that it is most likely the cutout location for a factory 7-way.
In addition to the brake controller and # ETBC7 Brake Controller Installation Kit that you purchased, you may need some additional Heat Shrink Butt Connectors like # DW05745-10 for 12 - 10 gauge wire or # DW05744-5 for 16 - 14 gauge wire and some dielectric grease for electrical connectors # 11755. If you plan to run the power wire through the interior, you may need additional jacketed wire, # 10-2-1.


Products Referenced in This Question
Deka Jacketed 2 Wire, 10 Gauge, Brake Wire - per Foot

- Wiring
- Wire
- Jacketed Wire
- 2 Wire
- 10 Gauge
- Deka
more information >
Dielectric Grease for Electrical Connectors, 2 oz.

- Accessories and Parts
- Trailer Wiring
- Wiring
- Dielectric Grease
- LubriMatic
more information >
T-One Vehicle Wiring Harness with 4-Pole Flat Trailer Connector

- Custom Fit Vehicle Wiring
- Trailer Hitch Wiring
- Powered Converter
- Custom Fit
- 4 Flat
- Tekonsha
more information >
Deka Heat Shrink Butt Connector - 16-14 Gauge - Nylon Insulation - Blue - Qty 5

- Wiring
- Wire Connectors
- Butt Connectors
- 16-14 Gauge
- Deka
more information >
Deka Heat Shrink Butt Connector - 12-10 Gauge - Nylon Insulation - Yellow - Qty 10

- Wiring
- Wire Connectors
- Butt Connectors
- 12-10 Gauge
- Deka
more information >
Product Page this Question was Asked From
Universal Installation Kit for Trailer Brake Controller - 7-Way RV and 4-Way Flat - 10 Gauge Wires

- Accessories and Parts
- Trailer Brake Controller
- Installation Kits
- etrailer
more information >
Featured Help Information
Instructions
Miscellaneous Media


Continue Researching
- Article: Brake Controller 7- and 4-Way Installation Kit (ETBC7)
- Article: Brake Controller Installation: Starting from Scratch
- Article: Trailer Wiring Diagrams
- Q&A: What is the Difference Between a 4-Way and 7-Way Trailer Connector
- Article: Towing a Trailer? Let's Talk About Brake Controllers
- Article: How to Choose the Right Trailer Hitch Class
- Q&A: My Vehicle has a 4-Pin Trailer Plug, but Trailer has 7-Pin Trailer Plug
- Article: Wiring Trailer Lights with a 7-Way Plug (It's Easier Than You Think)
- Article: How to Measure for Trailer Hitch Drop
- Q&A: Picking Between ETBC7 and ETBC7L for Brake Controller Install
- Q&A: What is the Difference Between a Class II and a Class III Hitch?
- Q&A: Where Do the Wires on the Universal Install Kit for Trailer Brake Controllers Get Installed?
- Q&A: Suspension Enhancement Recommendation for 2019 Toyota RAV4
- Q&A: Replacement Lid and Lift Arm for Dometic 810263