
To see if this custom-fit item will work for you please tell us what vehicle you'll use it with.


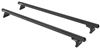
This fully welded trailer hitch receiver bolts onto your vehicle's frame with no welding required. Matte black, powder coated steel is durable and corrosion resistant and creates a rugged look.
Features:
Specs:
The sturdy steel construction is protected with a matte black finish for added durability. This unique powder coating gives etrailer hitches a carbide-like appearance and a rugged look that sets them apart from traditional glossy hitches. In addition to being rust and corrosion resistant, the tough matte coating hides dirt, scuffs, and dings better than a glossy finish.
At etrailer we're committed to the products we sell, and to our customers. Our experienced and knowledgeable staff are available via both phone and email to address your questions and concerns for the lifetime of your hitch. The technicians at etrailer perform hitch installations on a daily basis, making them a valuable resource for do-it-yourselfers. The one-on-one, personal service you'll receive comes straight from an expert in the towing and automotive field. We've installed it, we've wired it and we've towed with it, so whatever your question, we can answer it.

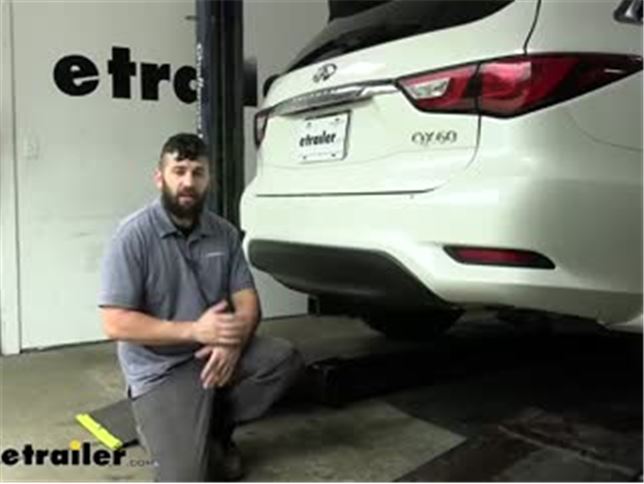
Videos are provided as a guide only. Refer to manufacturer installation instructions and specs for complete information.
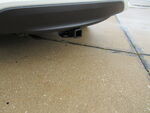
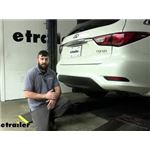
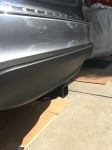
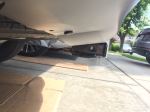
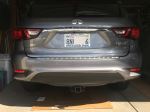
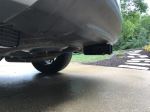
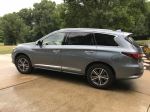
Hey everybody, how's it going today We're gonna be going over and showing you how to install the etrailer trailer hitch receiver here on a 2018 Infiniti QX 60. So this is what our trailer hitch is gonna look like installed on our vehicle. Now, this trailer hitch does have a hidden cross tube design meaning the cross tube is actually gonna be tucked up behind the bumper here making for the best overall appearance. And what we can see has a nice matte black powder coated finish. So it's gonna help protect the hitch from rust and corrosion. It also helps it blend in with the underbody paneling on the vehicle here.
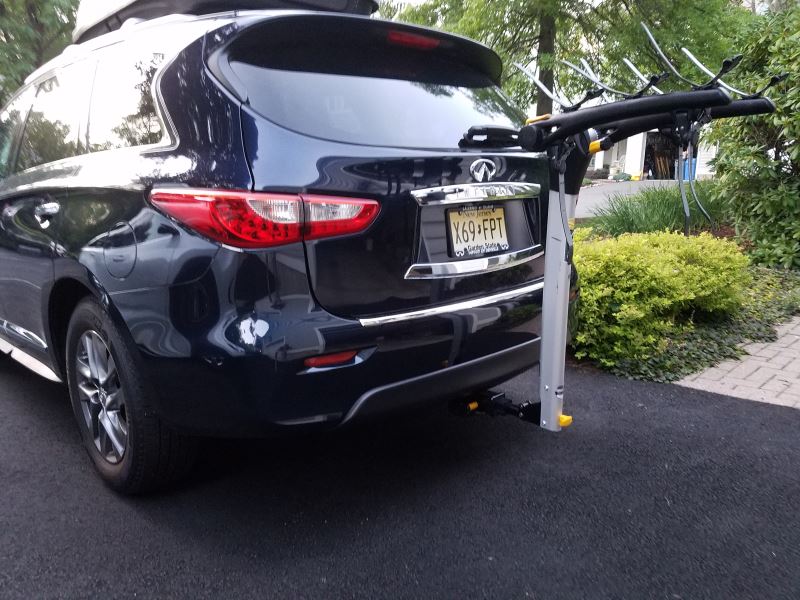
So adding a trailer hitch to your QX 60 it's gonna be an excellent option because it's gonna make your vehicle that much more versatile. Now, in addition to towing we could also use this trailer hitch for a hitch mounted bike rack if we wanted to hit the trails or a hitch mounted cargo carrier, if we just simply wanted to free up some space inside the vehicle for us and the family on those long road trips. In regards to towing our trailer hitch is gonna provide us with a 4,000 pound gross trailer weight rating. That's the amount we can pull outward on our fully loaded trailer. It also has a 600 pound tongue weight rating which is a downward force on the receiver tube.
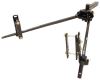
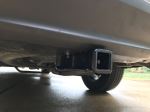
Now keep in mind, these capacities are for the hitch only which is actually tested separately, the vehicle. Therefore you do need to verify your vehicle's towing capacity in your owner's manual and abide by the lower of the two rated components, whether that's the hitch or the vehicle. On the side of our receiver tube we're gonna have our industry standard 5/8 inch diameter hitch pin hole. It's gonna work great with our industry standard 5/8 inch diameter hitch pin and clip. Keep in mind your hitch pin and clip is holds separately, doesn't come with the trailer hitch.
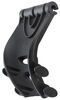
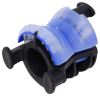
And the reason for that is a lot of your aftermarket accessories are actually gonna come with their own, but if you need one, we do have plenty of options here at etrailer. Then welded to the bottom of the receiver tube we have our safety chain loops. Those are gonna work great with both the larger clevis style as well as the smaller S type hooks. So now just a quick couple measurements for you guys. The first one as the distance from the ground to the top inside edge of the receiver tube opening.
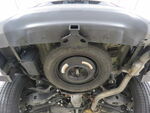
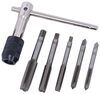
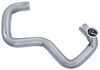
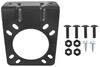
You're looking at about 14 and a quarter inches and that'll be useful when you're selecting a ball mount. So you can make sure you get the correct horizon drop to tow your trailer level. Now keep in mind, that's just the baseline measurement. This can vary from vehicle to vehicle. And then we have the distance from the center of the hitch pin hole to the outside edge of the bumper. And you're looking at about four inches there, and that's gonna be useful when you're selecting a folding accessories. That way you can make sure that while they're in the folded up and stowed position, they don't contact the vehicle. Now in regards to installation this is very straightforward. It's definitely someone with little to no mechanical experience can do at home by their selves and around an hour depending on your experience level. It doesn't require any specialized tools or anything like that. There is one tool you're gonna need, you might not have and that's a torque wrench, but you can actually rent this for free from most local auto parts stores. Now you will see us lift the vehicle up in the air but you guys certainly don't have to do this. You can still do this on the ground at home. Let's go ahead and walk you through the entire process step by step now. The first step of our installation today is underneath the vehicle over here on the driver's side frame rail. We're gonna be removing our tow hook here. So there's gonna be two bolts holding it on the bottom and then two on the side at the top there. We'll remove these with an 18 millimeter socket. Now keep in mind the tow hook and the hardware are not gonna be reinstalled on the vehicle, but don't worry. You can use your trailer hitch for vehicle recovery. Next, we need to temporarily remove our spare tire but we will be placing it back into position. So in order to do this, you're gonna open up the hatch, lift open the floor covering, and inside here there's gonna be a cap you remove which is gonna reveal a hex head. That's gonna allow us to operate the wench to lower our spare tire. Now, if you need further assistance with this be sure to reference your owner's manual. The tools that you need for this should be located inside your vehicle as well. So next we need to remove the fasteners that are holding the bottom of the fascia to our fascia, your support tab. So there's just gonna be a pushpin fastener one on either side, they're pretty easy to get out. You can use either a combination of a trim panel tool or a Flathead screwdriver. So you're just gonna be prying out the center section there. Sometimes it can be a little bit harder than others to release it. And then once you get that center section out the rest should come out with it. So sometimes they fight you a little bit but we're able to get this one out. We'll just do that same thing on the other side. And you can see now we can pull down on our fascia. Going to be unbolting those brackets from the vehicle there. There's just a single bolt up top attaching it to the bumper beam. We'll use a 12 millimeter socket to get that out. Now, next thing we need to do is we need to trim a small section of our bottom bumper fascia. here. You can see it's very minor. And the easiest way to do that is to measure from a reference point on one side all the way across and then you'll divide that by two. Make a mark for your center line. And then you're gonna measure out a few inches on either side and then a few inches on top. The exact amount is gonna be specified in your instructions but once we get that area marked out here we're gonna be taking a Dremel tool to remove the material. Now you can use a number of different tools as plastic isn't super heavy duty. So if you have some shears or even a razor blade knife you can score that and then break it off. So there's a number of different tools you can use. The best tool's a Dremel but if you don't have one, there's plenty of others. So let's go ahead and take some time now to remove that material. So now that we have the material removed I'm gonna go ahead and take off my tape there. And you guys really don't have to do that. I just do that so I can give you guys a greater visual of what we're gonna be removing. So you can see there's some rough edges here and we can easily clean that up with a razor knife or if you just take a file, some sandpaper, again there's tons of different tools you can use to complete these next few steps here. Just use whichever ones you have at hand. I wouldn't necessarily go out and buy something just for this. We're just gonna take a little bit more time here; clean up those edges for a nice, smooth finish. We're gonna turn our attention to the attachment holes underneath the vehicle. We're gonna gonna have three on either side. It's these three weld nuts closest to the inside of the frame here. So we're gonna make sure these are nice and clean. And the best way to do that is to spray some spray lubricant in there, and then come back with a wire brush and just get all the dirt and gunk out of there. And once I do that, I'm gonna take one of the factory hardware that comes in your kit and we're gonna try threading that into those weld nuts. And if it threads in cleanly you don't have to do any more cleaning but if you have some resistance, it's a good idea to go back and spray some more lubricant in there and use the wire brush a little bit more. Now in extreme cases, it could actually require a tap. That's just really gonna depend on how old your vehicle is though. You do need to be careful when you're using that so you don't cross thread the holes. We've got all of our weld that's clean, so now we're gonna go ahead and prep our hardware. So we're gonna have three hex bolts per side along with three conical tooth washers. So the only thing you wanna make sure of is that the teeth on the conical tooth washer are facing up towards the hitch. Now with an extra set of hands we can raise our hitch up into position. You do have to come up and over the exhaust on the passenger side first. So now that we have our hitch installed with all of our hardware in place, we'll come back with a 19 millimeter socket and we'll snug everything down. And now we'll come back with our torque wrench here and torque all of our fasteners down to the specifications in our instructions. Next we're gonna be reinstalling our fascia support tabs and raising our spare tire back up into position. And that's gonna do it today for our look at installation of the etrailer trailer hitch receiver here on our 2018 Infiniti QX 60..
Average Customer Rating: 4.9 out of 5 stars (9 Customer Reviews)
This fully welded trailer hitch receiver bolts onto your vehicle's frame with no welding required. Matte black, powder coated steel is durable and corrosion resistant and creates a rugged look.
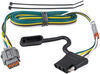
Follow the great video that is available thru etrailer website and you will not have any install issues..purchase the wiring kit and bracket and the install will go as planned. The products are built to last and fit is perfect..
READ AND FOLLOW THE INSTRUCTIONS before install...
Service at etrailer was great & the hitch has worked perfectly.
Easy install and fits perfectly. Great product and very low price. My third positive experience with retailer.
Josh has been great to work with !!!
I have an Infinity QX60. I had the hitch receiver professionally installed for $80 in Jax. FL. Perfect for our 2-bike rack from REI.
This is a perfect hitch for my needs on my 2020 Infiniti QX60. I’m just using it to carry two bikes only not pulling anything with it. Installation was simple I did modify the metal hanger that the rear bumper facia connects to using the pushpin.
It’s a real clean installation, looks like it came from the factory. Very glad I bought this and installed it myself. The dealership wanted $450.00 for the hitch and installation, wasn’t going to happen.
etrailer thanks for all the videos on the installation on the QX60, they were extremely helpful. etrailer Rocks!
I purchased and installed the Curt class lll hitch and 4 pin wiring harness on my 2016 Infiniti QX60. Installation was easy and went smoothly, thanks to the Etrailer video’s. There were no surprises and I am extremely happy with the product, installation process and the exceptional customer service Etrailer provides. Ordering was easy, I received it literally the next day and customer service followed up to make sure I had everything I needed. Would highly recommend Etrailer.
Shipping was immediate. Installation was just as easy as advertised. A 74 year old and a 75 year old got it done in less than an hour. The hitch will be used to pull my fishing boat, keeping he good times rolling.
Excellent trailer hitch ,easy to install also suply Nut and Bolt plus ring .
My friend mechanical shop and he told me you really by towing very good staff ,where you got it ?
I said to him look the sticker at the bar ,oh he said ,you smart by this extra spend time but saving big buck .
Saving money cost less than $ xxx ,but if you buy the car with towing package extra probably $ 1000 so I suggest do the same what I did .
And also behind you car people stop or parking not to close you car ,protect bumper from scratch or damage .
Thank you to all of you and Merry Christmas 2016 and the Best New year come 2017 .
Very glad and happy I got this hitch. Looks great and easy to get to for placing bike rack.
trailer hitch for 2017 infiniti qx 60 works great after 1 year. No problems! Great cost when compared to dealer.
I got this to go on our Infiniti JX35, and it works great. It took less than an hour to install, which I did on my own when it was cold out! I went with this hitch as wanted minimal parts showing, and this one fits the bill. The small amount of trimming that was required was easy, I just used a sharp utility knife and took my time. When you install this, do the exhaust side first, learn from my struggles!
Works great and has a clean install look.
Finally got around to mounting the hitch to my Infiniti QX60. Was unable to remount the fascia trim brackets that had to be removed for installation because once the hitch bolts were tightened down, the central hitch part actually presses upwards into the fascia trim and warps the natural flow of the fascia trim a bit ( I did indeed make the cuts to the fascia per the directions). Not a big deal as the pressure stiffens the fascia trim and there is no fluttering. However, I will get a couple pieces of aluminum and make some new brackets to remove any possibility of movement. The attached photo shows the hitch pressing the fascia up a bit and the outer edges of the fascia being pushed down. If that upward pressure was not there, I would have given this hitch 5 stars.
I ordered this trailer hitch for my 2014 Nissan Pathfinder… I watched the video that etrailer.com made, and decided it looked like a project I could try to do myself. I am not a mechanic, but I am decently handy with tools. I placed my order knowing that I needed the hitch to arrive the next week so that I could do the installation when I had some time off from work. The day after I placed the order I got a very pleasant phone message and email from a girl named Carla from etrailer.com. She told me that One of the products that I ordered was not in stock. She told me I had three options. One option was to wait two weeks until the backordered product was available, another option was to split my orders shipping apart but pay extra for that, or a third option was to buy a different Hitch ball assembly that Carla had found to be almost the same, but in stock.
This was one of the best online shopping experiences I have had, because of the personal touch from the cute girl with the southern accent that called me to talk about the options that were available due to a problem with my order. I love the fact that she was so personal, relatable, and not automated. I love the fact that she gave me three great options instead of just some lousy automated response that would tell me I'm shafted. I love the fact that the girl who called me was pleasant, kind, and located in the company, in the state, in the country, where I was buying the product. She was so helpful. She left a voicemail for me, she called me again, and she emailed me to be sure I got the message. This is what I call great service. This experience of service is what will make me want to buy from this etrailer.com again!!!
The hitch arrived in good condition, although the box was broken and the large metal sides of the hitch were protruding through the box by about 6 inches. Nevertheless, the product was not damaged at all. All the other products were also in the large box, in a smaller box.
I was able to follow the instructions on the instructional video that was provided, and I was able to put the hitch on my pathfinder by myself! This took a little bit of ingenuity, because I don't have a lift and I was alone. So I had to prop up the heavy-metal hitch assembly on some crates and shimmy it up with some planks of wood to just the right height so that I could boat in the other side. It worked! This particular hitch seems perfectly designed, and fit perfectly on the 2014 Nissan Pathfinder that I have. I am extremely satisfied.
I am extremely satisfied with my purchase from a trailer.com
I was looking for a hitch that would protrude as little as possible and be easy to install. Thanks to the etrailer's review and installation videos I chose exactly the right hitch to meet my criteria.
Everything but the Curt receiver is tucked up under the bumper, and the step-by-step installation video gave me the confidence and tips to make the job very easy.
My order was shipped promptly, delivered fast, and is now installed. I like to support companies that go the full measure - so etrailer.com has my full endorsement.
I'm not a "mechanically" handy person so following the instructional video was perfect.
Quick tips -
-2015 QX60 you can lower the spare to the ground with no need to remove it.
-The treads that the hitch will be mounted in were rusted so it took a good amount
of rust cleaner and I used the (removed) tow mount bolts to clean and thread the
holes. If you don't have an impact gun a breaker bar worked well to help in
achieving the perfect torque.
-Mount the hitch loosely -hold it against the bottom fascia- mark the area to be cut
(2.5 x 1.375) - drop the hitch and use a shape utility knife to EASILY cut the plastic.
The end result looks great and installed as easily as shown!
I received the trailer hitch in a reasonable amount of time and the installation time was very accurate. Took about an hour and a half without using power tools and no lift or help.
Would recommend this company for any one seriously thinking about installing a trailer hitch.
Works great for trailering my small sailboat and for my bike rack with my 2014 QX60. Ordered in the afternoon and it arrived the next day even on ground shipping. Took my local mechanic a couple hours to install the hitch and the Curt T-Connector Wiring.
Installation videos were very helpful. Quality product.
After 1 year I have had zero problems with my hitch. Installation was pretty easy and took me about 2 hours to complete. I only use this hitch for a 1up-usa bicycle rack

Do you have a question about this Trailer Hitch?
Info for this part was:
At etrailer.com we provide the best information available about the products we sell. We take the quality of our information seriously so that you can get the right part the first time. Let us know if anything is missing or if you have any questions.


Thank you! Your comment has been submitted successfully. You should be able to view your question/comment here within a few days.
Error submitting comment. Please try again momentarily.