
To see if this custom-fit item will work for you please tell us what vehicle you'll use it with.
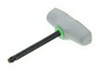
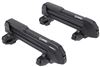
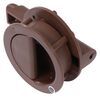
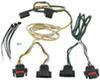
These custom clips and pads let you mount Thule Evo Clamp or Edge Clamp feet on your vehicle with a naked roof. The clips are easy to install - just slide them into the feet until they click. Rubber pads help protect your roof from scratches.
Features:
Specs:
Secure, Click-In Installation
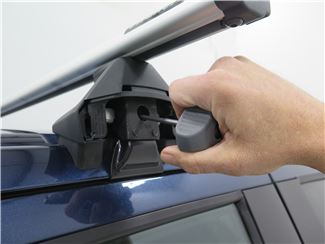
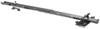
To complete installation, place the fully assembled rack on your roof at the location specified in the fit kit manual. Tighten the rack in place with the torque tool included with the feet. The single attachment point bolt lets you quickly secure the crossbars to the feet and the feet to your door jambs simultaneously. An audible click from the torque tool indicates the rack is secured properly.
Protection for Your Roof
The rubber-coated steel clips and molded rubber pads protect your vehicle's paint from scratches and abrasions. The pads easily slide onto the bottom of each foot, and they are specifically designed to fit the shape and contour of your roof.

Videos are provided as a guide only. Refer to manufacturer installation instructions and specs for complete information.
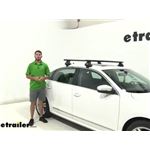
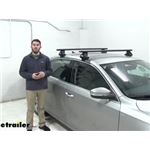
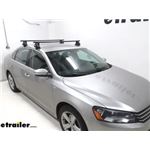
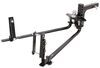
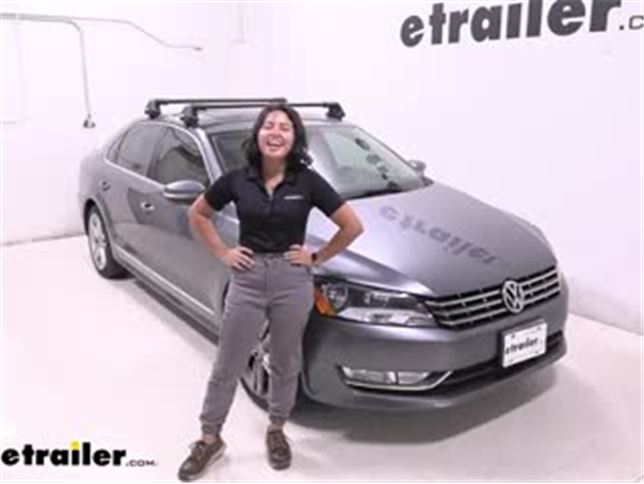
Hey everyone, it's Evangeline here at etrailer. And today, we're taking a look at how the Thule WingBar Edge roof rack system fits on your 2014 Volkswagen Passat. So, the Thule WingBar Edge system is really interesting, because it's super heavy-duty, it's super rugged, but it's also low profile. So, we'll talk about those features, and how it fits on the Volkswagen Passat. So, this is a custom fit for your car, and we have a kit put together with all the different parts that you need. So, make sure to use the fit guide here at etrailer.com to find the right fit for you.
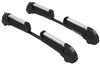
You have the 41 inch crossbar, the 37 inch crossbar with the Thule WingBar Edge towers, as well as the custom fit kit for your vehicle, that fits around the grooves and the edges. So what kinda cargo or accessories can you carry with this system Well, you do have a flush system, so for your actual roof bar space, it's gonna be 37 1/4 inches of space. And this is how much room we have to clamp items around. Even if you are using the T-track system, you're limited to that too, although it might give you a little bit of extra space, because then you don't have to worry about the space the clamps take up. So for your height, there's two measurements you might wanna know.
One is the distance from the bottom of the crossbar to top of roof. So here, from the glass to the crossbar, it's just about two inches, which isn't that much. You're gonna have to think about that if you have those U-bolts with wing nut style, you may or may not have enough space. Try to get accessories with just those clamps that go around, super low profile. Next is the height added to the top of the roof.
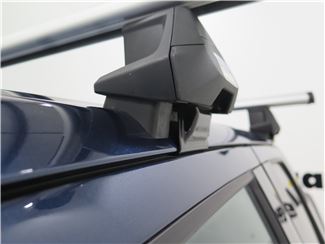
So this is 3 1/4 inches above our glass. That's where your cargo sit. So, let's say you're carrying around skis, snowboards, especially the skis with extra tall bindings, you wanna make sure that you have enough height and those bindings don't scratch up your roof. And if you don't have enough height, you can check out the accessories that we have available that can give you the extra height. When you take the end cap of your tower off, you then get access to your T-tracks.
You can see how the wind strips split apart to slide your accessories through. I do like how the clamps fit on this one. It is very low profile. You can slam your door on those clamps, and you're not concerned about it taking up too much space. Plus the pads are different for each side, and you can tell how they fit around the groove, but also give you some extra height. Now when you have a naked or an empty roof like this, then you can't really adjust the crossbars that go on them. So for your crossbar spread, center to center, it's gonna be 27 1/2 inches apart. Some accessories require a specific crossbar spread. This is pretty in the middle of the range, so hopefully this will help you out. Now you do have a custom-fit kit that has instructions specific for your vehicle, for installing. And we're gonna take a look at how I got this onto our Volkswagen Passat. So, the first thing is to get your towers, or the feet, onto your crossbars. Now look at the towers, see how they're curved. There's gonna be a right and there's gonna be a left. So, as long as it matches the end of your crossbar, you're good to go. So you're gonna have to push this tab in, in order to pop your crossbar tower through. It connects in the crossbar, and then you're gonna tighten it down to where it lines up. So, just double check your instructions for what letter you need to go to. But for example, if you need to go to letter H, just tighten this down until the H-line lines up with your crossbar. Your fit kit will include some pads, as well as some hooks, with their own numbers for your vehicles. Now, these just pop onto the clamp, and the hook just slides in right there. Now, before you put your crossbar on, just double check where they're gonna sit. So in our case here, we want it about 27 1/2 inches from the front crossbar. So find that spot, place your mark, and then you're just gonna place it onto your roof, right where you took your spacing measurement. So, we've followed the Thule measurement so far, and definitely follow along with those letters, spacing, things like that. Now, every now and then there might be a bad fit for a certain vehicle. And in our case here, we actually came up a little bit too short. If that happens to you, you are gonna have to take some manual measurements. So measure from where the groove is on your roof, to the other side. And then once you tighten down your crossbars to your towers, make sure it matches with the groove of your pad. So in our case here, my measurement was 44 inches apart, and that's how far apart I got the towers. So the grooves on the flip pads match that, and now we have a really good fit. Your tool has a torque setting of three Newton-meters, so just rotate that tool on that clamp until it clicks. Once you've tightened down both sides, and then just pop that end cap on. Once all end caps are on there, you then pop in your plastic lock core. So, you can tighten down those plastic lock cores with a flat head screwdriver, or a coin, or the back of a key. This is also a good time to replace those plastic lock cores with metal lock cores. Those are sold separately. And once you've secured all four towers, then that's it for the install. You're ready to load up your roof rack and hit the road. And that was a look at the Thule WingBar Edge roof rack system on the 2014 Volkswagen Passat..
Average Customer Rating: 4.7 out of 5 stars (3 Customer Reviews)
These custom clips and pads let you mount Thule Evo Clamp or Edge Clamp feet on your vehicle with a naked roof. The clips are easy to install - just slide them into the feet until they click. Rubber pads help protect your roof from scratches.Appreciative that etrailer organizes it so that I didn't have to think too hard/figure out what Thule equipment would work best for my 2015 VW Passat TDI SE. It takes some time to install, moving the bars back and forth so that the padding lines up as best possible for a naked roof; overall, very pleased.
Do you have a question about this Roof Rack?
Info for this part was:
At etrailer.com we provide the best information available about the products we sell. We take the quality of our information seriously so that you can get the right part the first time. Let us know if anything is missing or if you have any questions.


Thank you! Your comment has been submitted successfully. You should be able to view your question/comment here within a few days.
Error submitting comment. Please try again momentarily.