
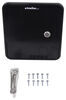
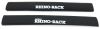
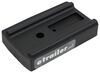
Custom RCP Fit Kit for 4 Rhino-Rack RC and RV Series Roof Rack Legs - Fixed Mounting Points
(179 reviews)
Price: $114.97
In Stock
Custom RCP Fit Kit for 4 Rhino-Rack RC and RV Series Roof Rack Legs - Fixed Mounting Points
Item # RRRCP45-BK
Retail:$155.28
Our Price: $114.97
You Save: $40.31
Will this fit?
To see if this custom-fit item will work for you please tell us what vehicle you'll use it with.
In Stock
Thank you! Your comment has been submitted successfully. You should be able to view your question/comment here within a few days.
Error submitting comment. Please try again momentarily.


- All Info
- Reviews (179)
- Q & A (0)
- Videos (2)
- Photos
- Used (1)
Rhino Rack Roof Rack - RRRCP45-BK
- Fit Kits
- 4 Pack
- Rhino Rack
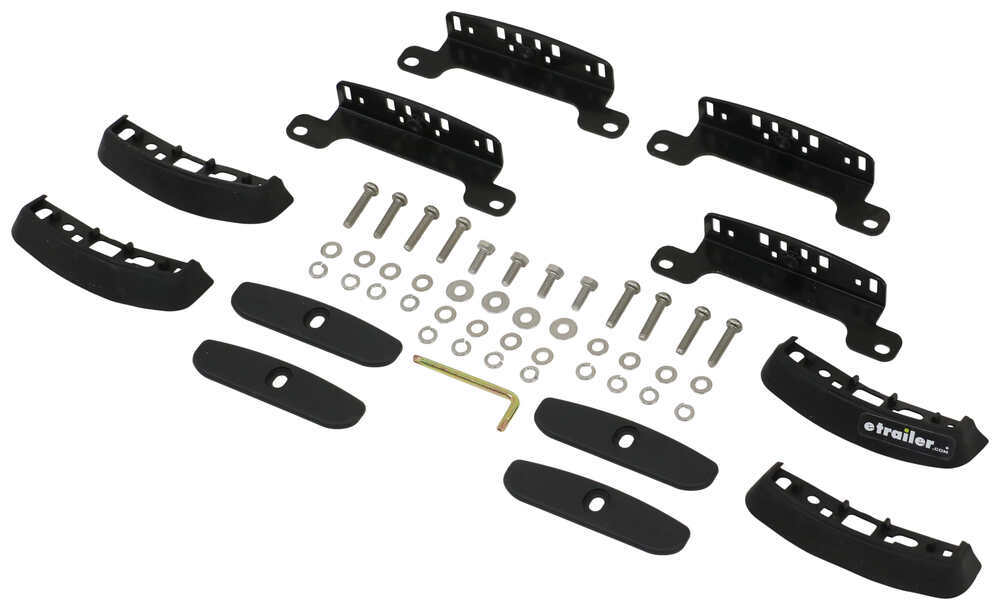
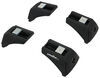
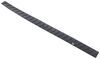
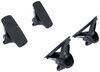
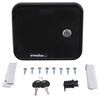
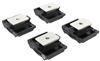
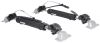
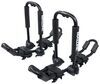
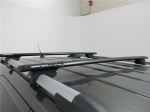
Custom fit kit lets you mount Rhino-Rack RC or RV series legs to a vehicle with fixed mounting points. Legs mount to vehicle with attachment studs. Molded inserts cover bases when the legs are removed. Includes 4 pads, covers, and mounting hardware.
Features:
- Custom fit kit allows you to mount 4 Rhino-Rack RC or RV series legs (sold separately) on your vehicle with fixed mounting points
- Threaded studs screw into fixed mounting points to provide attachment point for legs
- Legs slide onto studs and secure with hex bolts
- Molded-rubber pads are designed to fit the contours of your roof
- Protect your roof from scratches and abrasions
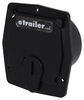
- Precision-molded inserts cover bases when the legs are removed
Specs:
- Application: Rhino-Rack RCH, RCL, RVH, and RVL roof rack legs
- Quantity: 4 pads, 4 covers, and mounting hardware
- 5-Year limited warranty
RCP45-BK Custom RCP Fit Kit for Rhino Rack RCH, RCL, RVH, and RVL Series Roof Rack Legs - FMP
Installation Details


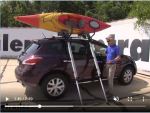
Video of Custom RCP Fit Kit for 4 Rhino-Rack RC and RV Series Roof Rack Legs - Fixed Mounting Points


Videos are provided as a guide only. Refer to manufacturer installation instructions and specs for complete information.


Video Transcript for Rhino-Rack Vortex Aero Roof Rack Installation - 2019 Ford Explorer
Hey everybody, how's it going Today we're gonna be going over and showing you how to install the Rhino-Rack Vortex Aero crossbar system, here on our 2019 Ford Explorer. So this is what our crossbar system is gonna look like installed. Now for starters, we'd have the black crossbars on our vehicle here 'cause our vehicles black matches a little bit better. It's also offered in a silver option as well. It really just comes down to preference, whichever you feel will look better on your vehicle. So, with the Rhino-Rack Vortex Aero crossbars, we're gonna have an arrow shape.
And what this arrow shape does is it does a couple of different things. Number one, it cuts down on wind noise, a lot of crossbar systems that use those square blocky crossbars can really get kind of noisy up here on your vehicle. You really not gonna have too much of an issue with that, due to this arrow design, obviously it's gonna be more aerodynamic. So they're also not gonna take as big a hit with our miles per gallon. So adding a Fracture Explorer, it's a great versatile option.
It's gonna allow us to do many different things. We can pretty much carry anything we want up here. We could definitely put some kayaks up here, a cargo box or even a bike rack. We're gonna have endless possibilities here with our roof rack. So, I'm sure you've noticed that we have these giant channels running down the center of our crossbars, and these are gonna be great for our roof mounted channel accessories.
So basically what this does is it makes it a little bit easier to secure your accessories to the crossbars. You don't have to worry about the wraparound clamps tightening each side. Sometimes there can be up to four equal side. The channel is gonna be nice integrated seamless into the crossbar. It's usually only one to two fasteners per side.
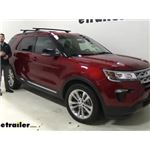
We also not gonna have a ton of space between the bottom of the crossbar and the top of our roof. There's actually only a couple of inches here. Therefore it may require the channel Mount accessories for certain application. A lot of the times we have these U bolts, or even these locking knobs here that we have to manipulate, could still be possible but it's gonna be a little bit harder when we don't have as much space. So these integrated channels here are gonna be an awesome feature here to this crossbar system. So, in regards to weight capacity, we're gonna be 165 pounds evenly distributed across both crossbars. So, in regards to installation, we're gonna get pretty lucky here on our Explorer because it actually uses factory fixed points here on the inside of these rails. Therefore, installation is super easy, we don't have to worry about attaching any door clips that go inside and damage our weather seal possibly everything's gonna be right up here on the roof. It's super easy to install. And again, we get this seamless look with the factory fixed points. So before we start our installation, what we like to do is we just like to get everything out of the box here, lay it down in front of you and then explain what everything is. So, first we have our crossbar here. It's pretty self-explanatory what that does. Next thing we have here is gonna be our mounting feet. Now we have to show, so this is our mounting foot. We have this square nut here which actually goes into the channel on our crossbar and then we'll have an Allen head underneath the tight-knit. So we're gonna have two of these per bar, we're also gonna have our locking in caps here, they get installed over there like so and then we can lock and remove them with the included key. Then next we have the fit kit. So to a roof rack, you're gonna have three components, the cross bars, the mounting feet and the fit kit. What the fit kit does is pretty much attached to everything for this particular vehicle here. We're gonna have fixed mounting points that this installs into using these two holes here, and then our mounting feet are gonna connect to the top of the fit kit using this hole here. So this mounts on the vehicle our mounting fee attached to the fit kit and then our crossbars attached to the mounting feet. You're also gonna notice a few other things in your kit here. So we have these little protective caps. So these are gonna get installed on top of the fit kit and we don't have our system installed. So meaning when we have the crossbars and mounting feet removed, we can still leave the fit kit on the vehicle here and protect it from any issues using these protective caps. We're also gonna get all the tools we need for our installation, we're gonna have the security torques bit. We're also gonna have the security Allen bit. You'll need both of these to complete this installation. And then the last two things we have here, we have these protective strips so if we turn our crossbars over, we're gonna see the half channels here on either side on the bottom of our crossbar. These are actually gonna install inside these channels here to provide an extra level of protection. So, once we get our mounting feet in the correct position, tightening everything down, we'll measure the distance we have between here and here. I'll cut the strip accordingly and install it in there. And then finally we have the in caps to our crossbar. So these are actually locking, they come with the key here. Basically, they just install in the outside ins of our crossbar here. Stop anything from being able to slide off our crossbar for using the channel mount accessory. And again, just keeping our crossbars nice and free from any corrosion or dirt. So we're gonna take our crossbar now to start our installation. The side that goes up is gonna have our Rhino-Rack sticker on there. We're just gonna flip it over to the bottom side, and again the bottom side is gonna be the one with our half channels here. Probably more, only a quarter of the crossbar actually. But then we're gonna take one of our mounting feet here, along with our hex security tool, but what I'm gonna do is I'm gonna line up that channel nut here inside the channel of our crossbar. Keep in mind we want the connection point to be facing outward. So not like this, like this. We'll just slide that on. So right now we don't know where we need to secure this, it could come in more, it could come out more. So don't wanna fully tighten this down, but we also don't want the mounting feet sliding around on this when we're trying to get it on the vehicle, so I'm just gonna snug up our fastener here. So we want it to be snug, but we still wanna be able to move it, so about like this should be fine. Now have on the other side, install our other foot. And then once we have both of our mounting feet installed, we'll come back with our end caps here, insert those into the end of the crossbar, take our key and turn it to lock it in place. So now we're going to assemble our fit kit. Here's what our fit kit looks like fully assembled. It's gonna be composed of two parts. We have the rubber foot here and then we have the actual metal portion. So the way this installs it's simply gonna slide in that channel. And then you're gonna have these little plastic or rubber tabs on the bottom that will push up through that middle opening there. Now, we already installed the front crossbar but we're gonna show you guys how to do the rear one. So you're gonna notice if we look inside the silver rail here, we're gonna have two sets of points. Two sets here, and two sets here. We can actually install our crossbar into either one, it's really gonna be preferenced depending on what sort of things you're carrying, if you have larger boats like kayaks, you may wanna use the ones that are spread further apart, just really depends on what we're gonna be carrying. But for demonstration purposes, we're just gonna go ahead and install it in this closest one. So we're gonna take the security torque smith that comes in our key here. We're gonna be removing these two caps here. So it's just a little plastic torque nut or Torx screw here. So I want to be careful, we don't damage it when removing it but they're pretty easy to get out. We'll start it with our tool and we should be able to remove the rest of it by hand. Here's what that looks like. So go ahead and get this other one out and then repeat that same process on the other side. So now we're gonna get our hardware ready, we're gonna take one of our security Torx bolts, put on a split lock washer and follow that up with a flat washer. We'll need two of these for this one side. So once we get these ready, we'll take our fit kit here, line up our holes and then thread in our hardware. Now, we're just taking our security key here, just tighten down our two Torx bolts. So now all we did is we simply went ahead and took our crossbar assembly and set it onto the fit kit here. We did have to adjust the feet a little bit but we knew we we're gonna have to do that beforehand. Basically, what are we gonna do now is we're gonna measure the distance from the edge of the crossbar to the beginning of that foot there. We just wanna make sure that's even on both sides. And then we can go ahead and take the bolt in our kit here. We're gonna get four of these smaller bolts here, we're gonna place a split lock washer on, follow that up with a flat washer, then when we see we can actually secure the mounting foot to our fit kit here. Now we'll just take our 10 millimeter wrench here. Let's go ahead and finish tightening that down. So now a couple more things we have, we're gonna take our locking in cap here or the cover rather for a mounting foot. Snap that into place, then we can lock it, and then finally, we're gonna take our Allen head security key here, we're gonna come underneath our mounting foot here, we have a little bit of an opening and we'll basically just tighten up that center bolt there to further secure our crossbar to the mounting feet. And that'll do it today for a look and installation of the Rhino-Rack Vortex Aero crossbar system here on our 2019 Ford Explorer..
Customer Satisfaction Score:
98% were satisfied with this product
2% of customers were not satisfied
- Wrong item was ordered
- Product did not meet expectations
Customer Reviews
Custom RCP Fit Kit for 4 Rhino-Rack RC and RV Series Roof Rack Legs - Fixed Mounting Points - RRRCP45-BK
Average Customer Rating: 4.7 out of 5 stars (179 Customer Reviews)
Custom fit kit lets you mount Rhino-Rack RC or RV series legs to a vehicle with fixed mounting points. Legs mount to vehicle with attachment studs. Molded inserts cover bases when the legs are removed. Includes 4 pads, covers, and mounting hardware.by: Brice10/02/2023
Rock solid attachment, the install didn’t go as smooth as hoped, but got it to work. Customer service was very available, though I do t think anything they could have done to make the install easier - chalked up to slight car model variations.
by: Kimberly 04/13/2023
Great product! Happy with the ordering process, company, and follow-up on the purchase.
by: Michael02/10/2022
2016 Ford Explorer
Very straight forward to install. Took about a half hour in total. No whistling whatsoever. They look awesome on my 2016 Ford Explorer Sport! Especially with my running boards and tires...
Waiting on my Rhino basket to get here to install that next!
by: Timothy 09/13/2021
Easy installation
by: Don 03/31/2021
by: Bill N07/28/2020
Easy to install
by: Jamie 11/08/2020
Great communication.
by: Mie12/07/2019
Essential piece easy to install
by: Tyler03/11/2020
Fast delivery and great service.
by: James 09/04/2022
by: Paulette 10/08/2022
by: Robert 07/18/2021
by: Thomas 10/19/2021
by: Shaun 03/20/2021
by: Bryan 11/08/2021
by: Darren 04/28/2023
by: Emmanuel 08/21/2020
by: Jonathan 10/06/2021
by: Tim 03/16/2023
by: Steve 11/26/2022
by: Larry 10/03/2021
by: Jacob 08/04/2021
by: Leonard 05/23/2021
by: Dan12/16/2021
2016 Ford Explorer
by: Neil12/25/2023
These were the only mounts I could find to fit a 2019 Toyota Highlander LE factory roof bolts. Have never used Rhino Racks before but was very happy to find their sturdy mounts for aero bar legs.
25
179
Show More Reviews
See what our Experts say about this Rhino Rack Roof Rack
- What Parts do You Recommend to Install the Thule Pulse L # TH615 to My 2018 Ford Explorer? If you are looking to install the Thule Pulse L # TH615 on your 2018 Ford Explorer XLT, you will need a crossbar system. If you have factory crossbars or crossbars already installed on your Explorer, the clamps on the Pulse will grasp the bars if your crossbars measure no greater than 3-5/16" wide x 1-1/2" tall. In order to make sure you have the correct dimensions, I recommend measuring your crossbars. If you have flush factory rails without crossbars installed, I recommend the Rhino-Rack...
view full answer... - Recommended Roof Rack To Mount Roof Top Tent To 2018 Ford ExplorerI have a solution for you, however, there are not any platform racks that attach to the roof of your 2018 Ford Explorer so you will want to go with a standard crossbar setup. I have not seen any negative feedback from attaching a rooftop tent to crossbars, so rest assured that the tent will not fall off if properly installed. If your Explorer has raised roof rails then you can go with Inno Aero Crossbars Black - 54" # INXB138-2 along with the necessary Feet # INXS350 and Fit Kit # IN28FR....
view full answer... - Can Yakima SkyBox 12 Fit Rhino Rack Roof Rack of 2017 Ford ExplorerThe Yakima SkyBox 12 # Y07334 fits more than just the Yakima rack roof racks. It would fit a Rhino Rack roof rack like the # RRVA137B-2, # RRRCH4, # RRRCP45-BK quite well. The Rhino Rack bars are very similar in shape to the Yakima bars.
view full answer... - Best Roof Rack for 2019 Ford Explorer with Flush Roof Rails and MoonroofFor your 2019 Ford Explorer with moonroof and front-to-back flush roof rails I recommend the Rhino-Rack Vortex Aero roof rack system because of its proven quality, quieter operation and because this black rack will provide an appearance more like a costlier factory rack. Rhino-Rack products also offer excellent value for the dollar as compared to other premium roof rack brands. The system consists of parts # RRVA137B-2, # RRRCH4 and # RRRCP45-BK and you can see an Explorer installation...
view full answer...
- Roof Rack for 2017 Ford Explorer Compatible With Thule Hullavator ProThere is a roof rack for your 2017 Ford Explorer that is compatible with the Thule Hullavator Pro Kayak Carrier and Lift Assist # TH898, although the 53 inch bars of the Rhino-Rack system are not going to be quite long enough to work. Due to that, in order to get long enough bars you will need to go with the Yakima roof rack. The reason is due to how crossbars mount; they foot pack that attaches to the bars slides into a channel underneath the crossbars. That channel on the Rhino-Rack...
view full answer...
- Thule Canyon XT Roof Cargo Basket Mounting for 2017 Ford ExplorerThe Thule # TH859XT-8591XT Canyon XT Roof Cargo Basket is designed to attach to crossbars. I'd recommend a Rhino-Rack crossbar setup, which is assembled using the following parts: • Rhino-Rack 54 inch aero crossbars, part # RRVA137B-2 • RCH Roof Rack Legs, part # RRRCH4 • RCP Fit Kit for Roof Fixed Mounting Points, part # RRRCP45-BK With the rack in place, the basket will bolt to the rack. I've linked to an install video showing the basket being installed on a 2018 Ford Explorer.
view full answer... - How To Carry Two Kayaks On a 2016 Ford Explorer With Glass RoofI have just what you need to carry two kayaks on a 2016 Ford Explorer. In order to maintain the roof weight capacity you will indeed need to carry most of the weight on the hitch with the Rhino-Rack T-Load Hitch Mounted Load Assist part # RTL002. Then you can support the bow/stern directly on the roof with a roof rack like the Rhino-Rack Vortex Aero Crossbar System part # RRVA137B-2, part # RRRCH4, part # RRRCP45-BK. I have attached a selection of our kayak carriers for you as well such...
view full answer... - Is There A Third Rail Option Available For The Rhino-Rack RVP Roof Rack On A 2016 Ford Explorer?I went ahead and checked to see if a single bar was available for the Rhino-Rack RVP Roof Rack for Fixed Mounting Points # RRRVP45, and unfortunately a single bar kit is not offered for this system. With that being said, to add a third bar you'll need to piece together everything. For the bar you'll need to contact Rhino-Rack as they don't sell singles for this system. However, for the remainder of the kit you'll need a fit kit # RRRCP45-BK, and legs # RRRVH2. As for a keyed alike option,...
view full answer... - Can Thule Artificial RainGutters Be Installed on the Roof of a 2016 Ford ExplorerI have a solution for you, but you cannot mount the Thule # TH542 on the roof of your vehicle and still have a secure mounting point for the towers of a roof rack. From what I was able to determine, the 2016 Ford Explorer came standard with flush mounted roof rails. For this reason you can use the Rhino Rack # RRRCP45-BK, # RRRCH4 and # RRVA137B-2 to give yourself a complete roof rack for your Explorer.The Rhino Rack is a great option because it provides you with a high quality and durable...
view full answer... - Can Thule Rapid Traverse Feet Be Used on Flush Side Rails on 2016 Ford ExplorerI have a solution for you, but the Thule Rapid Traverse Feet # TH480R are not designed to fit on flush mounted roof rails, so there's not a fit kit that will allow this; additionally, your older square bars will not fit in the feet that are available for your 2016 Ford Explorer. For these reasons, if you wanted an aftermarket roof rack for your 2016 Ford Explorer so that you've got flat bars, you would need to get an entirely new system. If you wanted to go the aftermarket route, I recommend...
view full answer... - Largest Rhino Rack Pioneer Platform that Fits 2016 Ford ExplorerRhino Rack doesn't have the larger Pioneer platform trays available for your 2016 Ford Explorer since they don't have any direct mount options using their Backbone system, but they do have universal style Pioneer trays that attach to their crossbar kits for your vehicle part numbers # RRVA137S-2, # RRRCH4, # RRRCP45-BK like with the part # RR42115BF which is 58 inch by 47 inch.
view full answer... - Does Rhino Rack Roof Rack Vortex Aero Crossbars Fit 2017 Ford Explorer with Flush RailsWhat you are describing is a flush rail installed on the roof of your 2017 Ford Explorer. The Rhino Rack roof rack part numbers # RRVA137B-2, # RRRCH4, and # RRRCP45-BK is confirmed as a fit for exactly what you described so this would fit and work well for you.
view full answer... - Do Yakima and Thule Accessories Fit Rhino-Rack CrossbarsAs long as the crossbar spread is within the range of the Thule or Yakima accessory there will be no issues mounting it to Rhino-Rack crossbars. Most accessories fit round, square, aero, elliptical and factory crossbars. For example, if you added the Rhino-Rack Roof Rack # RRVA137B-2, # RRRCH4, and # RRRCP45-BK to your 2017 Ford Explorer the # TH615 you looked at would fit the Vortex Aero Crossbars. You would need to make sure that the crossbar spread was 23-5/8" - 34-3/8" which is what...
view full answer... - Recommended Roof Rack For 2017 Ford Explorer That Will Accommodate A Roof Top TentI have a solution for you, but there are not any roof racks for your 2017 Ford Explorer that are rated for 190lbs when vehicle is in motion. I will give you a few roof rack recommendations so you are aware of your options. If your 2017 Ford Explorer has factory raised rails running front to back then you will want to go with Inno Aero Crossbars - Aluminum - Black - 51" Long # INXB130-2 along with the necessary Feet # INXS350 and Fit Kit # IN28FR. This has the highest weight capacity available...
view full answer... - Will Rhino Rack Installed on 2018 Ford Explorer Allow Sun/Moon Roof to OpenWith the Rhino Rack roof rack part # RRVA137B-2, # RRRCH4, and # RRRCP45-BK installed on your 2018 Ford Explorer there are no restrictions on opening the sun/moon roof but if you were to do this with the rack installed you most likely find that the wind noise is going to be loud enough you'd want to keep it shut. If you check out the picture I attached you can see there would be plenty of clearance for the roof to open. The picture is a 2018 Explorer like yours with this rack installed...
view full answer...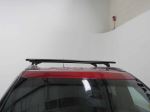
- Recommended Roof Rack for 2019 Ford Explorer with Flush Side RailsIn order to put crossbars on the flush mounted side rails of your 2019 Ford Explorer you'll want to use the Rhino Rack # RRRCH4 feet with # RRRCP45-BK fit kit and the Rhino Rack Vortex Aero Crossbars # RRVA137B-2. Rhino Rack offers a similar quality and durability of the more expensive roof racks at a much better price point and they will allow you to carry a kayak carrier Thule Hull-A-Port # TH834. This Rhino Rack will mount to the fixed mounting points on your flush mounted side rails...
view full answer...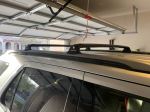
- How To Carry a Canoe On a 2016 Ford ExplorerIn order to carry a canoe on a 2016 Ford Explorer you'll first need to start with a roof rack, the Rhino-Rack Vortex Aero Crossbar System part # RRVA137B-2, part # RRRCH4, and part # RRRCP45-BK is a great cost effective option. In order to secure the canoe, the Lockrack Adjustable Watersport Carrier part # LR54FR is what I recommend as it's one of the very few options which can be locked.
view full answer... - Could 59” Rhino Rack Aero Cross Bars Fit on 2017 Ford ExplorerSince the track on the underside of the Rhino Rack crossbars does not run the full length of the bar and it is what the feet of the rack attach to we can't guarantee you'd be able to fit the longer bars on your rack. I can say that when we installed the 54 inch rack part numbers # RRVA137B-2, # RRRCH4, and # RRRCP45-BK on a similar Explorer we found there was several inches further to the inside that the feet of the rack could attach to so I would be inclined to believe that the longer...
view full answer... - Recommended Roof Rack for a 2019 Ford Explorer XLT W/ Flush Mounted RailsSo I can definitely see the concern but the weight rating that you're looking at for our roof racks are going to be the dynamic weight rating, meaning the max weight those bars can handle while in motion. When you're parked the weight rating increases dramatically since the weight won't be moving and will be supported by the axles. With that being said, something like the Rhino-Rack Vortex Aero Crossbars # RRVA137B-2 with the RCH Legs for Rhino-Rack Crossbars and Pioneer Platforms # RRRCH4...
view full answer... - Best Value Roof Rack And Kayak Carrier With Load Assist For 2019 Ford ExplorerI have the perfect roof rack option with the best value for the 2019 Ford Explorer. I recommend the Rhino Rack Aero Bar Roof Rack part # RRVA137B-2 for the bars, part # RRRCH4 for the legs, and part # RRRCP45-BK for the fit kit. The Rhino Rack roof racks are cost effective without compromising on quality. The aerodynamic bars of this particular setup will cut down on wind noise and they also look great. The weight capacity of the bars is 165 lbs which is more than most brands we carry....
view full answer...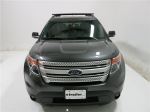
Do you have a question about this Roof Rack?
Used Items Available


Condition: Missing Parts
Notes: Item is missing 4 hex set screws. Otherwise new and unused.
Info for this part was:

Video by:
Andrew K

Video by:
Chris R

Expert Research:
Jameson C

Video Edited:
Jacob T

Video Edited:
Dustin K

Test Fit:
Colin H

Test Fit:
Conner L

Updated by:
Wilson B

Updated by:
Alex H

Written by:
Daron K
At etrailer.com we provide the best information available about the products we sell. We take the quality of our information seriously so that you can get the right part the first time. Let us know if anything is missing or if you have any questions.
Product Experts Available Now!
Call 1-800-940-8924
Don
4/1/2022
Great, The best way to indorse a product is to answer the question, would you purchase it again? Yes I would.