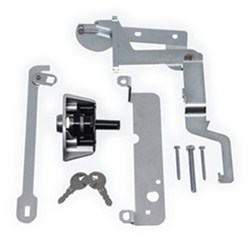
Installation Instructions for Pop and Lock Manual Tailgate Lock for a 2014 Honda Ridgeline
Question:
HOW DIFFICULT IS IT TO INSTALL THIS LOCK. I HAVE 2014 HONDA RIDGELINE WITH A REAR CAMERA.? I AM INSTERESTED IN THE MAUAL KEY LOCK.
asked by: RICHARD
Helpful Expert Reply:
Installation of Pop and Lock tailgate lock # PAL6102 for your 2014 Honda Ridgeline is not all that difficult:
STEP 1 - Lower the tailgate. Remove the four Phillips head screws from the top trim, slide the trim to the right (passenger) side using a rubber mallet and lift to remove it. Apply downward pressure on the top trim if it bows up. Remove the white clips that remain on the tailgate by turning them 45 degrees to pull out. NOTE THE ORIENTATION BEFORE REMOVAL. Remove the T40 torx screws holding the interior trim panel and lift it off.
STEP 2 - Remove the handle rod from mechanism by turning the green rod clip and pulling the rod out of the clip. Swing the rod up and out of the way. Remove the two screws holding the factory handle in place; there are tabs that will keep the handle from falling out of the tailgate, but for extra assurance hold the handle in place so not let the handle to fall. Install the mounting bracket over the back side of handle and reinstall the two screws and tighten. Reinstall the handle rod.
STEP 3 - Using the bracket holes as a template drill the two 3/16” (or 5mm) holes and one 1/2” (or 12mm) hole. Insert the lock assembly from the front of the bezel inserting the shaft through the 1/2” hole and aligning the two mounting holes on the bezel with the mounting bracket. Insert the 2 supplied 8–32 x 1 1/2” screws through the mounting bracket in to the bezel. Tighten the screws. DO NOT OVER TIGHTEN. IF LOCK ASSEMBLY BINDS LOOSEN SCREWS UNTIL THE KEY MOVES FREELY!
STEP 4 - Remove the two mechanical assemble screws. Mount the Pop N Lock bolt linkage under the upper latch rod as shown using the existing two mechanical assemble screws.
STEP 5 - Install the crank rod assembly by hooking the slotted end onto the bolt linkage and the square hole to the end of the lock assembly shaft. Insert the 1/4” x 20 x 2” screw into the shaft and tighten.
STEP 6 - Check the functioning of the lock.
Lock-Turn the key to the right (passenger side) to the two o’clock position and then then back to 12 o’clock to lock.
Unlock-Turning the key to the left (driver side) to the ten o’clock position and then then back to 12 o’clock to unlock.
STEP 7 - Replace the interior trim panel using the torx screws removed in Step 1. Replace the white top trim clips onto the tailgate, making sure they are oriented as noted in Step 1. Carefully locate the top trim over the clips and press it firmly into place. You will hear and feel them snap into place. Adjust the position of the top rim once again using a rubber mallet. Reinstall the four Phillips Head screws.
I will email you a copy of the instructions as well.

Product Page this Question was Asked From
Pop & Lock Custom Tailgate Lock - Manual - Silver
- Tailgate Locks
- Lock Only
- Manual Lock
- Keyed Unique
- Vehicle Specific
- Silver
- Pop and Lock
more information >

Continue Researching
- Article: My Trailer Hitch Doesn't Fit
- Article: RV Sway Control, Stabilization, and Suspension Enhancement
- Article: Stability Control for Heavy Duty Vehicles
- Q&A: Is the Pop & Lock Custom Tailgate Lock # PAL6102 the Same Color as my Silver 2014 Honda Ridgeline
- Q&A: Can I Install the RedArc Tow Pro Liberty in a 2019 Honda Ridgeline
- Q&A: Will the AC/DC Power Adapter # ACDC3212 Work with My Jensen Television # JEN46VR
- Q&A: Will Jensen 12V Power Adapter DCCIG09 Fit 24-Inch TV Model JTV24DC
- Q&A: Location of Wiring Connections to Install Pop & Lock PL8662 Tailgate Lock on 2013 Honda Ridgeline
- Article: Trailer Wiring Diagrams
- Q&A: Pop and Lock Tailgate Lock for a 2014 Honda Ridgeline


