How To Install the Redline Trailer Vent # WHMAV2-WAVT2 on an Enclosed Trailer
Question:
I was curious on part:Redline Enclosed Trailer Parts - WHMAV2-WAVT2 If you had a video of how to install this on a 12x16 enclosed trailer? Thanks!
asked by: Steve
Expert Reply:
I do not have an installation video on the Redline Trailer Vent, part # WHMAV2-WAVT2, but I can help you with the installation. The tools you will need are a caulk gun, drill, a 3-inch hole saw, a 3/16-inch drill bit, and a flat-tip screwdriver. The other parts you will need I have listed below in the instructions.
The # WHMAV2-WAVT2 vent is two pieces. The # WAVT2 is the 3 inch round interior vent that will need to be installed in a 3 inch diameter hole on your trailer. You will need to cut a 3 inch diameter opening on you trailer and insert the vent through the hole. Drill three 3/16-inch holes where the screws will go. I would recommend to put a sealant like # 0160297, around the lip of the round vent before attaching to the trailer with three of the # 30587 wood screws.
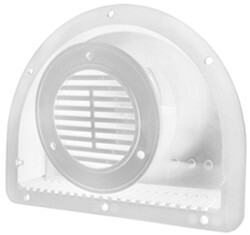
The # WHMAV2 will install on the exterior of the trailer and will insert into the 3 inch round vent of the # WAVT2. You can position the slotted vents on the # WHMAV2 for the best airflow and drill six 3/16-inch holes where the screws will go. Also, put some sealant on the edges of the vent before attaching to the trailer with six of the # 31071 sheet metal screws.
That is all that is necessary to install the trailer vent on your enclosed trailer.

Products Referenced in This Question
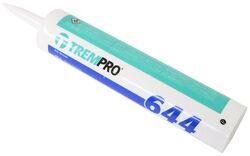
TremPro 644 Silicone Sealant - 10.1-Fl-Oz Cartridge - White
- Lubricants Sealants Adhesives
- Sealant
- Multi-Purpose Sealant
- 10.1 oz
- Flint Hill Goods
more information >
Replacement Round Interior Trailer Vent for 3" Diameter Hole - White
- Accessories and Parts
- RV Vents and Fans
- Wall Vent
- Redline
more information >
Replacement Exterior Half-Moon Trailer Vent for 3" Diameter Hole - White
- Accessories and Parts
- RV Vents and Fans
- Wall Vent
- Redline
more information >
Product Page this Question was Asked From
2-Piece Exterior Wall Vent for Enclosed Trailers - Polypropylene - 3" Diameter Hole - White
- RV Vents and Fans
- Vent
- Wall Vent
- No Fan
- 6W x 8L Inch
- Plastic
- White
- Redline
more information >

Continue Researching
- Q&A: 2024 Ram 5500 Cab and Chassis 2-1/2" Trailer Hitch Receiver Options
- Q&A: What are the Wire Colors and Functions of the Nissan Factory Brake Controller Harness
- Article: Trailer Wiring Diagrams
- Q&A: Idler Hub for Lippert 7k Axle that Has 6-Bolt Pattern
- Q&A: Could Redline 2-Way Pop-Up Roof Vent # 9106-2756 Install in Ford Transit Connect Van
- Q&A: 20 Amp Charge Controller Compatible With Goal Zero Boulder 200 Briefcase
- Q&A: Curt Adjustable RV Trailer Hitch 13703 Replacement Hardware Kit
- Q&A: Vent Positioning for Trailer Vent # WHMAV2-WAVT2 to Prevent Rain/Exhaust from Getting in Trailer
- Article: Powering Vanlife: How to Design the Perfect Power System
- Article: How to Measure for Trailer Hitch Drop
- Article: 30-Amp and 50-Amp RV Service: What's the Difference?
- Article: How to Choose the Right Trailer Hitch Class
- Article: Trailer Jacks
- Article: Ball Mount Basics: Weight Capacity, Class, and Size


