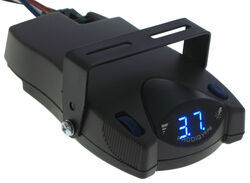
Intermittent Error Codes and Poor Braking on Trailer Using Tekonsha Prodigy P2 Brake Controller
Question:
My situation: The 90185 is 5-6 years old. Everything has worked well until now. The first indication a problem existed was an OL code, along with poor braking action. I thought a brake magnet would be the most probable cause, since the brake system was 7 years old. I decided to replace the complete brake system. After new brake system installation was completed, the OL code went away, only to be replaced with an intermitting O9 code. The code would flash for about 10 times then go away for a brief period then do it again. This was with the vehicle in motion. Also, my trailer braking didnt improve at all with the new brake system. When I attempt the set the brake system using the provided instruction, I cant get enough brake action to lock up the wheels. It doesnt matter how much I increase the setting using the power knob, I get very little brake action. I set the power setting to 13, and again the braking changed very little, if any. Im thinking the controller is faulty, but I dont want to replace the old one until Im sure. When I purchased the Prodigy years ago, everything worked as advertised. It was very easy to install and set up, but I cant do that now. Any help that you might be able to provide would be greatly appreciated. I would like to go purchase another controller and have things return to normal. If only it was that simple. Thanks.
asked by: Reginald G
Expert Reply:
The O9 code you mention is telling you that there is a poor ground connection between the controller and the vehicle.
If the controller is hardwired into the vehicle, review the connections and ensure that the white wire exiting the rear of the controller is grounded directly to the vehicle battery. If the controller was installed using a wiring adapter that plugs into the connector under the dash, check that connection to make sure it is secure. You might need to run a jumper from the white wire exiting the rear of the controller and ground it directly to the negative battery terminal to ensure a good connection.
When you replaced the brakes on the trailer, if the brakes were not adjusted, I would recommend doing so.
To adjust the brakes, jack the trailer following the manufacturers recommendations. Remove the rubber or plastic adjusting hole cover on the back of the brake backing plate. With a standard screwdriver or brake adjusting tool, spin the star wheel on the brake adjuster to expand the the brake shoes until the wheel is very difficult to spin by hand. Then, back off the starwheel in the opposite direction (usually about 10 clicks) until there is just a slight brake drag. Replace the adjusting hole cover, and repeat on each brake assembly.
We have a video that outlines the procedure for adjusting your trailer brakes. Click on the provided link, and fast forward to the 4:45 minute mark.

Product Page this Question was Asked From
Tekonsha Prodigy P2 Trailer Brake Controller - 1 to 4 Axles - Proportional
- Trailer Brake Controller
- Proportional Controller
- Electric
- Electric over Hydraulic
- Automatic Leveling
- Under-Dash Box
- Dash Mount
- Up to 4 Axles
- LED Display
- Up to 360 Degrees
- Tekonsha
more information >
Featured Help Information
Instructions
Miscellaneous Media

Continue Researching
- Shop: Dexter Nev-R-Adjust Electric Trailer Brakes - 10" - Left/Right Hand Assemblies - 3.5K
- Shop: Towing Mirrors
- Shop: Brake Controller
- Search Results: hitch coupler lock
- Search Results: hitch lock
- Search Results: hitch ball lock
- Search Results: hitch and coupler lock
- Video: Dexter Nev-R-Adjust Electric Trailer Brake Kit Installation
- Video: etrailer Trailer Hitch Receiver and Coupler Lockset Review
- Video: Master Lock Hitch Receiver and Coupler Latch Lock Set Review 1481DAT
- Video: Longview Custom Towing Mirrors - Slide-On Mirror - CTM2500 Review
- Shop: Tekonsha Prodigy P3 Trailer Brake Controller - 1 to 4 Axles - Proportional
- Shop: Universal Installation Kit for Trailer Brake Controller - 7-Way RV and 4-Way Flat - 10 Gauge Wires
- Shop: etrailer Hitch Receiver Lock for 2" and 2-1/2" Hitches - Flush - 3-5/8" Span - Chrome
- Shop: Longview Custom Towing Mirrors - Slip On - Driver and Passenger Side
- Shop: Bulldog Lifelong Trigger-Style Coupler Lock and 2" Trailer Hitch Receiver Lock - Chrome
- Shop: etrailer Hitch Receiver and Coupler Lock Set - 2" Hitch - 1/2" Coupler Latch - Keyed Alike
- Video: This Old Trailer: Changing Hydraulic Trailer Brake to Electric
- Video: Performance Tool Plastic Bearing Packer Review
- Video: Trailer Brake Controller Wire Testing
- Article: Troubleshooting Brake Controller Installations
- Q&A: Dexter Never Adjust Brakes Initial Adjustment on Tandem Axle Trialer
- Q&A: How to Initially Adjust the Dexter Nev-R-Adjust Electric Trailer Brakes
- Shop: Trailer Wiring
- Shop: Transmission Cooler
- Q&A: Parts Needed to Install a 7-Way on a 2015 Subaru Outback Wagon
- Q&A: Determining Correct Electric Brake Assemblies for 2,200 Pound Axles on Viking Pop Up Camper
- Q&A: Replacement 7-Way Trailer Connector for 2018 Ram 1500
- Q&A: How To Install a 7-Way Trailer Connector On a 2016 Honda Odyssey
- Search Results: prodigy p2 troubleshooting


