
Saris Fluid² Bike Trainer with Smart Speed Sensor - Fluid Resistance
(7 reviews)
Price: $299.99
In Stock
Saris Fluid² Bike Trainer with Smart Speed Sensor - Fluid Resistance
Retail:$412.00
Our Price: $299.99
You Save: $112.01
In Stock
Thank you! Your comment has been submitted successfully. You should be able to view your question/comment here within a few days.
Error submitting comment. Please try again momentarily.


- All Info
- Reviews (7)
- Q & A (0)
- Videos (2)
- Photos
Saris Bike Trainer Stand
- Bike Resistance Trainers
- Progressive Resistance
- Saris
- 26 Inch
- 27 Inch
- 29 Inch
- 650b
- 700c
- Fluid Resistance
- Virtual Training
- No Watt Measurement
Designed for the advanced cyclist, this fluid trainer is perfect for frequent indoor rides. Resistance is based on pedal speed, resulting in a more realistic ride than a magnetic trainer can provide. Cadence sensor included for virtual training.
Features:
- Fluid trainer lets you ride your bike anytime, regardless of weather, time, or traffic
- Progressive resistance curve increases the faster you pedal
- Included speed sensor lets you train with Zwift, Rouvy, and other virtual apps
- Includes 1-month subscription to Rouvy virtual training app
- Pair with smart phone, TV, or computer via Bluetooth
- Bluetooth or ANT+ USB adapter (sold separately) available for devices that don't have built-in Bluetooth
- Turbine oil encased inside the cast-aluminum shell creates resistance
- Precision-balanced flywheel creates real-world biking experience
- Built-in fan keeps fluid cool, so it won't overheat and leak onto your floor
- Clutch knob adjusts roller to perfectly fit against rear tire
- Clicks when optimal tension is reached
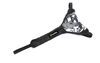
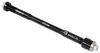
- Included quick-release skewer secures most road and mountain bikes to the trainer
- Thru-axle skewer (sold separately) accommodates 142-mm x 12-mm and 148-mm x 12-mm bikes
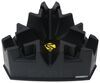
- Included block for front tire keeps bike level
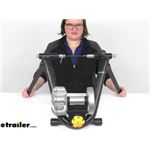
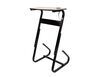
- Lightweight steel frame folds for easy transport and storage
- Adjustable feet keep trainer level on uneven surfaces
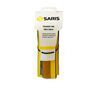
- Trainer Tire (sold separately) helps prevent excess wear on back tire
- Made in the USA
Specs:
- Application: 650b, 700c, 26", 27", and 29" wheels
- Fits 29" wheels up to 2.25" width, depending on tire tread
- Rear dropout spacing: 120-mm, 130-mm, 135-mm
- Noise level: 69 db at 20 mph
- Weight limit: 300 lbs
- Lifetime warranty
Bike Trainer with Fluid Resistance

The Fluid trainer has a progressive resistance curve which simulates riding outdoors. It gets progressively more difficult the faster you pedal, keeping the power curve consistent. As a result, the trainer has a smoother road-like feel than a magnetic trainer. You can also manually switch gears to make your ride easier or harder - just like in the real world.
Precision-Balanced Flywheel

The Fluid trainer features a precision-balanced, zinc-alloy flywheel. This large flywheel helps create the same inertia riders experience on the road when accelerating. This results in a more realistic ride when compared with smaller flywheels. The flywheel keeps spinning even when pedaling has stopped to simulate coasting.
Turbine oil encased inside a cast-aluminum shell creates resistance. As pedal speed increases, the fluid becomes hotter. A fan built into the flywheel channels the air intake to cool the fluid so it won't leak out of the casing and stain your floor.
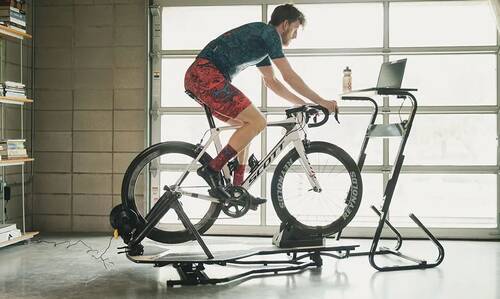
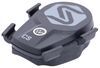
Virtual Training

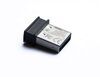
The included speed sensor lets you experience virtual training via Bluetooth on your smart phone, TV, or computer. If your device does not have built-in Bluetooth, a Bluetooth or ANT+ USB adapter (sold separately) is available. Install the sensor on your bike pedal, or over the rear hub.

Zwift, Rouvy, and other training apps give you the benefits of a full bike workout coupled with the excitement of riding real bike routes. A free 1-month subscription to Rouvy is included to get you started. Stream thousands of virtual routes from all over the world, or race against other competitors. While riding, your training data is automatically synced with the app so that you can compete against your own previous records. It also gives you the ability to create and share your own routes.
Available Accessories

Tire tread does not wear the same on the trainer as it does in the real world. Frequent riders will find that the tread on their back tire wears down much quicker on the roller due to the added friction. Most outdoor tires are not designed to handle that kind of heat. The trainer tire (sold separately) is made of rubber with a durometer higher than that of a traditional road tire. It's built to handle higher temperatures and will save your rear bike tire from premature tread wear.
The NFinity Motion platform compliments your bike trainer by creating a natural movement that's easier on your body than using your trainer alone. Just secure your trainer on the platform and you're ready to go. Because it moves forward, backward, and side-to-side, it creates the same motion your bike has when you shift your body weight. This natural movement provides a more comfortable and realistic ride. Additionally, it engages your core muscles, so you can tone your abs while you ride.

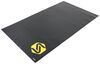
The trainer mat keeps sweat and bike grime off your floor. It's made of PVC foam that absorbs vibration, keeping your ride quiet.

A leveling block was included with the trainer, but you can use a climbing block (sold separately) instead to offer 2 levels of steepness that simulate riding uphill.

The trainer desk provides a place to put your water bottle, laptop, phone, and anything else you might need for your ride. It also has an integrated power strip, so you can keep all your devices powered.
9907T Saris Fluid² Bike Trainer with Smart Speed Sensor
Item # SA9907T
California residents: click here
Video of Saris Fluid² Bike Trainer with Smart Speed Sensor - Fluid Resistance


Videos are provided as a guide only. Refer to manufacturer installation instructions and specs for complete information.


Video Transcript for Saris Fluid² Smart Speed Sensor Bike Trainer Review
Hey, everyone it's Evangeline here at etrailer and today we have the Saris Fluid 2 Classic trainer. This is gonna be a bike trainer that includes the Saris cadence and speed sensor. You can also get this system without the sensor, but today we're gonna talk about how this all works together and I'll show you later on how to set it all up. Bike trainers are something that you may use with your own bike in order to get a good workout in. Maybe it's the off season, you're not quite ready to ride outside because maybe the weather's not so great. Maybe you wanna stay in shape, but you want something easily accessible.
You can set this up right beside your computer at your home office, in your basement, in your garage, pretty much wherever. This is gonna be the classic trainer. So rather than smart trainers that have everything already included but also an included high price, this is gonna be a more affordable but also still very effective way to get that training in. And with this including a speed sensor, you're able to pair this with your favorite riding apps. A quick overview of the Fluid 2 though is it uses fluid resistance in order to give you a more realistic ride.
It is the more premium option, but compared to a magnetic resistant trainer, like what we have here, the Saris Mag, this is gonna be a progressive resistance. So as you pedal, it is going to create resistance, and when you pedal faster, it catches up to you too. So just like you're riding out in the real world, there's gonna be wind blowing through your hair, you're gonna be going up slopes and inclines, things like that. As you pedal, you're going to feel that resistance. Now the thing with fluid resistant trainers is that if they do overheat, they do tend to leak.
Fortunately, this does have a fan, so it has your pedaling the fan helps cool down the fluid, making sure that everything stays contained, giving you a good experience. This kit is going to include your fluid to a trainer, your cadence and speed sensor, as well as your front wheel block. In order to change your experience, you also have other accessories you can add on to this, whether you want the adjustable wheel chock for different inclines, maybe you want a trainer mat, you can find all those extra add-ons right here at etrailer. Two of the main questions that I have, and you might have too, is can I use my own bike and will this support me So I like to ride a gold mountain bike. If I was to use it on here, perfectly fine as long as I switch out the rear tire.
So there is the separate trainer tire offered by Saris. You can find it here at etrailer. That is a slicker tire, also ideal for road bikes too if you don't want uneven tread between your front and your rear tires. Now, with that switched out, we can then use a mountain bike on this trainer. Another thing is, and another reason why I brought out the demonstration bike is will this support me. We had different people around the shop try out this trainer, and the big thing about that was with the weight and with movement, will I fall off of the trainer As you pedal around and even as you pedal faster, even as you lean around on the bike, you can see how the legs stay firmly on the ground no matter how much you move or how much you try to pivot. This creates that realistic riding experience where as long as you're going forward, you're not worried about going down. Even though the trainer looks small, it has that stability because of how it's designed. This is made of steel. We have those legs that pivot out to create that base, and on the feet we have these adjustable rollers, adjustable rubber pads, and even if you have an uneven surface, you can move it around so you can have a more level experience. A lot of people use this on its own without even a sensor if they just wanna ride along with a video or just have that experience of working out. Now where this all really pairs together is when you use that sensor and this trainer with your favorite cycling app. This can be a point that's a little tricky for a lot of people because pairing everything can be a struggle. Let's guide you through that whole process of setting your bike up, setting your sensor up and setting your app up. First thing you need to do is you're going to assemble your trainer. This only needs to be done once and it's a very simple process. Everything is included. Only thing not included is gonna be a half inch wrench, which you'll need to tighten down a bolt, but once that's assembled you then set up your bicycle. So if you do have a mountain bike, this is when you switch out your tires for the trainer tire. If you want to use a trainer tire on your road bike, do the same thing and you're gonna replace your skewer with the one included with your kit. So this is gonna be the Saris skewer. The reason you need to replace your skewer is because the Saris skewer has the proper shape on the sides of it in order to secure your bike to the trainer when tightening down, just to make sure that the lever is on the non-drive side, so away from the gears and make sure it is fully secure before you continue on. I'm gonna loosen our resistance knob here so that we have enough space for our wheel. All right, that's pretty loose right there. And then we're gonna lift our rear hub up to our trainer. So notice how I have this out in the furthest position. You can adjust this to different notches. I just found for our specific one here, we're gonna need it in the furthest notch. So as we lift this up to that, we're gonna then turn our lever here and see how it secures up against our skewer. So turn it to a bolt action lever so then now we're in the secured position. Give your bike a good shake and notice how it's secured there. Final step is to adjust the resistance. Now for the Fluid 2, we do have a clicking knob. So what that means is once it gets up to the bike's wheel, and then once it feels enough tension, it then clicks and prevents over tightening. Put your leveling block underneath just to hold this all in place. And if you did get the climbing riser block, that's what you would use instead. And just like that, you're now ready to ride. Now if you're gonna be using the speed sensor though, we're gonna set that up. You first happen to decide if you're gonna be using as a cadence or a speed sensor. For most apps like Rouvy, you have to have a speed sensor and then you can add a cadence sensor afterwards, and that may be different depending on what type of app you use. If you want to use the speed sensor, you can put it on either the front or the rear hub. Obviously on a trainer, you're gonna want it on the rear hub. So I'll show you how to get it set up for both configurations. Here we have our speed sensor. We're gonna turn it over to where the battery goes in and we have the battery in place. One battery is included, make sure it's the plus side down and then we have this open side facing out. So if we we're going to set it to speed, I would have it lay horizontally like this. If I needed to set it to cadence, I'd have it seen vertically like this. We're going to do cadence first, so notice how this fits in and then make sure it clicks. Let's see, line that up and click. So we're gonna watch the lights change. So notice how it's flashing green right now, switching between the colors, but we're holding it vertically, so we're gonna wait for it to stay on green until we see a solid light like this. For the speed sensor, it's gonna stay on the white and hold that light there. In the cadence mode, we're going to secure our sensor around our non-drive crank arm, so that's gonna be the pedal away from your gears. For the speed sensor, if you are going out for a ride outside and you wanna attach this to your front hub, you can use the rubber spacer included and then pick whichever of the rubber loops. You do get three options fits best around your hub. I've found that there's usually more space up here, so it's a slightly easier process to get this attached, but pick whichever of the loops gives you the tightest and most secure fit. For our rear hub, we don't really have space for the rubber spacer. In fact, we barely have space for the sensor and I've found that while it can mount sort of vertically like this, it didn't really register the speed as well as if I secured it flat against the hub. I'm gonna jam this up against the spokes and then find the best fit for our rubber hoops and that's gonna be where it sits. You'll give your sensor a couple turns, at least two rotations, and then the light that showed which one it was, whether it was cadence or speed, will also turn on to indicate that it is active. You'll have that indicator light, but the true test of it is online is your app. So we're gonna be using Rouvy because our specific trainer here came with a free trial. We're gonna add our sensor. If I had cadence sensor, I'd connect to that and if I was using it in the speed sensor setting, since you only have one sensor with us, we're gonna connect to the classic trainer. So fortunately on this brand you can even select which type of trainer you have, select your wheel size, 28C, and then it's gonna search for the sensor. So here we see the Saris speed sensor, so we're gonna go ahead and connect to that. So we're currently doing this on an iPad. I found that when I was using it with my own phone, which is a pixel phone, I could not find the sensor no matter what. I know a lot of people have had great experience with using their own laptops or computers and then getting an ANT+ dongle for that, which will work kind of like your Bluetooth and would connect with your sensing. If you pedal and your app's avatar starts moving, then you know that everything is sensing properly. So we're gonna start pedaling here and you'll see the movement on your app. There is a slight delay sometimes, but once you start going you just go. All in all this whole kit is awesome for getting those rides in even if you're not able to ride outside, maybe it's wintertime, you're in a crowded area, you're just trying to get a quick ride in before work, using both the trainer and the sensor with the right device and the right app is awesome. Now, getting all of those factors to match up may be tricky and hopefully this video help guide you through that process. If you like the concept of the Fluid 2 because of that progressive resistance, but maybe you don't need the sensor or maybe you already have your own sensor, that's perfectly fine too. You can get each of these components separately here at etrailer, it just depends on what are you trying to get out of your rides. This is a look at the Saris Fluid 2 Fluid Resistance Trainer with the smart sensor, and you saw it at etrailer.com. My name is Evangeline and I hope you enjoy the journey.
Customer Reviews
Saris Fluid² Bike Trainer with Smart Speed Sensor - Fluid Resistance - SA9907T
Average Customer Rating: 3.9 out of 5 stars (7 Customer Reviews)
Designed for the advanced cyclist, this fluid trainer is perfect for frequent indoor rides. Resistance is based on pedal speed, resulting in a more realistic ride than a magnetic trainer can provide. Cadence sensor included for virtual training.by: Ben03/12/2023
I never did figure out how to attach my bike to it. There was not sufficient instruction. I will certainly try again. Then if it gets working I will update my review.

Ben
3/22/2023
Thanks for your response. There was no manual so I just looked up some [online] videos. My bike is a 26” Scatante. However, I took another attempt at it and now it is finally working.

Jenny N.
3/22/2023
Fantastic news! I did not want for you to not be able to use the bike trainer. I will send you a copy of the manual for it from the manufacturer.
by: Jacqui12/28/2020
This bike trainer is AMAZING! I think I actually might like it more than riding outside! I'm still able to get a great workout, and I don't have to worry about traffic. It's absolutely worth the money!
by: Jenny 11/18/2021
by: Gabby01/03/2016
Product arrived as described and was fairly easy to set-up. I did a test ride and it will work nicely as an alternative to getting out on the road during the bad weather. Looking forward to breaking it in this winter.
by: Brian11/18/2020
Well made, but requires a quick release hub. I'm using an older street bike and will have to buy a new wheel.
by: Haiching01/23/2016
I have riding this for a week and based on the short time experiences, I think the product works great, way better than the models that providing resistance based on the weight of the rider.
by: Steve 10/18/2021
by: Cecilia03/02/2021
8
8
See what our Experts say about this Saris Bike Trainer Stand
- How to Use Smart Speed Sensor Saris Fluid² Turbo Bike TrainerThe Smart Speed Sensor mounts to the rear hub or the crank arm. You can use the included sensor attached to your rear hub for speed. If you want to track cadence, you can attach it to your left crank arm The sensor connects via Bluetooth and can be used with Rouvy, Zwift and other indoor cycling apps. You can also connect it via ANT+ with the BLE USB PC adapter # SA7057T to connect it with your desktop or laptop. To see the speed or cadence, you'd have to use the corresponding app or program.
view full answer... - Does the Leveling Block Come with the Saris Fluid Bike TrainerIt sounds like you're referring to the Leveling Block for Saris Bike Trainers # SA9702T, which is not included with the Saris Fluid² Turbo Bike Trainer with Smart Speed Sensor # SA9907T but is available as an add on purchase since it is not a required part. The Leveling Block # SA9702T is a great addition to keep your bike level and firmly in place during your training sessions and is compatible with any bike trainer.
view full answer...
Do you have a question about this Bike Trainer Stand?
Info for this part was:

Installed by:
Kathleen M

Installed by:
Evangeline M

Video Edited:
Chris R

Updated by:
Wilson B

Written by:
Matthew S

Edited by:
Daron K

Video by:
Ethan H
At etrailer.com we provide the best information available about the products we sell. We take the quality of our information seriously so that you can get the right part the first time. Let us know if anything is missing or if you have any questions.
Product Experts Available Now!
Call 1-800-940-8924
Jenny N.
3/15/2023
Lets see what I can do to help get you rolling. Can you tell me the type of bike that you have? What size tires on are on the bike? What size axle skewer do you have. Also, if you want which step in the manual is holding you up?