
Hopkins Custom Tail Light Wiring Kit for Towed Vehicles
(12 reviews)
Price: $79.99
Hopkins Custom Tail Light Wiring Kit for Towed Vehicles
Item # HM39VR
Retail:$102.09
Our Price: $79.99
You Save: 22%
Will this fit?
To see if this custom-fit item will work for you please tell us what vehicle you'll use it with.


- All Info
- Reviews (12)
- Q & A (0)
- Videos (2)
- Photos
Hopkins Tow Bar Wiring - HM39VR
- Wiring Harness
- Plugs into Vehicle Wiring
- Tail Light Mount
- Custom
- Hopkins
Wire your vehicle and get the signal lights required for flat towing without having to splice into your wiring with this custom, plug-in harness. Integrated diodes prevent feedback from RV for safe operation.
Features:
- Lets you wire your vehicle to accept your RV's tail, brake, and turn signal lights for flat towing
- Provides 4-way flat plug at front of towed car to connect to motor home
- Plugs in quickly and easily - no cutting or splicing of wires
- Connection points are located behind your vehicle's tail lights
- Prevents electrical feedback to safeguard towed car's electrical system
- Weatherproof box keeps built-in diodes protected
- Won't interfere with electrical system when towed car is not hooked up to RV
- Custom designed for your vehicle
- Includes wiring harness, mounting bracket, and installation hardware
- Extension loop for connecting towed car to RV is sold separately
- Brake light relay (RM-88400 - sold separately) may be required if used with supplemental braking system
- 90-Day warranty
Wiring Your Towed Car with Hopkins
Wiring your car for flat towing has never been easier. No more testing wires or splicing into your electrical system. No need to painstakingly position multiple diodes beneath your vehicle. No worries about voiding your warranty. With this custom-fit towed vehicle wiring kit from Hopkins, all you have to do is plug the harness into your vehicle's existing wiring, which is located behind your car's tail light assemblies. No cutting, tapping, or splicing is required.
After plugging in the wiring harness, use the included bracket to mount the 4-way flat connector at the front of your towed car. An extension loop (sold separately) is required to connect your towed car to your RV.
Do You Need a Brake Light Relay?
Because your vehicle has a combined lighting system - wherein the brake signals and the turn signals are carried on a single wire - a brake light relay (RM-88400 - sold separately) may be required if you use a supplemental braking system with your towing setup. A supplemental braking system depresses the brake pedal in your towed car every time you apply the brakes in your RV. So, if your towed car's brake lights illuminate when the brake pedal is pressed and the engine is off - as is the case when towing - then you need to install a relay to ensure that the lights on your towed car always act in accordance with the signals sent by your RV via the wiring harness. Without a relay, the brake signal from your towed car will override the turn signal sent by your RV when you slow down to make turns, creating a potential hazard.
56210 Hopkins Plug-In Simple Dinghy Towing Harness
Installation Details
This Product Fits The Following Vehicles
- 2020 - 2025 Jeep Gladiator
- 2018 - 2018 Jeep JL Wrangler
- 2018 - 2018 Jeep JL Wrangler Unlimited
- 2019 - 2025 Jeep Wrangler
- 2021 - 2025 Jeep Wrangler 4xe
- 2019 - 2025 Jeep Wrangler Unlimited


Video of Hopkins Custom Tail Light Wiring Kit for Towed Vehicles


Videos are provided as a guide only. Refer to manufacturer installation instructions and specs for complete information.


Video Transcript for Hopkins Tail Light Wiring Kit Installation - 2021 Jeep Gladiator
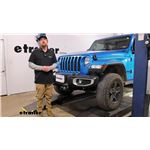
Hey everyone, Ryan here at Etrailer, today on our 2021 Jeep Gladiator, we're gonna be taking a look at and showing you how to install the Hopkins custom fit vehicle wiring kit for towed vehicles. Before we jump right in, I figured it'd be useful just to address one of the main questions a lot of people wonder when it comes to setting up a flat tow. And that's, what parts am I gonna need There's gonna be a total of five main components, and usually we like to be hooked up to the motor home and really give you a good visual of what's going on. We got some really bad weather today, so, kinda stuck inside, but, that in mind, you're gonna have your base plate. And that's going to give us an attachment point, that way we can hook our tow bar up to it. So a tow bar, connect the front of your Jeep to the back of your motor home.
Third main part'll be safety cables, and these are just gonna connect to the Jeep, to the back of your motor home's hitch. And in the event of an unlikely disconnect, we're gonna keep everything paired together. The fourth main part will be tow bar wiring. Again, connect to the back of the motor home and to the front of your Jeep, and that's gonna transfer the lighting functions. That way you're safe and legal.
And last but not least, the fifth main part will be a supplemental braking system. And what that'll do is hit the brakes in your Jeep whenever you hit the brakes in your RV, helping to bring you to a more complete and predictable stop. To effectively demonstrate how a kit is gonna work, I'm hooked up to a test box here, which is simulating a motor home, so, whatever signal that we turn on here, it should get sent to the back of our Jeep. I turned our left blinker on, and it's getting sent to the back of our Jeep. Sam's gonna hold true for the right turn.
The taillights as well as the brake lights. There are a lot of kits available for the Gladiator, and they're all gonna work pretty good. You're gonna have the types of kits that you actually splice diodes into it, like the Roadmaster, the Roadmaster smart diodes, you have a Blue Ox kit. And all those are really reliable, we do a ton of 'em, nothing wrong with them, but with the Hopkins, what kinda separates it is the fact that it's plug and play. So, big difference with this is it's definitely going to simplify the installation process.
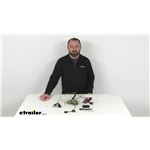
I pulled our taillight out to show you how this kit is going to work, and it just uses T connectors. So you unplug the harness from your taillight, and the new harness plugs right into it, and so it really makes things simple when it comes to setting everything up, as opposed to, you know, taking the diodes, the diode-style kits, with those you have to actually splice into your factory wiring and plug 'em in. Which, like I said, work really well, and are pretty reliable, but it is a little bit of extra work, as far as that goes. And for those of you that might be wondering too, I know this is something that came to my mind. If you end up setting up your Jeep to pull a trailer around, whenever you're not flat towing and you need trailer wiring, a lot of the wiring kits are going to kinda work the same way, you know, they're just gonna tee in to the taillight wiring harness. And if that's something you plan on doing, those kits are going to work in conjunction with the wiring kit that we have here, you'd simply just kinda double it up, you know, you don't plug the trailer wiring in, and tee that in as well, so you can have both functioning properly, so, you know, it'd be set up correctly whenever you're flat towing, and then if you're pulling a trailer around with your Jeep, that trailer wiring will work as well. Something I wanna mention, the kit is going to have a four-way flat style end on it, similar to this here. And that part will be here at the front of the Jeep, and allow you to actually plug in to the back of your coach. With that said, you are gonna need that jumper wire, so there's a piece with two ends like this on it that would plug into the front, and then you can plug into the back of your motor home, so you can always grab that separately, but, with that in mind, it's a really popular upgrade and super common, and almost necessary in most cases to cut that four-way end off and upgrade to a six-way round style connector like we did here. And a big reason for that, is it's just a lot more common, you have a lot more options, in terms of what types of umbilical cables that you can use, a lotta the late model coaches are gonna have a seven-way style connector, electrical connector on the back of 'em. And, you know, it's just a lot more compatible with a lotta the different types of motor homes over the road, not to mention as well, sometimes you might have to do this, so for example, if you're wanting to use a battery charge line kit, that way you can trickle charge your Jeep's battery whenever you're flat's on it down the road. Those charge lines get hooked up to these six-ways. So, if you had that original four-way flat there, you wanna be able to use it. There's a ton of these available. We're using the Roadmaster one here today. But they're all gonna work out pretty much the same. Other than that, at the end of the day, you know, there's quite a few different diode wiring kits out there available for the Gladiator, and having experience with pretty much all of 'em, you know, they're all gonna work out well, keep your Jeep protected, and keep you safe and legal. As far as the installation goes, this one being plug and play, definitely a little more simple. It is time-consuming, though, just having to route wiring from the back of the Jeep all the way up here to the front, but, take your time, stay focused, and you should be in pretty good shape. That in mind, though, why don't we go ahead and get started on it now To start, the first thing that we're gonna need to do is remove our taillights, so ahead and drop the tailgate, and you're gonna have two eight-millimeter head screws. Go ahead and pull those out. Then what you wanna do is grab a taillight, pull it straight back towards you. And that will release it. And we'll go ahead and unplug it, it's kinda buried up here. So here's the connector, you're gonna have this red tab. Push back on that and then down on the center. And that'll release it. Go ahead and set our light off to the side. Do the same exact thing to get the passenger side when removed. We'll grab our wiring connector now, our new harness. And decide with the real short wiring here, it has yellow, blue, red, and brown. We're gonna take this, over on the driver's side, just run it from the bottom up into the taillight pocket. And then these are going to match up with our factory connectors. One of the T connectors is gonna line up with our factory connector there. You really can't mess this up, it only plugs in one way. We'll lock that down, and then, for this box here, I'm gonna go ahead and get this secured, and I'll show you what I came up with. Here's where I secured our box. We just had a bundle of factory wiring that ran straight down here, And it was pretty secured, actually, to the body of our vehicle, and so I just used a zip tie, ran it around the box, and zip tied it around that bundle of factory wiring. What we're able to do now, we can take our taillight connector, plug that in to the other end, lock the tab down, and simply just reinstall this the opposite way that we removed it. Underneath of our Jeep now. So this is the driver's side back corner, where we took that connector and pushed it up into the taillight pocket. This is where we went through. And so, for the rest of the wiring you need to route it. You'll have your other T connector, and this green, yellow, and brown wire, they go this way. The green, yellow, and brown wire, and it just comes up and over, and that'll get routed towards the front eventually. But the other one, the T connector, I pushed through the tube here in our trailer hitch. And just pushed it completely through it, over to the passenger side. This is where it comes out here. And just zip tie it up every now and again. And I took that T-connector, simply just pushed it right up into the passenger side taillight pocket. Over here on the passenger side, you know, our wire. I pushed it right up into the taillight pocket. And just like we done on the driver's side, plugged it right on in, same way, kinda zip tied up our loose wiring, the extra wiring. And that's really all there is shoot over here, so we'll go ahead and get our taillight reinstalled. Back underneath of our Jeep, over on the driver's side. We can get the yellow, green, and brown wire routed up towards the front. And whenever you're routing wiring, you always wanna do your best to avoid any hot or moving parts, so keep that in mind. But I took our wire and ran it kinda up along through here. Kinda tricky to see, but there's a factory piece of wire that runs along the frame that I just followed. It's a little difficult to see, but, it comes up through here up and over our spring. And way up through here, where it continues along this way. Here's a better look at the wiring, where I have it routed, along through here. And with a lot of our exhaust being right here, I decided to take the wire, push it over the top of our frame, where it's gonna run along the outside of the frame rail. So actually, you can see the wire pretty decent from the outside. But this is where it's going. And this is where I kinda ran it up and over the frame. Where it just follows along through here. And you just use your zip ties every now and again to keep it secure. And once it got to this point. The wire. Essentially it's pretty wide open, the wire, I kinda just jammed it up in the engine compartment, was able to go from up top, grab it, and pull it into place. Here's where a wire came up into the engine compartment. And if you're doing a supplemental braking system, which requires a tap in to this wiring, give yourself a little bit of working room here, that's what this big loop's for. I'm doing the Stay-IN-Play, made by Demco, just to give you an example, but, anyway, the wire just continues along, and drops down. And so that wire, you can actually see a little piece of it, in through here. But, you're just gonna route it down to the front where your mounting bracket is located, which ours happens to be right here. And we can start to get this hooked up. So at this point, now there's a couple things you could do, you could mount this up. And then this white wire coming outta the back, this is a ground. So you could take the self-tapping screw that they give ya and ground this to the frame somewhere. That's if you wanted to utilize the four-way style connector, which, in the majority of cases, people aren't gonna use this setup, most people are going to upgrade, which is what I would recommend too, to a six-way round, they're just a lot more versatile. You can use a battery charge line kit with this style connector and some other things, so, that's what we're gonna be doing. So, we'll just get rid of our four-way here. I'm just gonna cut that off. I'm gonna cut as much as I can off of the white wire. Because we might be able to use this for a ground, since this already has the ring terminal attached and everything. We'll find out in a minute. We're gonna take these three wires, and strip the insulation back. Give that wire a twist. And I'm just gonna do same thing to these other ends. We'll take the rubber dust cover now, and slide that over the bare end of the wires. And, we are gonna be able to use the white wire for ground here, so I cut it, you know, about in half, strip that in back too. So I'll feed that, through there as well. And then we can grab our connector and make our connections here, so, these are going to be labeled. Kinda tricky to see. But this is TM for taillight, so the brown wire goes there. We have GD for ground, so the white wire plugs into that. This one is LT for left turn. So the yellow wire goes there. And then RT for right turn. So the green wire plugs into that. So what we'll do, how this works, you have these little set screws. You can back these out almost all the way. So I have the TM, the taillight. Push our brown wire into the socket. Now you're holding it down in there, you can tighten up that set screw. Snug it up, and I'm just going to work my way around, until we get all of 'em plugged in. You got all of 'em hooked up, and here's how the back of the connector plug looks. And for the time being, I'm just gonna take the dust cover, put that over it. Once I verify everything works, I'll come back and apply silicone to all the terminals to keep it sealed up and prevent corrosion. And you know, then you can come back too and put this over and tape it up, but, I like to do that at the very end, make sure it works first, that way if there's an issue, we have to get back in here, you don't have a huge mess to deal with, so, just take this and loosely mount this up, for the time being. We have our white wire, and this is gonna have to get grounded, I'm just gonna go right to the bottom of our bumper beam. Got this self-tapping screw. What I like to do with this style of ring terminal, is actually start to drill the hole first. And then. I actually secure this. Now it's a good idea to test the wiring to make sure that it's working properly, so you can plug in your motor home when you're doing this, but, keep in mind, if your motor home has any issues, it might mislead ya into thinking it's something you did on the Jeep side, so, that's why I'm using this test box here, kt simulates the motor home, I know it works 100%. And I plugged our cable and it into the front of our Jeep, and we can run through all of our lighting functions. We'll turn on our taillights. We can try out our left turn signal. Our right turn signal. And our brake lights. Since we verified it works, I sealed everything up like we talked about earlier. And with that done, that'll finish up our look at and our installation of the Hopkins custom fit vehicle wiring, on our 2021 Jeep Gladiator.
Customer Satisfaction Score:
99% were satisfied with this product
1% of customers were not satisfied
- Defective
Customer Reviews
Hopkins Custom Tail Light Wiring Kit for Towed Vehicles - HM39VR
Average Customer Rating: 4.5 out of 5 stars (12 Customer Reviews)
Wire your vehicle and get the signal lights required for flat towing without having to splice into your wiring with this custom, plug-in harness. Integrated diodes prevent feedback from RV for safe operation.by: Jim 04/01/2024
Took a bit longer than expected
by: Robert 03/15/2024
quick, on time delvery.
by: Joann 04/15/2024
by: Walter 02/11/2024
by: Dan04/01/2024
by: Mark 03/20/2024
by: Patrick 03/24/2024
by: Richard 03/08/2024
2021 Jeep Wrangler Unlimited
by: Russ 02/21/2024
by: Andy02/26/2024
by: Edward 03/21/2024
by: Ricky 02/21/2024
12
12
See what our Experts say about this Hopkins Tow Bar Wiring
- Recommended Plug and Play Flat Towing Wiring Harness for a 2020 Jeep WranglerYes, we do! It is the Hopkins Custom Tail Light Wiring Kit item # HM39VR. This will give you a plug and play set up to control your 2020 Jeep Wrangler's lights with your RV.
view full answer... - Can You Use The Blue Ox Tow Bar Wiring Kit On A 2021 Jeep Wrangler UlimitedFor your 2021 Jeep Wrangler Unlimited, you can use either the Hopkins Custom Tail Light Wiring Kit for Towed Vehicles # HM39VR you mentioned, rather than the Roadmaster Wiring Kit with Smart Diodes # RM47ZR. If you choose not to use # RM47ZR and you use # BLU79FR you will not need any additional wiring as this is a plugs into your vehicle's harness. If you choose to use # RM47ZR, then you may need the Roadmaster Brake-Lite Relay Kit # RM-88400 if you use this kit with a supplemental braking...
view full answer... - Recommended Custom Tow Bar Wiring Kit for a 2021 Jeep Wrangler Unlimited Hey Patrick, so I took a peek and what we have for you and I was able to find the Hopkins Custom Tail Light Wiring Kit for Towed Vehicles # HM39VR which is a custom fitting harness that plugs into your existing wiring without splicing. As far as the Roadmaster Stop Light Switch Kit # RM-751490 goes, you are going to need that with your Roadmaster Even Brake Portable Flat Tow Brake System # RM-9400 to complete install. You're also going to need the 12 Volt Outlet Kit, 20 amps # RM-9332.
view full answer...
Do you have a question about this Tow Bar Wiring?
Info for this part was:

Edited by:
Lindsey S

Video Edited:
Joshua S

Test Fit:
Ryan G

Installed by:
Andy C

Written by:
Amanda K
At etrailer.com we provide the best information available about the products we sell. We take the quality of our information seriously so that you can get the right part the first time. Let us know if anything is missing or if you have any questions.
Product Experts Available Now!
Call 1-800-940-8924
Thank you! Your comment has been submitted successfully. You should be able to view your question/comment here within a few days.
Error submitting comment. Please try again momentarily.