
Bestop Supertop NX Soft Top for Jeep - Tinted Windows - Sailcloth - Black Denim
(3 reviews)
Price: $1,099.99
Bestop Supertop NX Soft Top for Jeep - Tinted Windows - Sailcloth - Black Denim
Item # B5460115
Retail:$1,209.99
Our Price: $1,099.99
You Save: $110.00
Will this fit?
To see if this custom-fit item will work for you please tell us what vehicle you'll use it with.


- All Info
- Reviews (3)
- Q & A (0)
- Videos (1)
- Photos
Bestop Jeep Tops - B5460115
- Soft Top
- Tinted Zip-Out Windows
- Complete Soft Top System
- Black
- Bestop
- Includes Bow System
- No Sunroof
- No Doors
- 28 oz
A new twist on an old classic, the Supertop NX is a complete replacement soft top for your vehicle. It comes with OEM-style hardware for easy installation and is made of premium sailcloth that minimizes road noise.
Features:
- Complete, OEM-style replacement soft top and hardware for your vehicle
- Includes fabric top, bow hardware, BeltRail channels, windshield channel, door surrounds and tailgate bar
- High-grade, 3-ply sailcloth construction
- Reduces road noise by 50 percent when compared with vinyl or denim soft tops
- Resists mildew and harsh UV rays
- OEM-style hardware and BeltRail attachment system
- Offer simpler design and easier installation when compared with original Supertop
- OEM-style, metal-stamped, driver's- and passenger's-side door surrounds
- Provide strong attachment points for top
- Create excellent door seals to shield you from the elements
- DOT-compliant, tinted side and rear vinyl windows included
- Zip out in seconds so that you can enjoy open-air driving
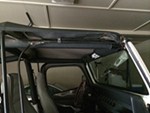
- Convenient storage with no need to completely remove the top - folds compactly to fit behind rear seat
- Handy tailgate bar lets you open your tailgate without opening the rear window, providing trouble-free access to your cargo area
- Versatile top works with factory lower hard half steel doors and Bestop door kits B51785 and B51782 (sold separately)
Specs:
- Color: black denim
- 2-Year limited warranty
The Bestop Supertop NX marks a new generation of fabric soft top for your vehicle. This soft top comes complete with all hardware necessary for installation, including Bestop's patented BeltRail attachment system. So all you need is the Jeep, and Bestop provides the rest.

The Supertop NX is constructed of premium, 3-ply sailcloth. Compared with vinyl and denim soft tops, this heavy-duty fabric reduces road noise by 50 percent, giving you a much quieter ride. The sailcloth maintains its shape in all temperatures, resists mildew, and is treated with UV inhibitors to prevent sun damage.
The inclusion of OEM-style hardware and the BeltRail attachment system really sets the Supertop NX apart from the competition - and even from earlier versions of the Supertop. The hardware is made of high-strength steel and composite plastic for durability, and its simplified design makes this top much easier to install.


The driver's- and passenger's-side, OEM-style door surrounds install in seconds and include BeltRail channels that provide strong attachment points for your top. The door surrounds create an excellent seal against the elements.
For even more open-air exhilaration, the Supertop NX features zip-out side and rear windows. The tinted, DOT-compliant vinyl windows also insulate the interior of your Jeep from the sun on those really hot days.

The Supertop NX includes a handy tailgate bar that lets you get to the rear cargo area of your Jeep without opening the rear window.

For complete open-air driving, the Supertop NX folds down to conveniently store behind the rear seats of your Jeep. This allows you the freedom to enjoy the sunshine without the burden of completely removing and then reinstalling the top.
54601-15 Bestop Super Top NX Jeep Soft Top with Sailcloth and Tinted Windows - Black Denim
This Product Fits The Following Vehicles
- 1988 - 1995 Jeep Wrangler
- 1988 - 1995 Jeep YJ
California residents: click here


Video of Bestop Supertop NX Soft Top for Jeep - Tinted Windows - Sailcloth - Black Denim


Videos are provided as a guide only. Refer to manufacturer installation instructions and specs for complete information.

Video Transcript for Bestop Supertop NX Soft Top Review
Today we'll be taking a look at and installing the Best Top super top NX soft top, sun roof, and tinted windows for Jeeps. Part number B5472335. Also available in the color khaki diamond, part number B5472336. The super top NX is a complete replacement top for your Jeep Wrangler unlimited. It comes with all the in style hardware for easy installation. The top itself is made of premium seal cloth that minimizes road noise. The three ply seal cloth features a vinyl layer for weather protection, a rubber layer to reduce wind noise, and a cotton layer for reinforcement and stabilization.
It even has a built in sun roof. The seal cloth construction reduces road noise by 50% when compared to vinyl or denim tops. The cloth will also reduce mildew and harsh UV rays. The tinted rear and side windows are DOT compliant, and they zip out in seconds. That way you can enjoy an open air drive. There's no need to remove your top for the full Jeep experience.
It simply just folds down behind your rear seat. Now we can enjoy that open air drive. With our top down, you can get a clearer view of our arched supports. These are going to help keep tension on our top as well as prevent water from puddling on top. They are completely removable.
Simply pick up on the middle and they pop right out. But you can leave them on in case the weather turns and you need to put your top up in a hurry. Now to put our top back in place, we could do it by ourselves, but it's easier to have a second set of hands. So you get one person on this side and another on the other side. We'll set it up top. Then we'll clip it in just like that on both sides.
Now we can fold it over. Then the only thing left to do is to secure our latches up front and then put our windows in. The tailgate bar allows us to gain access to our cargo area without having to undo the rear window. It features a thick rubber seal to protect us from the elements. This versatile top is going to work with all Best Top door kits. Here in the inside you can see that our frame is made from a high strength steel for durability. Now that we've gone over the features, I'll go ahead and show you how to get it installed. I've already removed the top from our Jeep here today, and it's important that we've made sure that the temperature is going to be at least 72 degrees. Working in that temperature is going to help the top . Make it easier to install and keep it flexible. Okay, so the first thing we need to do is we'll grab one of our rear door rails. I've got my passenger side here. It's going to come like this. We'll need to open it up. Then we're going to grab one of our guide bracket rails. And what we want to do, is we want to install it right here in this position. You'll need to make sure that you have the correct guide bracket to go with the corresponding rail. So we'll set it like that. Then we'll take our hardware. We're going to drive up through the bottom. Followed by our lock nut. Do the same thing on that side. Once we've got those in place, let's go ahead and tighten them down. So I'm going to take my wrench here today, I'm going to hold it in position up top. Then I'll take my Phillips screwdriver and tighten from the bottom here. Once we get that one tight, we tighten our other one down. All right, now with that one secure and nice and tight, let's go and repeat that same process with our other rail. Next we'll grab our driver's side door rail with the guide bracket installed, and we're going to put it in place. So let's open up the rear door here. And keep in mind everything we do, we're going to repeat on the other side. Then we'll take our door rail, we're going to set it in this hole here. So we're going to line that up, essentially. Once that's seated, then we'll come up top. We'll want to make sure to guide our door rail into this weather seal here. So we want this to slide in like that until that seats. And then we're going to line up our holes right here. You may have to move the roll bar padding out of the way. We just want to line those holes up then we'll take our longer knob and we're going to thread that through, and we're going to tighten that down. No reason to over tighten, once you've get it plenty tight, it'll be all set. Next we'll grab our front door rail. You'll need to make sure that you have the correct side, so this is what our driver's side is going to look like. And we'll want to set this portion down into the weather stripping here. So we'll guide that down. And then we're going to push the front clamp around the roll bar front, making sure the front portion of the weather stripping lines up here. Once you have that seated, we're going to take our shorter knob as you see here and we're going to line up our holes right here and screw that down. You may have to work around it a little bit to make sure you have it lined up but it's going to go through our other door rail, our rear door rail rather, and into the mount that's on our Jeep here. Okay, looks like I've got that started, so we can go ahead and tighten that down. And as you can see, as it tightens it's going to line everything up. Then up front here, we'll grab our longer knob, line the holes up with the roll bar here, make sure everything's seated, and then we can thread that through. All right, then we've got that. Now we can grab our rear arch and the way to know it's the rear is it will say right here. It doesn't matter which way you go. We're going to clip it in right here. Okay, and once you have one side clipped in and where it needs to be, you may need to bow it a little bit just to clip it in. All right, now with that it place, let's go ahead and remove the protective cover. Now we can repeat that same process with our front arch. Now with our front and rear arches installed, let's go ahead and grab both of our inaudible 00:06:57 brackets. So you want to make sure that you have the left and right bracket correctly on the Jeep here. We've got the left one here. That's going to go with our driver's side. We want to come over here and undo our hook and loop. So once we bring that around, it will reveal two holes and those are the ones we're going to use. So we're going to want our bracket to look like this. So we'll just kind of work around our roll bar padding here and get that lined up. Then we'll take our hardware and we can drive that through. Get that hand tightened, then we'll set the other one, and then we can tighten them down. All right, once we get that tightened down, we can kind of replace our hook and loop around it there. Okay next, we can grab our tailgate bar mount and snap it in place. So you want it facing this direction and you want to also make sure that you have the left and right side, or the correct side, rather. So we've got the left side here for the driver's side. We're going to clip it underneath like that, and with a little bit of pressure, put it in place. Now let's turn our attention to the fabric top. As you can see, I've got it laid out nicely like this. Let's grab one of our bows. This is going to be the left one, which would be the driver's side. We're going to slide it right through here with the holes facing up. Now the idea is to line it up with the other holes and our header channel here. And once we've got those lined up, we take our provided hardware, and tighten that down. All right, now let's repeat that same process for the other side. Now that we've got our two screws on the bottom side of our header channel, we're going to go ahead and flip it over. What you want to do is remove your tab that holds the top in place, turn it over, and then we're going to finish up by putting the two screws on top here. Last one here, and then we're just going to repeat the same step on the other side. Now with both sides being done, we can go ahead and turn that back over, put our tab back in place, which holds our top to our header channel. Screw that down, and then we've got it. Next we'll take the upper rear portion of our bow assembly, and that's going to look like this. What we want to do is we want to snap this on each side in place right here. I'll do this side first so you can see it. These are the brackets that we installed earlier. So I'm just going to lay it up on the roll bar like this. And what we want to do is pull up on this knob, flip it onto our bracket, and then let it go back in, and then that's secure. And then we'll do the same thing over here. Now let's take the lower rear portion of our bow, and we're going to clip it into this bottom hole here the same exact way. Now we'll go ahead and install our stay straps, and it's going to go like this. We've already got our passenger one installed, as you can see there, so let's go ahead and place this one up top and get the screws started. We're going to go off of these two top poles here. So we'll take this portion of our strap with two holes, line it up, and start that in. Now you can use a Phillips screwdriver if you'd like, but we're going to use a low torque drill and it's going to make it easier with these self tappers here. We'll get this one started and then we'll do the other one. Then we'll grab our strap and we're going to bring it over this curved edge here of the lower rear bar. We're going to line it up with the three holes right here. Next let's go ahead and set our Jeep top in place and then we'll pull it over the windshield. Next with our top draped over the front of our Jeep, let's go ahead and grab our sun roof assembly and put it into position, which is going to be right about here. So we've set our sun roof assembly in place. We've already got the passenger side installed. Let me go ahead and show you how to install the driver's side here. This is the hardware that we'll need. The short screw, the lock nut, and the two bushings. So what we'll want to do . We'll raise the sun roof portion up here. We're going to put the bushings on either side here, and you'll have to hold them in place because they will fall out. So you want to set the other hardware aside for now. Then next we want to go ahead and push this down into that little slot down there and then run the screw through. It may take a little bit of work and maybe a couple of times. If one of the bushings falls out, it won't be a big deal. It's going to catch right down here and you'll be able to get it right back out. So you want to work it down through. You may need to raise up the sun roof assembly to get it lined up with the holes. Then I'm going to raise it up slightly with the holes lined up, put the screw through, follow it up with a lock nut on the other side, get that hand tightened and then we can tighten it down altogether. You don't want to over tighten. You don't want to damage the bushings, so you just tighten it to where it can still move. All right, that seems pretty good. Now we can go ahead and do the rear here. Now for this one, we're going to attach the rear portion of our sun roof, so we're going to use two bushings, a lock nut, and then the longer screw. Then we're going to come through this hole right here, so it's going to go through the sun roof assembly and through the bushings and then we'll follow up with a lock nut, just like that. Now we can tighten that down. Now same thing here, you don't want to over tighten because you may crack the bushings if you're not careful. Now with our sun roof assembly in place, we want to guide the whole assembly into our cable guide bracket here. You can see the bracket here, and we will lower this in place. And the idea is to snap it in place just like that. Now we'll take our rear bows, and we're going to meet them up with our assembly right here. So we're going to raise it up, guide it in place, and then we'll take our provided hardware, screw it in from the inside out. Get that hand tight and then we'll take our wrench and tighten it down. Once we've got that tightened down, we'll attach the other side the exact same way. Now we can take the fabric and drape it over the top. Now let's go ahead and fold back the front portion of the top. So we'll take our foam seal and we want to make sure that we have the correct side here. It's going to be notched up here and come down over the bar right here. With that being said, let's go ahead and peel it back and put that in place on our header channel. So then we're going to take our other foam seal and put it right here, just like that. And then we're going to do the same thing on the other side. Now we'll attach our cable spring to our bow corner plate on both sides of the Jeep. Then we can fold our top back down. Now here at the rear of the top, we want to bring our fabric flaps around this rear bar here. I've already got three of them done as you can see here. So we'll bring it around and we're going to drive the screw right through there. Here at the middle of our top, we're going to take the elongated strap as you see here and we're going to attach it to this last hole here. We've already got the other three done as well. Now we're at the front portion of our top here, and we need to attach this flap to our bar here. We've already got the other ones done, so we just need to do this one and then this last one here. What we want to do is bring it down and attach it just like that. Now we can attach our driver and passenger side latches here. What we want to do is we come up to the latch, we want to raise it up, bring the hook down, and you're going to want to pull down on the top a little bit just to hook that in place. Just like that. Then we'll repeat that same process on this side. Now with both latches in place, we can go ahead and close them up. You may need to bring out the visor a little bit, that way the latch can get around it. And there we go. With our latches in place, let's go ahead and grab our rear window and we'll zip it in place. So we've got the two zippers over here. We're going to fold our top open like this to reveal the zipper. Then we're going to take the top portion of the zipper and zip it up. And we'll zip that up working our way around. It's always good to hold up the window as you're leaning it. Then we'll take our tailgate bar, and it's going to sit like this in the rear of our Jeep. So we're going to slide it on to our rear window. We'll need to bring it out and it's going to slide on this channel right here. Then we'll go ahead and clip the tailgate bar into the tailgate brackets. You'll need to pull down just a little bit that way you can get it around, and you'll need to do both at the same time. With that it place, we'll go ahead and push our tab in place underneath the body on both sides. Then we'll work our way around the corner, tucking the tab underneath the body. So now we can go ahead and grab one of our side windows and we'll need to make sure the channel corresponds with the channel on our door here. So it's going to slide in place, but we're going to start with the zipper first. So we'll bend over the top flab. It's going to be up top here. We're going to slide that in place. Once we've gotten all the way to the rear, we're going to start zipping up inaudible 00:18:22. We'll work our way around. Zip it all the way. Next we'll tuck our channel into our door right here. Now once we've got that channel in place, we can go ahead and secure the top and the bottom. So we'll start here at the top. We're going to connect our hook and loop, tucking it underneath the top portion of our top just like that. Then we'll come down here. We'll push the tab underneath the body just like we did before. Working our way around. Then we can connect our hook and loop on the side here. One more window and we've got it. Now we'll take it on a test drive and as you can see, it looks great while we're going down the road. That's going to complete our look at the Best Top super top NX soft top, sun roof, and tinted windows for Jeeps. Part number B5472335. .
Customer Reviews
Bestop Supertop NX Soft Top for Jeep - Tinted Windows - Sailcloth - Black Denim - B5460115
Average Customer Rating: 4.3 out of 5 stars (3 Customer Reviews)
A new twist on an old classic, the Supertop NX is a complete replacement soft top for your vehicle. It comes with OEM-style hardware for easy installation and is made of premium sailcloth that minimizes road noise.by: Andrew 05/01/2021
The top worked out very well. Fit nice and tight and no flapping. Looks great as well.
by: Pat M06/14/2015
The product came as expected. I found the directions very easy to use, and had plenty of pictures.
by: Patricia 02/22/2021
3
3
See what our Experts say about this Bestop Jeep Tops
- Bestop SuperTop NX and Door Slider Recommendation for a 1992 Jeep Wrangler YJBoth the two products you referenced # B5178615 and # B5460115 will fit your 1992 Jeep Wrangler and are compatible with each other. The windows of the # B5460115 are tinted, but the part # B5178615 does not have any tint.
view full answer... - Replacement Soft Top Recommendation for a 1992 Jeep WranglerBecause you don't know what system you have, I recommend the complete replacement. This will give you the top with the bow system so you will have a correct fit for your 2002 Wrangler. I recommend the Bestop brand that makes the factory Jeep tops. For your Wrangler, I recommend part # B5460115 for black or # B5460137 for tan/spice if you have the factory half doors. Then for the doors you will need # B5178201 for black and # B5178237 for tan/spice. You may want the storage jacket #...
view full answer...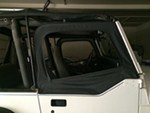
Do you have a question about this Jeep Top?
Info for this part was:

Written by:
Tyler C

Video Edited:
Jacob T

Updated by:
Matthew S

Updated by:
Ronnie R
At etrailer.com we provide the best information available about the products we sell. We take the quality of our information seriously so that you can get the right part the first time. Let us know if anything is missing or if you have any questions.
Product Experts Available Now!
Call 1-800-940-8924
Thank you! Your comment has been submitted successfully. You should be able to view your question/comment here within a few days.
Error submitting comment. Please try again momentarily.