bing tracking image

Replacing RV Awning Fabric: Your Step-By-Step DIY Guide

You've known this time would come. It was hard to imagine in the beginning, before your RV awning cracked and faded beneath the summer sun, before one too many gusts of wind took their toll. You know it's time to replace your awning fabric, but still, the prospect of a DIY awning fabric installation is intimidating.Here at etrailer, however, we believe in the indomitable spirit of RV DIYers and know that most just need a little assurance and a place to start. That's why we created this guide to DIY awning replacement and installation. Get started below.
Shop RV awnings or use our guide below to learn to:
  • Measure for and Select a New Awning
  • Remove the Awning from the RV
  • Remove the Old Fabric
  • Install the New Fabric
  • Replace the Awning on the RV
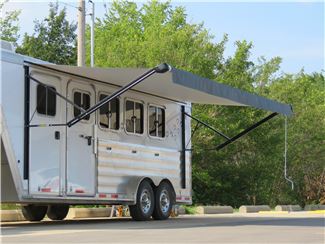
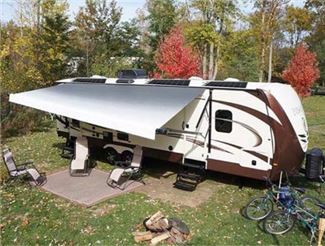
Trailer with Awning

How to Replace RV Awning Fabric

Watch one of our quick video demonstrations on replacing RV awning fabric, or go step by step through our guide below.NOTE: We recommend temporarily removing the awning from the RV to make the replacement easier, especially if you've never done it before. Some DIYers, however, prefer to replace the fabric without removing the awning from the RV. In this case, you and your helpers will need ladders (unless your awning lowers enough for you to reach it from the ground). If you go this route, you can skip the instructions below that concern removing the awning from the RV.
Replacement Awning Fabric Installation (video demonstration #2).

Step 1: Choose a Fabric Replacement

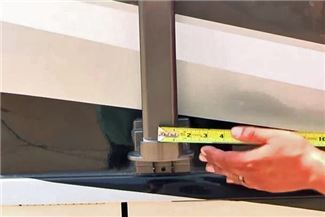
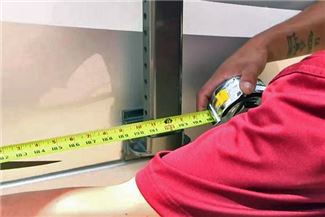
Measure for the correct awning replacement fabric. To do so, measure from the center of one arm to the center of the other. This is the fabric size you need to order. Do not measure the fabric itself.Next, choose your new awning fabric. Most RV awnings are made of either acrylic or vinyl material. A variety of colors are available for both fabric types.AcrylicPros: Acrylic is a breathable woven fabric and is typically preferred by RVers because it allows the air beneath the awning to remain cool. Acrylic fabrics dry relatively quickly, and though they are not waterproof, they do have a surface coat that repels water. Acrylic also does a better job of retaining its color vibrancy because its design is woven, not painted on the fabric surface.Cons: Acrylic is usually the preferable option, unless you plan to always park under shady trees when you camp. Removing tree sap from between the woven fibers of acrylic awnings can be a challenge. VinylPros: Vinyl is waterproof, easy to clean, and simple to repair when necessary. You don't have to worry so much about getting tree sap stuck in the material, and vinyl often packs a lighter hit to the wallet.Cons: Vinyl awnings don't "breathe" the same way acrylic ones do, so it will be hotter under a vinyl canopy.
Measure RV Awning
Measure RV Awning Arm to Arm

Step 2: Loosen the Awning Bolts

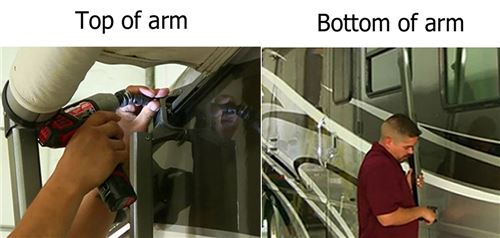
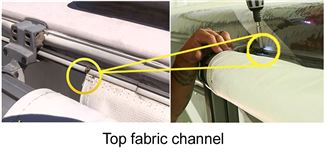
Roll the awning out from the RV. You don't need to extend it all the way—only about a foot.Top of arms: There are four bolts (two on each side) holding your RV arms to the side of your RV. The bolt size will be different depending on your awning model. With your awning slightly extended, remove these bolts.Fabric channel: At the top of the awning, there is a channel the fabric slides into. There should be at least two screws holding the fabric in place inside this channel. Remove the screws so the awning fabric can slide back and forth easily in the channel.Bottom of arms: Loosen the bottom of the arms so that they detach from the RV.NOTE: It's best to have a helper on hand for this step. Time to call in that friend who owes you a favor!
Loosen Awning Bolts - Top and Bottom of Arm
Awning screws - top fabric channel

Step 3: Remove the Awning

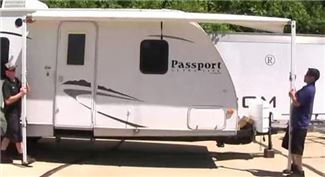
Lift up slightly; walk the awning down the channel and away from the RV. Be careful not to scratch the side of the RV or hit your mirror. If necessary, cut away any old sealant holding your fabric to the track.Lay the awning on the ground. Pro tip: we recommend elevating the awning on blocks to make it easier to work with.
Walk Awning Out from RV
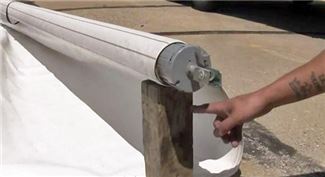
Prop Awning on Blocks

Step 4: Remove the Arm

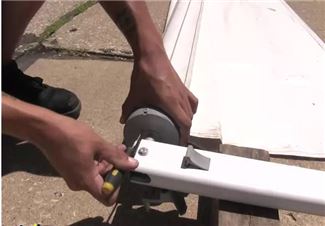
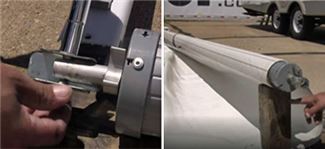
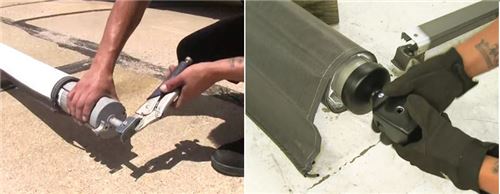
Come to the left, or back, side of the awning (the side without the extend/retract lever). Check for a small hole on the end cap (sometimes it is concealed beneath a small plug). Insert a small pick or screwdriver in the hole to lock the spring tension on this side.Once you've activated the spring locking mechanism, move to the front side of the awning.NOTE: Some awnings do not have spring tension locks. To view a fabric replacement for an awning without a lock, check out the video in this step. If you don't have a locking mechanism, you can continue on the left/back side of the awning.Remove the bolt holding the arm to the bracket, then remove the arm from the roller itself. Keep a tight hold on the bracket while you unscrew the arm; the spring is still under tension.
Lock Spring Tension
Lock the spring tension
Removing Bolt and Arm
Remove the bolt holding the arm to the bracket, then remove the arm
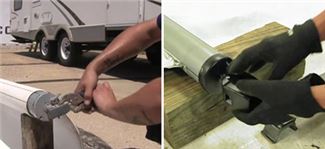
Step 5: Release the TensionYou'll need a bracket on the roller in order to release the tension (you'll need to rotate the bracket in place). If the bracket remains when you remove the arm, you don't need to do anything extra. If your bracket comes off when you unscrew the arm, you'll need to temporarily replace it on the roller (without the arm). Insert the bolt through the bracket and roller bar. Make sure it's hand tight and that the nut is secure.Next, take hold of your bracket, either by hand or with a pair of vise grips. We'll be releasing the tension off the roller, so it's important to keep a firm grip. Rotate the bracket slightly forward so you can return the selector lever to the retract position. Rotate your bracket slowly until the spring unrolls all the way.NOTE: Keep count how many rotations this takes. This will be important later for securing the right amount of tension when you add the new fabric.
Replace Bracket
If your bracket comes off when you unscrew the arm, replace the bracket now.
Rotate Bracket
Rotate the bracket until the spring unrolls.

Step 6: Remove the Cap/Spring Assembly
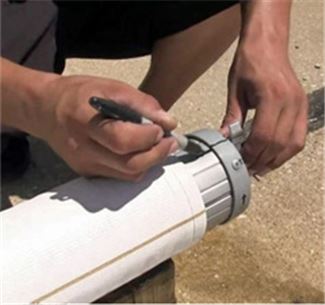
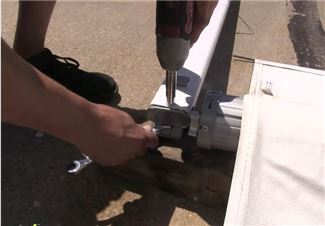
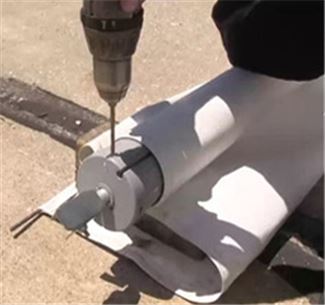
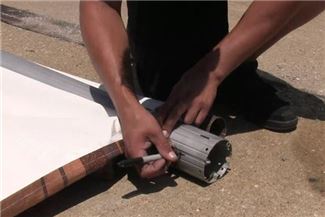
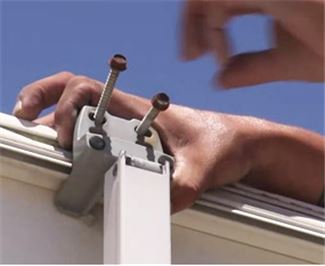
If you're working on the front side of the awning (with the extend/retract lever), take a marker and mark the lever position across the cap and onto the roller tube. It will be important to reassemble these parts in the same position. (This isn't necessary if you're working on the back/left side without the lever.)Remove the bolts, screws, or rivets (depending on your awning model) holding your end cap in place. (You will need new rivets to replace the old ones after you drill them out. You can find a rivet gun and rivets at your local hardware store.)Remove the cap and spring assembly. Set it aside.
Mark Cap and Roller Tube
Remove Cap Bolts
Remove Spring Assembly

Step 7: Unroll and Mark the Fabric
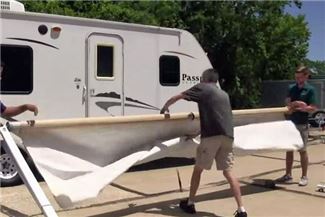
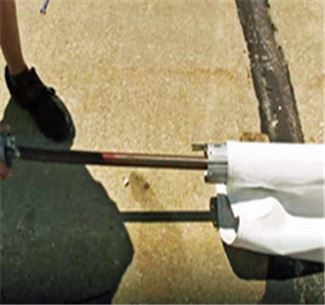
Unroll the fabric off the roller. This is easier with a helper or two. If you have a pick or screwdriver in the spring locking mechanism, make sure you don't accidentally knock it out.There are two separate sections of an awning fabric—the main section that is attached to the RV, and the decorative valance. There are also two channels on an awning roller, one for each fabric section.To make sure you insert the new fabric in the right channels, use a marker to mark each with a distinct letter or symbol, such as marking the main section with an M and the valance section with a V.
Unroll Awning Fabric
Mark Awning Sections

Step 8: Replace the Fabric

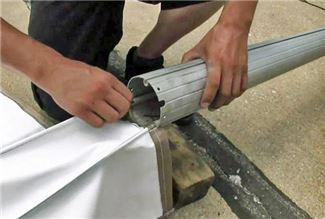
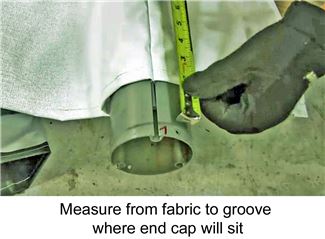
Slide the awning fabric out of the roller. To ease removal, take a razor knife and cut between the two vinyl cords to separate the valance from the main fabric. The two sections are easier to remove separately than together. Lay out your replacement fabric with the pattern facing the ground so you can find your connection points. On one end, you'll have two cords or tubes. The smaller section of fabric is the valance, and the larger is the main awning fabric.Slide the end of the valance section's cord into the channel you marked with a "V" or other indicator. Slide the end of the main section's cord into the channel you marked with an "M" or other indicator. Work the fabric into the channels and slide it into place. This is typically easier to do with a helper holding the other end of the fabric taut.Center your fabric as close as you can using a tape measure. Pull the fabric to one side and measure the distance between where the end cap will end (you should see the markings on the roller) and where the fabric begins. Divide this number in half, measure it out on the roller, and move your fabric to that point.For instance, if you have 2 inches between where the end cap should end and the fabric begins, divide this number in half, equaling 1 inch. Then measure an inch in from the end cap groove. This is where your fabric should sit.NOTE: Use a silicone spray lubricant (not caulk or sealant) to lubricate the channels before sliding in the fabric.
Slide Fabric Into Channels
Center the Fabric

Step 9: Put the Awning Back Together
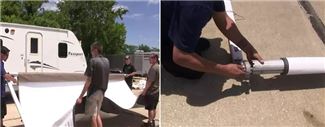
Fabric: With your helpers, roll the fabric up the opposite way you took it off. If the strap becomes wrapped in the tarp, you can get it out later when the awning is back on the motorhome.Spring assembly: Reinstall the spring assembly. If you made marks to indicate the lever position, make sure the marks line up and the lever is in the same position. Replace the bolts or rivets. Take hold of the end bracket (use vise grips if necessary). If you have a lever, lift up on it slightly to change its position so you can rotate the bracket. Remember how we kept track of how many times we rotated the bracket earlier? Rotate the opposite way the same number of turns.PRO TIP: If your awning is old and does not retract as quickly as it used to, you may add an extra turn or two to increase the tension.
Fabric and Spring Assembly
Arm: Hold the bracket in position. Reinstall the arm and replace the screw that holds it in place.If you replaced the bracket after removing the arm, remove it again before reattaching the arm. If you used a screwdriver or pick to activate the spring tension lock, you can remove it now.
Reinstall Arm

Step 10: Replace the Awning on the RV
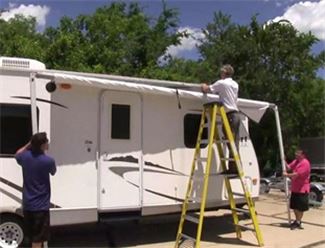
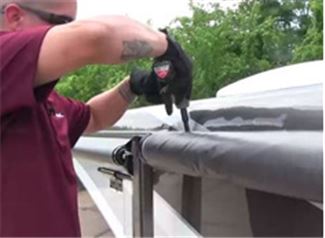
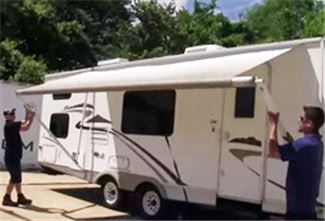
With your helpers, lift the arms of the awning against the RV, walking the awning in slowly as someone feeds the fabric back into the channel. Once the awning is in place, make sure the lower section of the legs are locked in, so you don't have to worry about it falling.NOTE: Use silicone spray to lubricate the track before replacing the awning fabric.With the awning secure, replace the brackets and screws you removed from the top of the arms earlier. Do so on both sides.
Replace Awning on RV
Replace Awning Bolts

Step 11: Double Check the Awning

Find the pull rope and hook it with your awning rod, or have a helper grab one arm while you grab the other and slowly pull the awning out. Make sure the awning rolls out evenly and that the fabric is not bunched to one side.If the awning seems crooked or bunched, slide the fabric left or right along the track as needed to even it out.Once you're satisfied that the fabric rolls in and out smoothly, replace the screws you removed earlier that secure the fabric to the top channel. These will hold the fabric in place.
Secure Fabric in Top Channel
Unroll Awning

Step 12: Enjoy

Sit back and enjoy your new awning fabric!
RV with Awning
Related ProductsWritten by: Amber S.Updated on: 1/15/19

Chris J.

11/22/2022

Is there a spring tensioner for the powered awning?

David B.

11/23/2022

You can add tension yes. Here are some links for you.

Chris J.

11/23/2022

@DavidB Thanks for the reply! I look forward to the links

Kevo

7/14/2022

Thanks for the great tutorial! I successfully replaced the 15ft awning fabric on my 2016 Aspen Trail. The detailed description in the video was great and the "pro tips" were definitely helpful.
John G.

12/9/2021

In a wind storm my awning came unattached from the RV. It is still on the roller and the arms are fully extended. Is there any way to reattach it to the RV without removing it from the roller?

Les D.

12/10/2021

@JohnG that is unfortunate. If you can give me the brand and model, I can try to locate an installation video that you could follow in reverse order. If you are asking if there is a way to manually retract the awning, yes, there usually is. Again, with the make and model I can see what the procedure is. It sound like you are saying that your awning was out and you had some wind damage. Are you saying that the awning entire assembly tore off the side of your RV, or that the awning arms assembly is still safely attached to the RV, but the long roller that the awning rolls up on, has come off of the awning arms?

John G.

12/10/2021

@LesD Thank you for such a quick response. The awning cloth came unattached from the trailer, but is still attached to the roller, which is still attached to the arms and the arms are still attached to the trailer. We can't just slide it into the strip on the trailer. Is there a way to remove the strip it slides in to and then re-attach it to the trailer? The RV is a 2020 Flagstaff 28" RBFK.

Les D.

12/10/2021

There is an "awning rail" like part # 36287-955, whose flat part is screwed to the side of the RV. One side has a slit tube. I am wondering if the awning cloth was pulled out of that, or if it ripped along the edge of the slit - like tearing cling wrap on the edge of the dispenser? What seems more likely is that the awning rail was pulled off the side of the RV and still has the cloth attached. In this case you will have to reattach the rail to the RV. If it were me I would figure out how to reattach the rail. You may need to drill new holes, and seal the others. Once you get a dry fit of the rail-only attached to the RV, you can take the rail off and then you can slide the awning back into the strip. Since it wil be somewhat taunt, you will need to unwind some slack, slide the strip onto the rail, then screw the rail back onto the RV. I have attached a video showing an installation and how to wind/unwind the awning on the roller. Just reverse the process. It usually takes two people with two ladders to get this done.

Scott

8/8/2020

I want to replace the fabric on both slideouts, on my 03 Monaco Dynasty, Carefree of Colorado. Are you able to help me out on those? Guess'n measuring instructions are different, if ya can help

Etrailer Expert

Chris R.

8/18/2020

On your Monaco Dynasty you'll still want to measure from arm to arm to get the right fabric size.

Reggie

8/7/2020

I suspect it may be a different procedure for powered awnings, no?

Etrailer Expert

Chris R.

8/18/2020

The procedure will actually be pretty similar for powered systems.


Departments

Towing

Sports and Recreation

Trailer Parts

Vehicle

What our customers are saying:

"very easy to shop"

Mike
Richmond, CA

Popular Vehicles