bing tracking image

RV Roof Cover Image

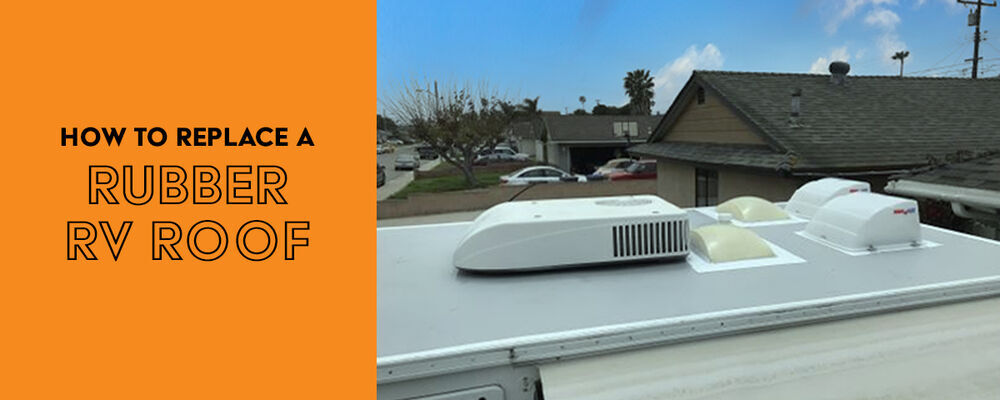
How to Replace a Rubber RV Roof

RVers, I won't lie to you: DIYing your RV roof replacement is a Job (note the capital J). Not that it's hard (it's actually pretty straightforward), but it's time consuming, so set aside a weekend before you dive in. If you like having a roof over your head when you camp, it's a job that'll become necessary at some point during your RV ownership. Sometimes a tree branch slices open your roof membrane. Sometimes the roof just gets old and succumbs to UV rays and rainy days. Whatever the case, when your roof starts getting shabby, it's time to replace it.So — can you DIY an RV roof replacement? Absolutely. You'll save yourself a pretty penny doing it yourself, rather than paying to have it done. What will it actually cost you (in cash and labor) when all is said and done? What are the actual steps involved? It varies depending on your camper size and replacement material, but we'll walk you through replacing an RV roof below so you know what your super fun upcoming weekend will consist of.If you'd rather see us in action, check out our video in which our handy RV expert Shane replaces an RV roof solo.
Supplies List
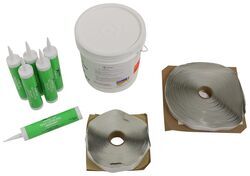
Roof Kit:
  • Roof membrane
  • Adhesive
  • Butyl Tape
  • Non-sag sealant (for vertical surfaces)
  • Self-leveling sealant (for horizontal surfaces)
How Long Will it Take? Give yourself at least 3 days from start to finish (it'll go a bit faster if you have an extra set of hands). It's a great job to do during a long weekend. For instance, give yourself a Friday afternoon/evening to remove your trim, vents, and old roof membrane. Take Saturday to finish removing your old roof and to apply the new roof. Use Sunday to put your vents/accessories back in place and seal everything. (Just make sure you pick a weekend with decent weather — although if you live in a state like mine, these may sadly be few and far between!)

Step 1: Prepare to Remove Your Old Roof (Remove Sealant, Trim, & Vents)
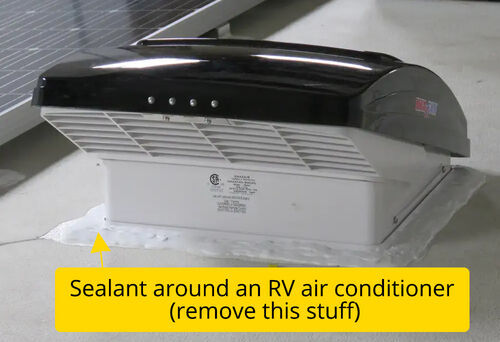
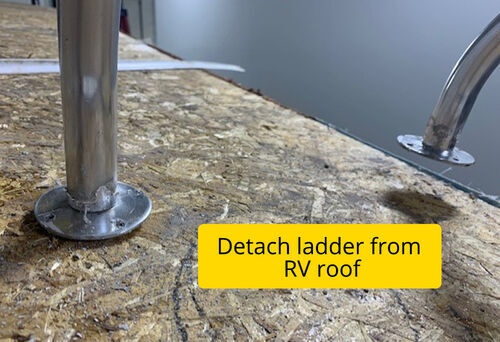
Anything holding your roof in place has to come off. This means AC units, fans, solar panels, trim pieces, and other coverings. If you've never been up on your roof before, you may not be sure whether or not you can even safely get up there. A general rule of thumb is that if your rig came with a factory ladder or built-in ladder-mounting location, it's walkable. If you don't have this, it's probably not walkable. Some RVs come with a weight capacity sticker with this information, and you can also check with your manufacturer or dealer to be sure. If you can't walk on your RV roof, you'll have to prop a ladder up to the side of it.If you do get on your roof and feel the roof give slightly beneath your feet, consider distributing your weight over the roof with a piece of plywood. Keep toward the edges (but not too close!); the weakest parts of your roof will be the center and around your vents. Peel up sealant around your skylights, vents, AC units, etc. Remove any interior vent or AC shrouds and disconnect powered vents so you can remove all these rooftop accessories freely. (Disconnect from shore power and from your 12V battery before touching any of the wiring.) Once you've removed all vents, AC units, etc, set them aside.You'll also need to detach your ladder from your RV roof (of course, you should use a different ladder to access your roof afterward).Photos from our roof replacement job:
RV AC with Sealant Around Edges
RV Ladder Detached from Roof
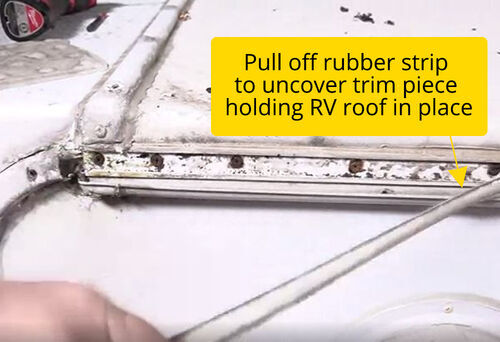
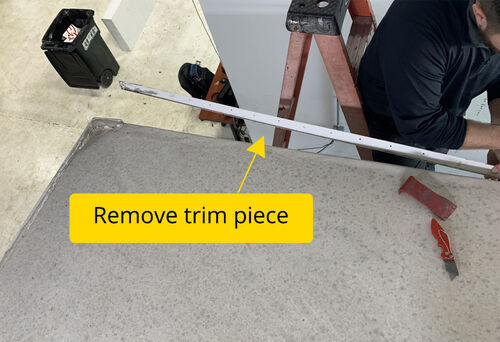
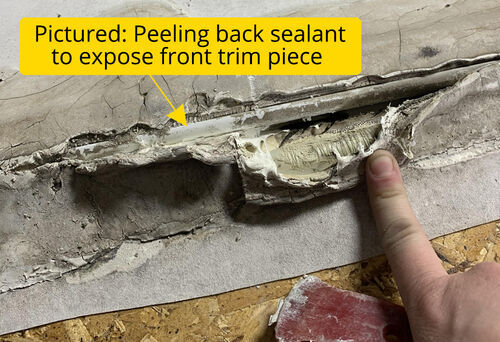
Unscrew and remove the trim pieces along the sides of your RV (you'll have to remove the rubber cover to expose the screws holding the trim in place). If your screws are damaged or rusted, it's a good time to replace them with new ones (possibly some rust-resistant stainless steel screws). Also peel off the butyl tape behind your trim. Mark the ends of the trim pieces so you can realign the holes and put them back the exact same way. If you have trim pieces at the front of your RV, you'll also need to remove these. (Be careful not to damage the nose with your putty knife or trim panel scraper.) There will probably be a lot of sealant at the front and back of your RV. To remove enough sealant to expose any trim screws, cut along the middle of the seal with a razor.Photos from our roof replacement job:
Removing rubber strip to expose trim piece
Removing RV trim piece
Peel back sealant to expose trim
Once the trim pieces are off, go back with a scraper to remove the sealant residue and create a clean working surface for your new membrane.

Step 2: Remove Old Roof Membrane
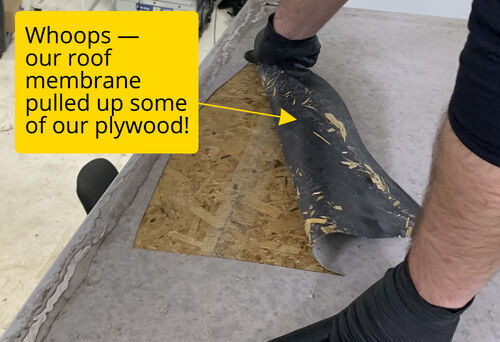
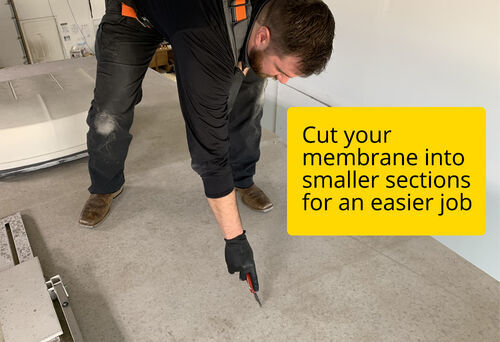
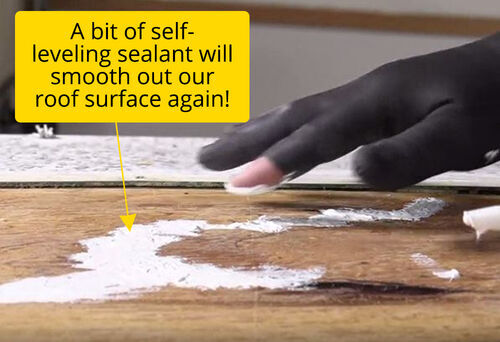
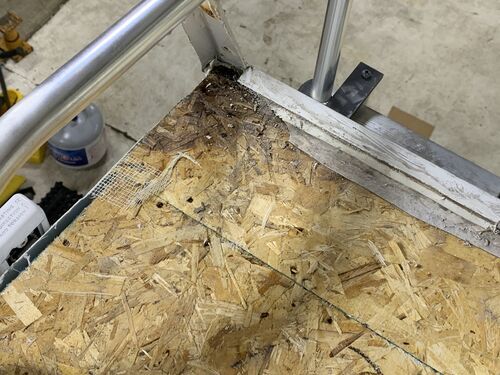
The easiest way we found to remove an old roof membrane was to use a razor blade to cut it into small sections (about 1' long), then peel it up. The smaller your sections, the easier it will be to pull them up. You won't need to cut deep — just enough to cut through the membrane to the plywood underneath. Most likely, the adhesive will also take up little bits of the plywood. You'll need to fill any holes or low spots with self-leveling sealant. If the seam tape comes up, you'll need to replace it with fresh tape. Also make sure there are no screws sticking up from the wood.If your plywood is especially damaged, you may prefer to buy luan board and bolt or glue it right over the old board. This way, you're working with a clean, flat surface.Photos from our roof replacement job:
Cut Roof Membrane with Razor Knife
Roof Peeling Up Plywood
Self-Leveling Sealant on Roof
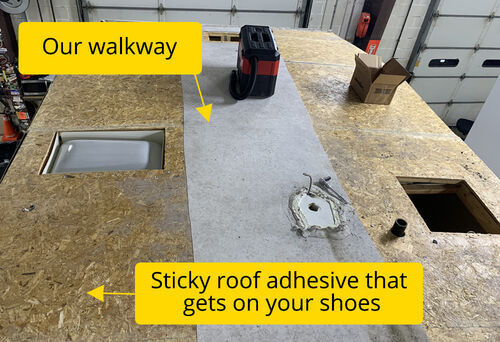
Tip #1: Wear gloves. The adhesive is sticky, and the bits of plywood can cause splinters.Tip #2: Remove the membrane on the left and right sections of your RV first, leaving a strip down the center for yourself to walk on in order to remove the left and right sides. It doesn't hurt to walk on the plywood, but it is very sticky, and it will stick to your shoes as you walk. It's not exactly a red carpet, but you'll appreciate having that strip of non-sticky runway.Photos from our roof replacement job:
RV Rubber Strip Down Center of Rig
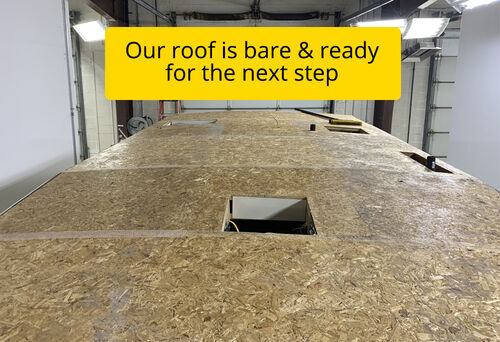
Bare RV Roof Stripped of Rubber Membrane

Step 3: Prep for and Apply New Roof Membrane
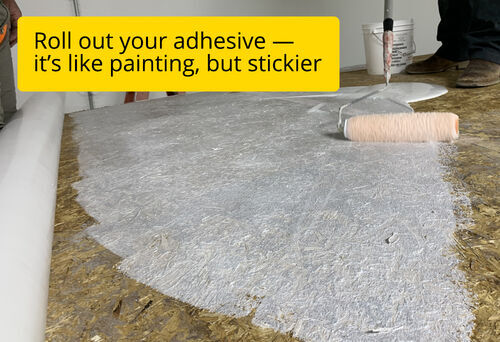
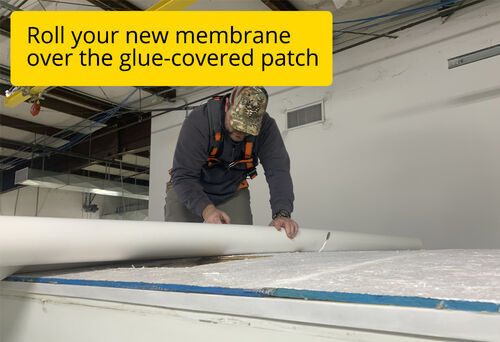
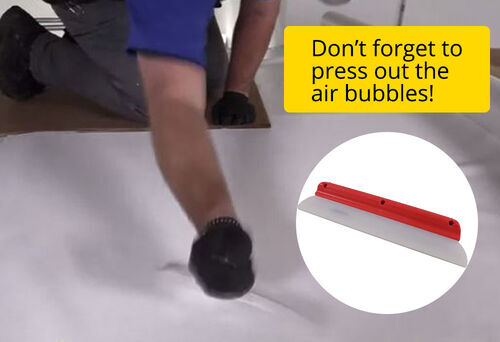
Sweep the roof clean of any dirt or debris. Mix your adhesive well before bringing it to the rooftop.Have a helper assist you in hauling your new roof membrane up the ladder. Once it's up there, carefully cut open your roof package, making sure not to slice into the roof membrane itself. Starting at the back, unroll enough roof membrane to slide beneath your ladder, but don't apply the glue just yet. Have a helper stand behind your camper and let you know when the membrane is situated evenly on the roof.When you're satisfied with the placement, roll the adhesive over the plywood in sections of about 4', making sure to spread the adhesive to the edges of the roof. Then, spread the roof membrane over the adhesive and press down. You won't get every air bubble out, but try to flatten out the large ones using your squeegee.Continue to move up the RV, spreading the adhesive in 4' sections, applying the membrane, flattening it with your squeegee, then moving to the next section.Photos from our roof replacement job:
Rolling Out Adhesive on Roof
Roll Membrane over RV Roof
Press Out Air Bubbles on Roof
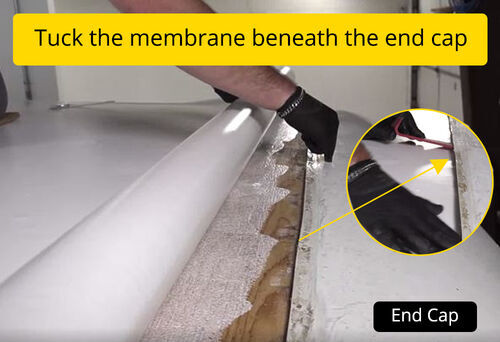
At the front end of the rig, make sure you have a few inches of overhang, then tuck the excess (about 3") beneath the end cap so the wind can't lift the edge of the material while you drive.
Tuck Roof Membrane Beneath End Cap
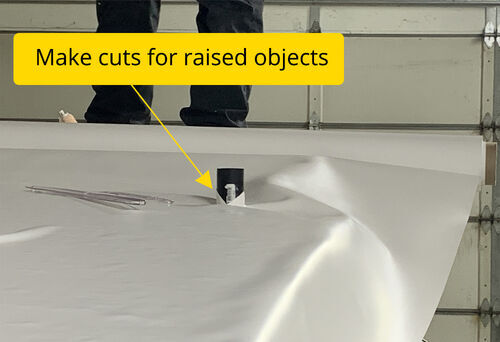
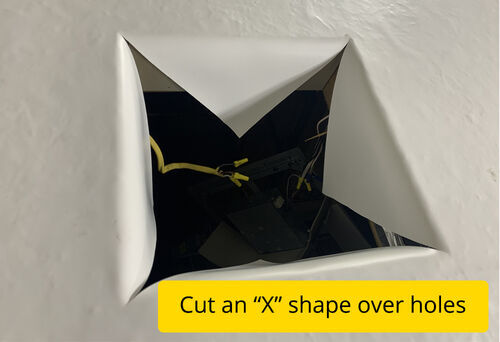
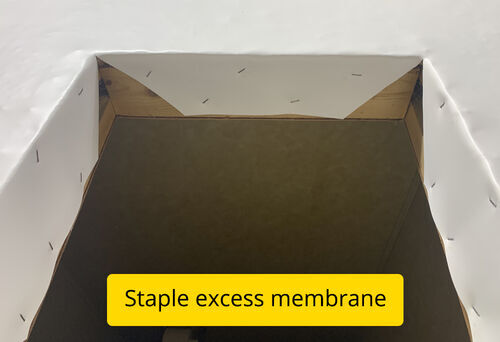
You'll also have to make cuts for pipes or vent holes along the way. For objects protruding from the rooftop, make a small "X" cut as you lay the membrane over the top, then slide the object through. For holes, wait until you glue the membrane in place, then cut an X shape over the hole. You should be able to see the outline of the hole through the membrane; just be careful not to accidentally step through it!Trim any overhanging flaps, then staple them to the wood inside the camper frame. (If there's no wood to staple the membrane to, you can glue the flap down or drill into the metal beneath it.)Photos from our roof replacement job:
Cut in Roof Membrane
Cut X Shape into Roof Vent Hole
Staple Excess Roof to Wood

Step 4: Add Back Your Butyl Tape, Trim Pieces, & Appliances
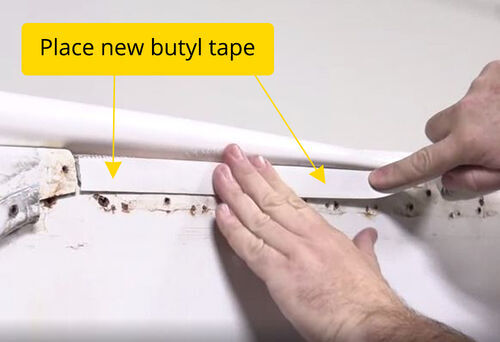
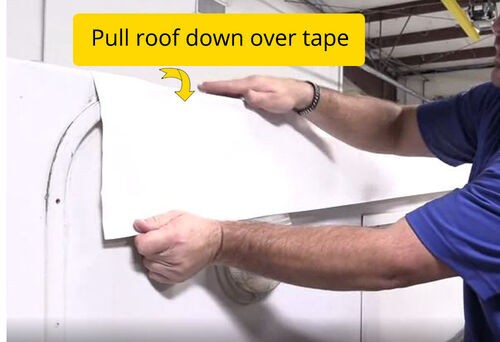
Place butyl tape along the sides of your roof (flush with the top) along the entire RV. Once you're done, peel the paper layer off the tape, come back, and pull the roof overhang tightly over the tape so it's stuck in place.Photos from our roof replacement job:
Add New Butyl Tape on Side of RV
Pull roof down over tape
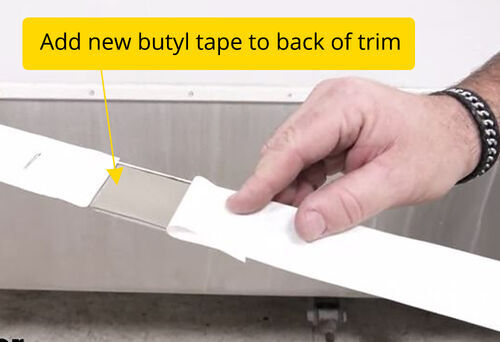
Make sure your trim pieces are free of any old sealant, then place butyl tape on the backside of the trim, making sure to cover all your screw holes. Try to use the same holes to reattach your trim pieces, if possible (if you need to, you can line up your trim piece and poke a hole through the back of the tape to get your first few screws in).Photos from our roof replacement job:
Add New Butyl Tape to Back of Trim
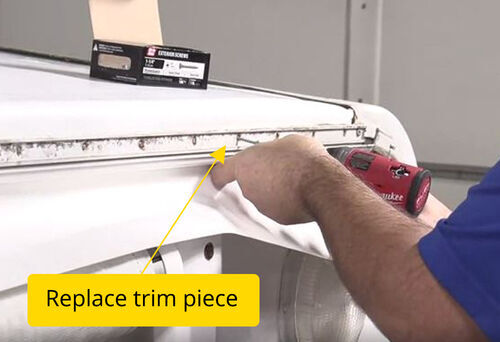
Screw Trim Piece Back in Place
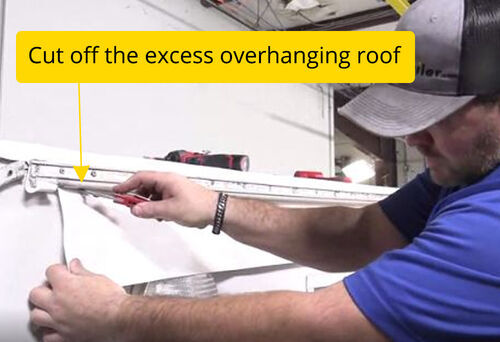
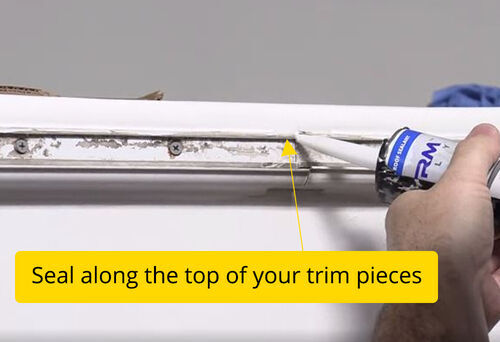
Trim the overhang of your new roof directly beneath the trim piece. If you have a PVC roof, it's a good idea to keep the excess in case you ever need to make a repair.Use non-sag sealant along the corners of your trim pieces, creating a water-tight seal, then along the top and bottom of your rails. Also apply a bit of sealant at the point where your trim rails meet. Come back after about a day and check for air bubbles, filling in any bubbles with sealant.Photos from our roof replacement job:
Trimming Membrane Overhang
Apply Sealant
Seal Along Top of Trim Piece with Non-Sag Sealant
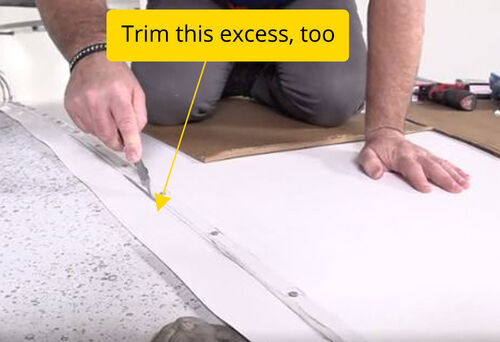
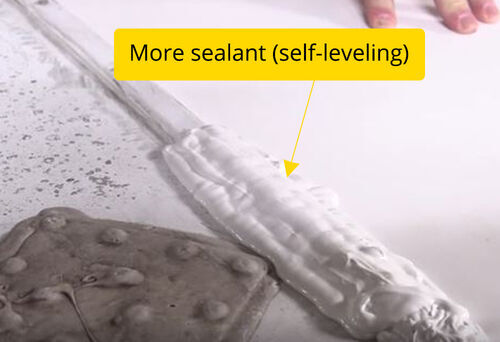
For the trim pieces on top of your RV, you'll use self-leveling sealant. Cut off any overhang and apply sealant on both sides of and on top of the trim rail.
Trim Roof Membrane Excess
Self-Leveling Sealant on RV Roof Trim
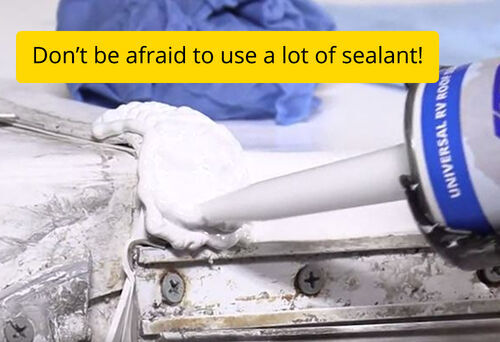
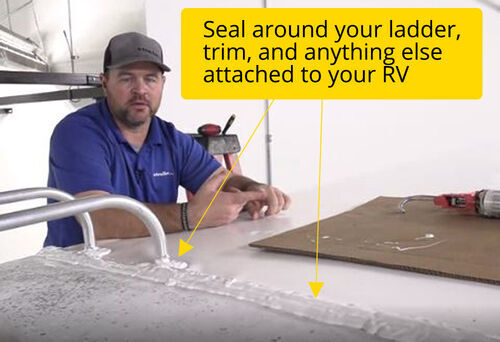
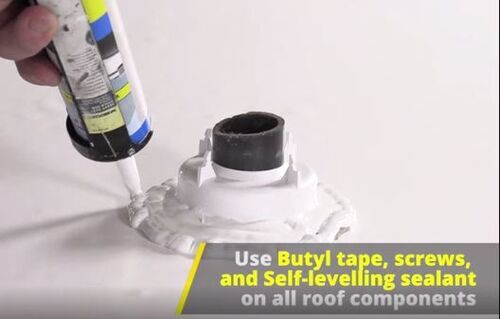
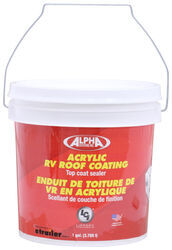
Anything that goes on your roof should be secured with butyl tape, screws, and sealant. Apply butyl tape to the attachment points on your ladder as well as any other accessory (vent, skylight, etc) before you attach it back to your roof. Then, screw the accessory in place and coat it with self-leveling sealant. Don't be afraid to make sure everything is completely covered with sealant; you don't need to glob it on, but you want to make sure there are no gaps in your coverage.If you're replacing your roof with an EPDM or TPO membrane, you may also choose to apply a final protective coat. (This one is made for EPDM roofs.)Photos from our roof replacement job:
Sealant Around RV Ladder and Trim
Self-Leveling Sealant Around Roof Component

When to Replace Your RV Roof

If you're on the fence about replacing your RV roof or repairing it, hop up there and take a look. Is your roof:
  • 15-20 years old?
  • Leaking?
  • Cracked, punctured, or worn in a spot larger than a patch or repair tape can cover?
  • Suffering from water damage?
  • Showing the black rubber layer underneath the white membrane where it's worn through?
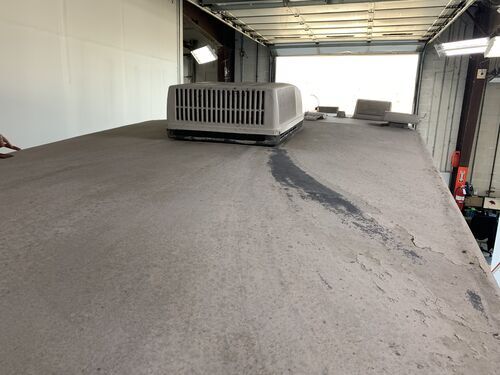
If any of these are true, it's likely time to replace your roof altogether. It's best to inspect your RV roof at least twice a year, at the beginning and end of the camping season, and check for any cracks or damage. If the old sealant is peeling or cracked, remove it with a putty knife and apply new sealant. Of course, you're more likely to run into problems as your roof ages. Once it hits the 15-20 year mark, definitely start considering a replacement.Photos from our roof replacement job:
Black Roof Material Showing Through Rubber
Here, you can see the black rubber showing through the white layer on this EPDM rubber roof. Condensation from the AC unit has left this black streak behind.
Water Damage on RV Roof
Pictured: water damage that became apparent once we removed the old roof membrane
Tip #1: Wash your RV roof several times a year to remove dirt and debris that can cause damage. Regular preventative maintenance will help extend the life of your roof membrane. Make sure to use cleaner designed for your roof type.Tip #2: Use an RV storage cover when you store your RV during the off-season. Avoid using a regular tarp, which can lead to mold and mildew when used over long periods of time.

RV Rubber Roof Replacement Costs

The cost of an RV roof replacement depends on your roof material, the size of your camper, and whether you replace it yourself or hire someone. The average cost to replace an RV roof is about $5,000 - $7,000 if you pay someone to do it. Obviously, you can save a good amount by doing the replacement yourself.Materials: $500-$1,000
  • Roof membrane
  • Adhesive
  • Butyl tape
  • Self-leveling sealant
  • Non-sag sealant
The easiest way to replace your roof is to purchase a roof replacement kit, which will come with everything you need to replace the roof based on the size of your camper, including the membrane, butyl tape, adhesive, and sealant.Note: When dealing with RVs, remember that every camper is different. You may have trim pieces on your roof, or you may have caps. You may have two rooftop appliances (vents, fans), or you may have five. All replacements will look a little different, but they all follow the same basic steps outlined here.
Amber S.
About Amber S.As a content writer for etrailer, I might spend my morning loading and unloading a bike on five different bike racks to figure out which is easiest to use. I might be in the parking lot, taking pictures of an impressive RV battery setup our techs came across in the shop and discussing the benefits of the setup with the owner. I might spend an afternoon in a manufacturer training class for some hands-on experience with new products, and then sit down to assemble all this information into a coherent article. At etrailer, one of our core values is that we are always learning, and I learn something new every day. I start each morning with the goal in mind of taking all of this information and figuring out the best way to answer the questions people ask us (and the ones they don’t know to ask yet), and helping people get the solutions they need to make their lives easier, safer, and more fun. I’m a DIYer at heart, so it brings me great joy to help a fellow DIYer find what they’re looking for, whether that’s a product, an answer, or a community.
Related ArticlesRelated ProductsWritten by: Amber S.Updated on: 4/28/21

Randy J.

8/11/2021

I have looked and can't find any thing specific for my 1996 Discovery. I want to replace my roof but don't know about soft Foam. The roof seems to be mostly foam with plywood glued. And do I drill out the gutter rivets and remove the gutter? How do I fix the soft or rotted foam?


Departments

Towing

Sports and Recreation

Trailer Parts

Vehicle

What our customers are saying:

"very easy to shop"

Mike
Richmond, CA

Popular Vehicles