
Stealth Hitches Hidden Rack Receiver - Custom Fit - 2"
(0 reviews)
Price: $668.00
Stealth Hitches Hidden Rack Receiver - Custom Fit - 2"
Item # SH38GR
Our Price: $668.00
Will this fit?
To see if this custom-fit item will work for you please tell us what vehicle you'll use it with.
In Stock


- All Info
- Q & A (0)
- Videos (2)
- Photos
Stealth Hitches Trailer Hitch - SH38GR
- 2 Inch Hitch
- Completely Hidden
- Stealth Hitches
- 350 lbs TW
- Custom Fit Hitch
This completely hidden hitch keeps your vehicle looking like it just came off the assembly line. Remove the receiver for a fully concealed look when you're not carrying your bikes to the trail. Only for use with hitch-mounted racks and carriers.
Features:
- Custom-fit rack receiver lets you carry a bike rack or cargo carrier with your vehicle
- Totally hidden design offers a clean, from-the-factory look
- Cross tube is concealed behind your rear bumper
- Receiver detaches with no tools and can be stowed away when not in use
- Sturdy center block allows secure mounting and easy removal of rack receiver
- Integrated lock protects the rack receiver from theft
- Durable stainless steel construction resists corrosion
- Hitch won't affect ground clearance or block your trunk's foot-access sensor
- Simple, bolt-on installation - no drilling or welding required
- Uses existing connection points to protect your vehicle's crumple zones
- Black powder coat finish offers superior rust protection
- Meets SAE J684 safety regulations
- Made in the USA
Specs:
- Receiver opening: 2" x 2"
- Maximum tongue weight: 350 lbs
- Limited lifetime warranty
Note: This rack receiver is for hitch-mounted accessories only. The receiver tube included with this hitch cannot be used for towing.
If you would like to upgrade this rack receiver for towing, you will need to purchase the Stealth Hitches towing kit (SH62MR - sold separately). The ball mount included in this kit inserts into the center block of the hitch in place of the receiver attachment. A 2" hitch ball is included with the ball mount, making it ready to tow with out of the box.
- Maximum gross trailer weight with towing kit: 8,000 lbs
- Not rated for weight distribution systems
If you want to take your bikes to the trail with your family this summer, you have plenty of options. You can carry your bikes on top of your car with a roof rack, but that bulky rack can increase drag on your ride. You can use a trunk rack, but that's a pain to mount and it can scratch your car's paint. Or you can install a hitch on your ride and use a hitch-mounted bike rack to carry your bikes.
This rack receiver is designed to act as a mounting point for your hitch bike rack or cargo carrier. Just slide the shank of your carrier into the receiver for use, and when you're done you can not only remove the carrier, but the receiver as well, leaving your vehicle looking clean and unmodified.
Completely Hidden Design
Nothing can ruin the clean, stylish look of your vehicle like a giant piece of metal bolted beneath its bumper. Luckily, with the Stealth Hitches rack receiver, you never have to worry about messing up your vehicle's lines.

This hitch installs behind your bumper, keeping the cross tube concealed and leaving only the hitch receiver visible. Even better, the receiver can be easily removed from the cross tube when it's not in use so that you won't see any trace of the hitch. This means that you can retain that clean, from-the-factory look for your ride, while still being able to carry your bikes and gear on the next family road trip.
Simple Set Up
The receiver can be attached or detached in seconds with no tools required. To insert the receiver, simply pop the base up into the stainless steel block at the center of the hitch until it automatically latches in place.

Be sure to then press the lock on the side of the block to fully secure the receiver. When you're finished carrying your bikes or cargo, use the included key to unlock the latch. Then turn the handle on the block clockwise and remove the receiver. You can stow the receiver in a safe place, like your vehicle's rear cargo area, or you can use a convenient carrying case (391CASER - sold separately).

And when you're not using the receiver attachment, the included hitch plug covers the center block's opening to protect the hitch's body from dirt and debris.
etrailer.com Technical Support
At etrailer.com we're committed to the products we sell, and to our customers. Our experienced and knowledgeable staff are available via both phone and email to address your questions and concerns for the lifetime of your hitch. The technicians at etrailer perform hitch installations on a daily basis, making them a valuable resource for do-it-yourselfers. The one-on-one, personal service you'll receive comes straight from an expert in the towing and automotive field. We've installed it, we've wired it, and we've towed with it, so whatever your question, we can answer it.
SHR32025 Stealth Hitch Hidden Receiver Rack Package - Custom Fit - 2"
Installation Details
This Product Fits The Following Vehicles
- 2010 - 2015 Mercedes-Benz GLK-Class GLK350 models
Video of Stealth Hitches Hidden Rack Receiver - Custom Fit - 2"


Videos are provided as a guide only. Refer to manufacturer installation instructions and specs for complete information.


Video Transcript for Stealth Hitches Hidden Rack Receiver Installation - 2015 Mercedes-Benz GLK-Class
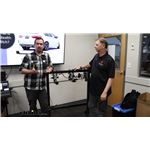
Hello neighbors, it's Brad here at etrailer and today we're taking a look and installing the Stealth Hitch Hidden Rack Receiver on the 2015 Mercedes-Benz GLK Class. Now this is what your receiver's gonna look like when it's installed on the vehicle and you may say, "well, that sticks out pretty far, it's pretty unsightly," but it is a 2" by 2" receiver tube opening, which is gonna be great. The great part about this though is being a Stealth Hitch, when you wanna maintain that nice clean look of your Mercedes, you can simply unlock this top and with the twist of this handle, we can drop our receiver out and take our key with us and that's gonna give us a nice clean, hidden look when we're not using our receiver. Now I did mention that this is a 2" by 2" receiver tube opening, which is really nice. It's kind of the standard when it comes to a lot of different accessories, whether it be a bike rack or cargo carrier. And those are all gonna stay in place with a 5/8" pin clip.
Now this is not included with the hitch, but a lot of times, your accessories will have those included. Now you can lock the receiver in place, but you also wanna make sure that your contents that may stay on your vehicle for a little bit also stay safe so you can pick up a locking pin and clip. We have plenty of options available here at etrailer. Something that you're gonna wanna pay attention to is this is the rack receiver kit, which comes with this 2" receiver that clearly says not for towing. If you plan on towing a trailer, you're gonna wanna pick up the tow kit version of this, which the hitch is gonna be very similar, but it's gonna come with a ball mount attachment.
That way you can actually tow those trailers. It also comes with the wiring. It's gonna allow you to have that four pole and seven pole. You also still get that rack receiver, so this is definitely gonna be used just for accessories like cargo carriers and bike racks. And when you have this in place, you have a tongue weight rating of 350 pounds, so that's gonna be pretty good for a large bike rack.
You can definitely load that up or a cargo carrier on vacation. So it really does come in handy, and I think the great part is you do get a nice clean look when you're not using it. Now from the side profile, this does stick out quite a bit, which is good, and that's because a lot of your accessories, when they, some of them can fold, they'll stow in a vertical position and sometimes vehicles don't really allow for it because it makes contact with a fascia. This, I don't have any worries about that. Now keep in mind you may not be able to open up your hatch with those stowed up, button, simple drop down, you should be able to gain access to that pretty easily.
Your tongue weight is also gonna be important when choosing some accessories and make sure it doesn't bottom out, the ground clearance here is 15" so it's actually pretty good. Just keep in mind when they're on your vehicle, they're gonna be a suspended part of it, so as you go up an incline, those do tilt towards the ground a little bit more. So if you're going up a steep incline or on rocky or rough terrain, any big bumps, you might wanna take into account that you have something on the back that can make contact. As far as the installation goes, this one really isn't too bad relative. Now the Stealth Hitch generally comes on a lot of higher end vehicles or luxury, and so the German cars, some of the Audis and BMWs sure are a lot to deal with, whereas the Mercedes kind of is really not too bad, it's all pretty straightforward. Everything goes together pretty well and I would set aside maybe about four or five hours and you can get this knocked out. The instructions are very good. They've done a very thorough job of step-by-step. So using those and then following along with our video, we'll make sure you get your hitch installed. So let's take a look at that. To begin our installation, we're gonna be removing some of the compartments here inside the vehicle and that's gonna give us access eventually to get our taillights as well as the fascia off. We'll start by taking our cargo cover off. We'll simply pull this out. We have panels on each side. We have this one that has kind of a little cargo area, so just twist this and we can set this aside. There's also a smaller one on the other side that we're gonna remove. Our center threshold also needs to come out and there's gonna be a T30 screw that's located right in the center here. So with a T30 torque bit, we'll go ahead and get that removed. (tool buzzes) Now I do recommend keeping your hardware in a nice organized spot, as we pull things off, it's nice to have it organized, ready to go back on, it'll make reinstallation that much easier. Now the threshold also has a series of clips where it snaps in, we want be careful here, but the best way to do this is just kind of work slowly at each corner. If you need to, you can put a plastic trim tool to kind of wedge and pop those out. Just take your time here, you don't wanna break your clips and if they do break, don't worry too much. It's pretty common to have some of these plastic push pins do that. So we'll kind of work on both sides here (plastic pops) and then I'll make my way to the middle (plastic pops) and you can see here's what our clips look like. There's a total of six of 'em that plug in here, so there's not a really great angle to be able to go from this side. If you want to, you could use that plastic trim tool to kind of peel back the weather stripping and wedge on those, that'll help it along. Now we'll remove the compartment where our jack is stored. So this just kind of pops up and the tray has two T40 torque bits that we're gonna remove to get this out of the way. There's gonna be one that's in this indent here. The other one, if you kind of just move the socket portion of the jack, it's gonna be located down there. We'll go ahead and we'll get these removed. (tool buzzes) Just slide this out and set it aside. On our passenger side, there's gonna be this cubby that's got a liner in it, a little tab, just pull that up and that's gonna give us access to two T40 torque bits just like the other side, get these removed. (tool buzzes) Now we also have two 10 millimeter nuts that we're gonna remove, so we'll swap to a 10 millimeter socket and get those out. (tool buzzes) Now these nuts do kind of wanna stay on those studs. So what I did, I tried to get it with my hand, that didn't work. But the best way I found is just kind of put a flathead screwdriver and just kind of wedge it under there, putting a little bit of pressure as you loosen it, and that should take it off. There's gonna be four studs that have a 10 millimeter nut on them, which isn't particularly hard to get loose. It's not on there super tight. The trick is it's kind of in a spot that's pretty tricky to get to with a normal socket and that's because of the studs' really long. So a normal socket's not gonna be able to get to the head of that nut. So they recommend using a hollow 10 millimeter nut driver. I don't even have one of those. And instead of going out and getting a specialty tool, you may have a swivel head 10 millimeter socket or ratchet. This is gonna work. So if you bend this, you can slide this over the shaft and loosen it up. Like I said, it's not terribly tight on there. So where they're located is in, there's four of these kind of rectangle holes here, right where our threshold was, and the stud, you can put your finger and touch it right away, but the nuts are pretty far back there. So I just put my swivel head, just ratchet that in to where I can gain access to it and just kind of rotate it. Now again, it's not very tight, but if you needed to get a little leverage, you could use a pair of pliers or channel locks to kind of just get that to move. So we'll get these all loosened up and you might want to use either a pair of needle nose pliers or a magnet would really work great here. Just kind of go in there and draw those out. That way they're not dropping in the frame of the vehicle, It's not threaded the whole way. So really once you kind of get it loose, you'll just slide this off. Again, using a magnet here has made this nice and easy for me. So it's at the end here, we'll just get this taken off. Now there is a little cap at the end of the little stud that you're sliding on, so just make sure it doesn't get caught up on that, but it should look like this. So we'll get the four of those removed. Now we'll head to both of the taillights. We're gonna be doing the same step on both sides, pretty easy, we'll get the plugs separated first. And so if you reach on the outside edges, there's two tabs, just kind of push those in, and then you can kind of use your fingers to pry it away. Got that unplugged. So now we just have the three 8 millimeter nuts on those studs, we'll get those removed. (tool buzzes) So with those nuts removed, we should be able to get our taillight removed. So what I did is just kind of push on the studs where we had those nuts and that's gonna help push this forward. There are gonna be some alignment clips here like this one slides in, so it might fight you a little bit, but the best way just kind of push along on these, that'll get it to draw out, now we can get our taillight set aside. Now on each of the wheel wells on the rear or the backside of the vehicle, we're gonna have two plastic push pins. I'm using a trim panel tool. That way you can kind of wedge underneath that center portion to draw that out. These are pretty long, so normally you can kind of get the center part out and then pull the whole thing. You really want to just focus on the center part on these, which it's pretty small here, so might have to get creative, maybe a needle nose pliers or something along those lines to get a hold on it, but we'll just pry this back. And then we have this one. And then the one that's kind of located on the mud flaps, you may or may not have mud flaps on your vehicle. And something I see is this metal clip here that attaches to the fascia. I'm gonna separate that too. The instructions don't denote it, but I think it might be a smart idea to, so either with a flathead screwdriver or a trim panel tool, I'm just gonna kind of pry this back and keep that from attaching it and we'll head underneath our fascia and you're gonna find that there's gonna be some tabs that are attaching to kind of the spare tire compartment. There's gonna be a 10 millimeter bolt there and there's one on the other side. We'll get those removed. (tool buzzes) Now we'll head to the side, there's gonna be two T20 screws that we're gonna remove. Now this one's easily accessible, the other one's actually tucked behind the mud flaps. So if you had mud flaps, you're gonna need to remove that, and that's what we're gonna do here. There's just gonna be a series of Phillips screws that are attaching this on the backside. It's pretty tight between the tires, so I'm using a small ratchet with a 1/4" bit in there to get this removed. (tool buzzes) Your mud flaps may have some double-sided adhesive holding it in, which is kind of a nice quality feature from the factory, but I'm just pushing this back just enough to kind of give us access to this Torx bit. We'll get this removed. Now we'll just repeat on the other side of the vehicle. Coming back to our wheel wells, we're gonna get ready to get our fascia pulled off, so I recommend maybe grabbing an extra set of hands here shortly. We're gonna wanna peel back our wheel well liner and right tucked up, kind of facing vertical, is gonna be a 10 millimeter bolt head. So just kind of get your socket up there and we'll get that loosened up and removed. (tool buzzes) So using the extension, I was kind of able to get a straight shot on this. Now something we're gonna do too while we're here at the wheel well is before we pull the fascia off, is just take some painter's tape and run it along the edge of where the rear quarter panel meets the fascia. And we'll do it on both sides. And this is mostly because as we pull this off, it may rub against each other and we don't want the clear coat or the paint to get scratched. So this is a nice easy way to prevent that from happening. So we'll get this done on both sides. Now to remove our rear fascia, it's pretty easy. There's gonna be a series of clips, so just kind of pull back on the corner of our fascia and just take your time here. You don't need to damage the clips, you should get them to slowly work, just kind of put pressure as you work your way down until we get this all kind of popped off. Now these are pretty tricky. What I did was I kinda lifted this tab kind of over this portion to kind of keep pressure on here. And then each of these little tabs, kind of what I ended up doing was if you can kind of wedge under the plastic here, kind of loosen it up, you might need two tools to accomplish this, but we're trying to get this tab to slide over that plastic and you do want to keep that rear pressure on it. So just kind of work at it here. And if you need to, you can take a screwdriver or something and wedge it here. I was able to push that one down, and then we'll get that released. So a lot of this buildup could be part of that. So that soapy water's definitely gonna help it along. So get both sides popped out, we'll get our fascia pulled apart. Now as you're pulling your fascia back, don't pull too far because you're more than likely gonna have electrical connections. We have this one that would just separate, pushing that center tab, pull this apart and now we can set our fascia somewhere safe. Now we need to remove our factory bumper beam and there's gonna be a nut that is attached to the stud here that's on the inside and it's gonna require a 16 millimeter socket to get it taken off. So we will find it located here. There's gonna be one on each side, let's go ahead, get that removed. Now the remainder of the nuts are gonna be underneath on the backside, kind of tucked by the exhaust here. So I'd use a shallow 16, get these taken off. (tool buzzes) Now I did struggle a little bit getting this top corner one out on both sides, so just using a swivel ratchet to kind of gain access to that. It's kind of tucked back, but once you get those all off, it does look like the bracket that holds the exhaust hangers up is attached to this. So you might have to kind of work at this a little bit and those may drop out. But we'll take our bumper beam and this will not be going back on, so you can do whatever you want with it. We're gonna get ready to put our hitch in place. And I think the best way to do this, because we're gonna need to lift this one up to get those bolts passed through, we're gonna use the one that goes from the inside of our cargo area. So we're gonna put the flat washer on that bolt, pass this through and I'm gonna do that on the other side, and then we'll just lift this up, try not to push those back in. I'd lift this up and just once you kinda have the stud poking through, take your serrated flange nut and just kinda get this few threads on to hold that up, and then we can get the other side in place. This point we can go ahead and get the other remainder ones. We're gonna pass 'em from the front to the back just as we did on this one. Just make sure you get that exhaust bracket lined up as you do it. We have all the hardware hand tighten and in place. Now that's a good time to kind of check to make sure it's all centered up. So kind of using where our receiver block is gonna go, we'll just make sure, there's not a whole lot of wiggle room, but you wanna make sure it's obviously right exactly where you need it to go. Now as far as getting these tightened down, I have a 5/8" wrench that I'm gonna be putting on the head of the bolt and I'll be tightening these down with an 11/16". So let's go through, we'll get these all tightened down. (tool buzzes) With all of those snug down, we're gonna come back with our torque wrench and the torque settings are found in the instruction manual. It's gonna be important, it's gonna make sure that it's gonna be tight enough for the lifespan of the hitch, but also not too tight, putting any stress on the hardware. So we'll go through and get these all torqued down. To get our receiver block in, now leading up to all of this, we are doing just the rack receiver kit. If you're getting the towing kit, it is gonna change because there's some safety chain loops that you'll have to attach as well as the bracket for the wiring. But for just the rack receiver kit, we'll just slide this up, run our bolts through. We will get our nylon lock nuts on here and these are gonna be a 15/16 socket and wrench combo to get these tightened down. And there is a torque setting associated. So we'll get these tightened and torqued. (tool buzzes) Before we get our fascia put back on. We obviously have to make sure that there's gonna be space for us to gain access to our receiver block. So I went ahead and I used the instruction manual to tape this out so you can refer to that. It's not the clearest picture, but essentially off the center, it's a slightly offset and then tapers out. So I just measured the total overall length, found those points, and just kind of used painter's tape to create a nice little opening here. It doesn't have to be spot on. In fact, if you wanted to go a little bit larger for a little bit more access, by all means, go ahead and do that. As far as cutting, I use an oscillating tool or a multi-tool. This works really well, a Dremel works fine. So whatever cutting method you have, just kind of go through, make some nice clean cuts and then we'll come back and file off the burrs. (tool buzzes) Now it does come with this kind of chrome plated trim here that will go around this edge. So if you want to, you can definitely put this on you kind of just pry this back and then press it on. Now some of these corners, if you are using it, it might be a little bit better to get a rounded edge. It's hard to put a 90 on here or a, you know, a sharp angle. So it's up to you if you wanna put this on. I'll go ahead, we'll get ours installed and see how it looks. So what I ended up doing was kind of trimming this into sections that are a little bit straighter. So I just kind of did like a 45 cut here at the angles. It does kind of roll along with this. So the best way that I found, it does have adhesive deep into it. So what you're gonna want to do is kinda use a flathead screwdriver at first to kind of spread it out to get over the curves. And then once you have it kind of all in place, I recommend taking something pretty solid and just kind of making sure that it's seated on there so that adhesive really sticks to it. I will say once you have it on, it's a little bit of a struggle. You just gotta kind of pry at it and work on it. And as I mentioned before, just make sure it's pressed on there, really good for that adhesion. But overall it's really nice because otherwise you're gonna have even, you know, with filed down edges, it's gonna be rough, and this is nice and smooth and it looks good overall. So now that we have this attached, we're gonna go ahead and get our fascia put back on, making sure that we get all of our electrical connectors plugged back in. We get our fascia put back on. We're just gonna use the reverse order that we took everything off. So just take your time here. This is, you know, the last little bit to get it all nice and tidy. So we'll go ahead and get this all reinstalled. Now if you haven't already, you can remove the protective cover, which is really nice when you don't have your receiver in, it's gonna kind of keep this nice and clean. But as you pry this out, your keys are gonna be located in them. And there's also gonna be a five digit code located on the keys. There's a piece of paper in your instructions that you can write down that five digit code so that way if you ever lose these, you can get replacements. So with this kind of in its state, we're just gonna peel back where our tumbler is and right now it's unlocked. I can see that just by, it was spring loaded, but pretty easy here to actuate the lock, you just put the key in here and then from here we'll just twist this handle back. We'll see that pin popped down and that means it's ready to get the receiver put in. Now with your receiver, just line this up, press it up, it's gonna lock in place and once the handle twist, you can hear that clunk. You can lock this in place, put your cover back on, and now you're ready to start using your receiver. And that was a look and installation of the Stealth Hitch Hidden Hitch Receiver on a 2015 Mercedes-Benz GLK class.
0
0
See what our Experts say about this Stealth Hitches Trailer Hitch
Info for this part was:

Edited by:
Lindsey S

Video by:
Dustin K

Video Edited:
Chris R

Video Edited:
Jonathan Y

Updated by:
Wilson B

Test Fit:
Bradley B

Written by:
Justice A
At etrailer.com we provide the best information available about the products we sell. We take the quality of our information seriously so that you can get the right part the first time. Let us know if anything is missing or if you have any questions.
Product Experts Available Now!
Call 1-800-940-8924
Thank you! Your comment has been submitted successfully. You should be able to view your question/comment here within a few days.
Error submitting comment. Please try again momentarily.