
Pace Edwards UltraGroove Retractable Tonneau Cover w Ladder Rack - Aluminum and Vinyl - Matte Black
(1 reviews)
Price: $2,302.79
In Stock
Pace Edwards UltraGroove Retractable Tonneau Cover w Ladder Rack - Aluminum and Vinyl - Matte Black
Item # KRDA24A55-ELD0101
Our Price: $2,302.79
Will this fit?
To see if this custom-fit item will work for you please tell us what vehicle you'll use it with.
In Stock


- All Info
- Reviews (1)
- Q & A (0)
- Videos (2)
- Photos
Pace Edwards Tonneau Covers - KRDA24A55-ELD0101
- Retractable - Manual
- Low Profile - Inside Bed Rails
- Pace Edwards
- Rack Compatible
- Aluminum and Vinyl
- Matte
- Opens at Tailgate
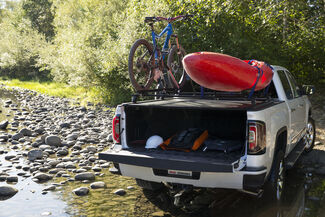
Retractable tonneau cover with light-duty ladder rack lets you carry kayaks, surfboards, and other sports gear. Aluminum and vinyl deck has strength of a hard cover and seamless look of a soft cover. Offers enhanced cargo protection for your vehicle.
Features:
- Custom-fit, retractable tonneau cover protects your cargo and your vehicle's bed from the elements
- Light-duty ladder rack lets you carry up to 200 lbs of sports equipment or cargo above truck bed
- Installs easily to the T-slots in the tonneau cover side rails
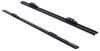
- Includes 4 black powder coated steel uprights and 2 steel Thule square load bars
- Retractable design offers full bed access without removing cover
- Handle underneath rear plate automatically retracts cover when turned
- Tension spring allows cover to open smoothly
- Stored cover won't restrict rear window visibility
- Built-in pull strap lets you deploy cover quickly
- Cover engages the rails at 12" intervals so you can partially cover long items
- Closed cover secures truck bed when used in conjunction with locked tailgate
- Compact canister protects retracted cover from the elements
- Angled design allows for maximum useable cargo space in bed
- Low-profile cover sits 1" above the bed rails for a streamlined look
- Aerodynamic style reduces wind drag and helps to improve gas mileage
- Black vinyl fabric bonded to rigid aluminum panels offers a seamless, stylish look
- Enhanced cargo protection with more weather seals and drain tubes than industry standards
- Endcaps and rear seal extend over tailgate to keep dust and water out of truck bed
- 3/4" Wide exterior rail seals conform to truck bed caps to prevent water leakage
- Interior rail seals extend along cover to further shelter cargo from the elements
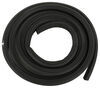
- Drain tubes at front and rear of truck bed funnel water out through OEM drain holes
- Easy, no-drill installation
- Cover clamps to truck bed side rails
- Canister attaches to cover rails at cab
- Made in the USA
Specs:
- Ladder rack weight capacity: 200 lbs
- Load bar dimensions: 65" long x 1-1/4" wide x 1" tall
- Upright dimensions: 24-3/4" tall x 8-3/4" long
- Canister dimensions: 9-1/4" tall x 9-3/4" deep
- Lifetime warranty
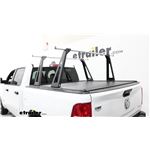
The UltraGroove is a retractable tonneau cover with a built-in, light-duty ladder rack. This EL200 elevated rack allows you to transport up to 200 lbs of bikes, kayaks, snowboards, and other gear while freeing up space in your truck bed for more items. The cover's stylish ArmorTek construction consists of a vinyl fabric top sheet that is bonded to rigid aluminum panels, combining the seamless appearance of a soft tonneau with the security features of a hard tonneau. The enhanced weather seals ensure your gear stays clean and dry.
Retractable Cover with Built-In Pull Strap

The UltraGroove retracts with one turn of a handle. The handle - located underneath the rear plate of the cover - activates a heavy-duty tension spring. This spring automatically retracts the cover into the canister at the bulkhead of your truck bed. A built-in pull strap helps you extend the cover over your bed. As you pull, the handle will unlock and the cover will engage the side rails at 12" intervals.

You can stop the cover at these designated intervals if you need to carry tall or long items that overlap your tailgate while still covering cargo, such as a toolbox, stored closer to the bulkhead of the truck. You can also use the rear plate of the tonneau cover to pull it closed.
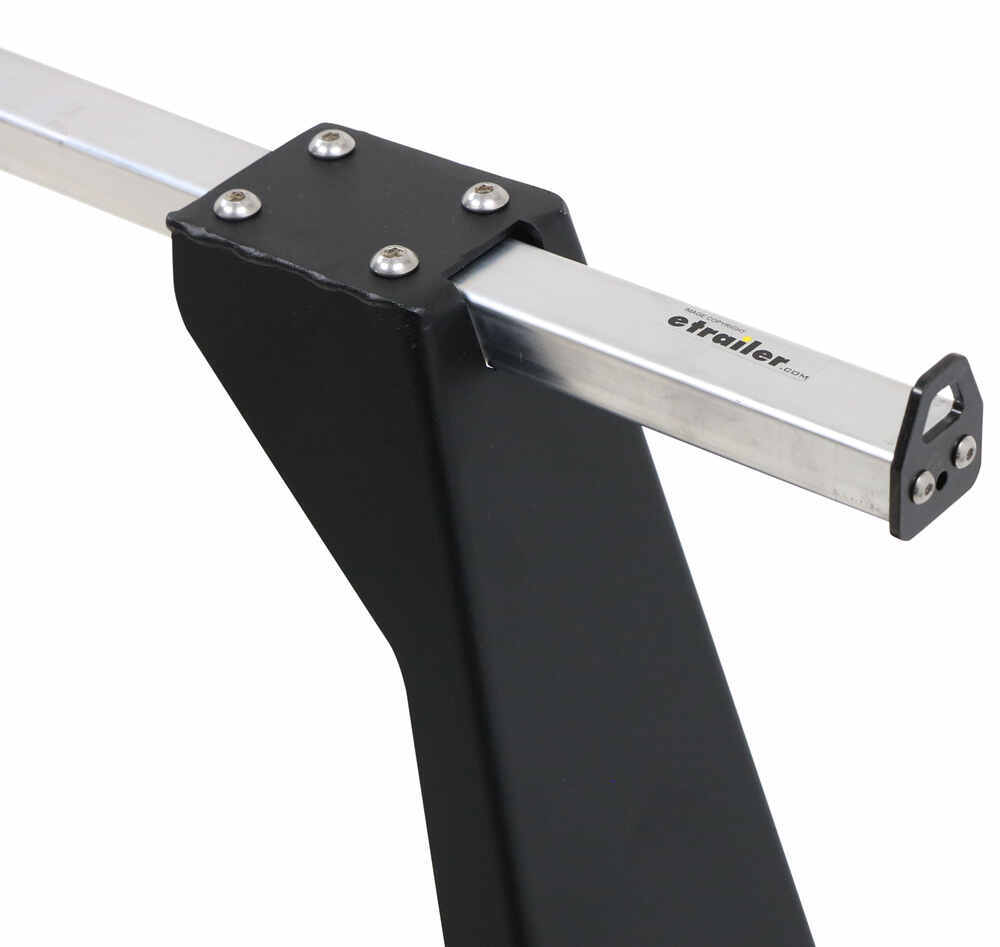
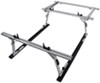
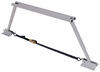
EL200 Elevated Ladder Rack

The light-duty ladder rack lets you carry up to 200 lbs of gear while leaving your truck bed free for more items. 2 Square, steel Thule load bars let you attach canoes, snowboards, bikes, camping gear, and more. The rack may also be used to carry lightweight construction supplies such as plywood or sheets of drywall. The rack easily mounts to T-slots built into the cover side rails.
Rail Expansion System
The T-slots in the rails allow you to position your ladder rack as needed to accommodate different sized loads without interfering with the operation of the cover. The T-slots also allow you to mount additional accessories such as a roof rack directly to the cover.

These rails have rounded sides and curved endcaps that are sleeker and more streamlined when compared with other slotted tonneau cover side rails.
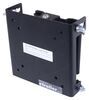
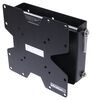
Angled Canister

The cover retracts into a compact, angled canister located at the front of your truck bed. This canister protects the retracted cover from the elements, and with the cover stored in the canister you'll have unrestricted visibility out of your rear window. The angled design of the canister also allows for maximum useable cargo space in your truck bed.
Enhanced Cargo Protection

The UltraGroove provides more protection from water and debris than many other covers on the market. Its rails feature a water management system that channels excess water into the canister. This prevents water from getting into your bed or freezing in your tonneau cover rails during cold temperatures. Drain tubes attached to the bottom of the canister remove water through the OE drain holes in the floor of your truck bed. Additional drain tubes at the end of the side rails also channel water out through existing drain holes in your truck bed side walls.

The cover side rails have rubber seals on the outside that conform to your truck bed rail caps and keep dirt and water out of your bed. The rails have seals on the inside to create another barrier that protects your cargo from water and dust. There are also endcaps that seal over the top edge of your tailgate to prevent leaking at the corners. Lastly, a large seal at the rear of the bed closes the gap between the cover and your tailgate to shield your cargo from runoff water.
Low-Profile Design

The curved side rails and endcaps sit approximately 1" above the truck bed rails for a low-profile look. This sleek design is aerodynamic to reduce wind drag, and it helps to improve gas mileage when cover is closed.
Stylish and Heavy-Duty Construction

The UltraGroove deck is constructed of a vinyl top layer bonded to heavy-duty aluminum slats. This ArmorTek deck looks like a soft tonneau cover with no visible seams, but has the strength and security of a hard tonneau cover. The rails are constructed of extruded aluminum with a black powder coat finish.
Security
The UltraGroove provides excellent protection for your cargo when used in conjunction with a closed and locked tailgate. Both the handle and pull strap are located underneath the rear plate, which makes them inaccessible when your truck bed is closed. The durable aluminum panels are better at preventing theft when compared with soft covers that can be cut or punctured with a knife. The panels are also more effective at preventing theft than a tri-fold hard tonneau cover because the panels cannot be pried open at any point along the rails.
No-Drill Installation
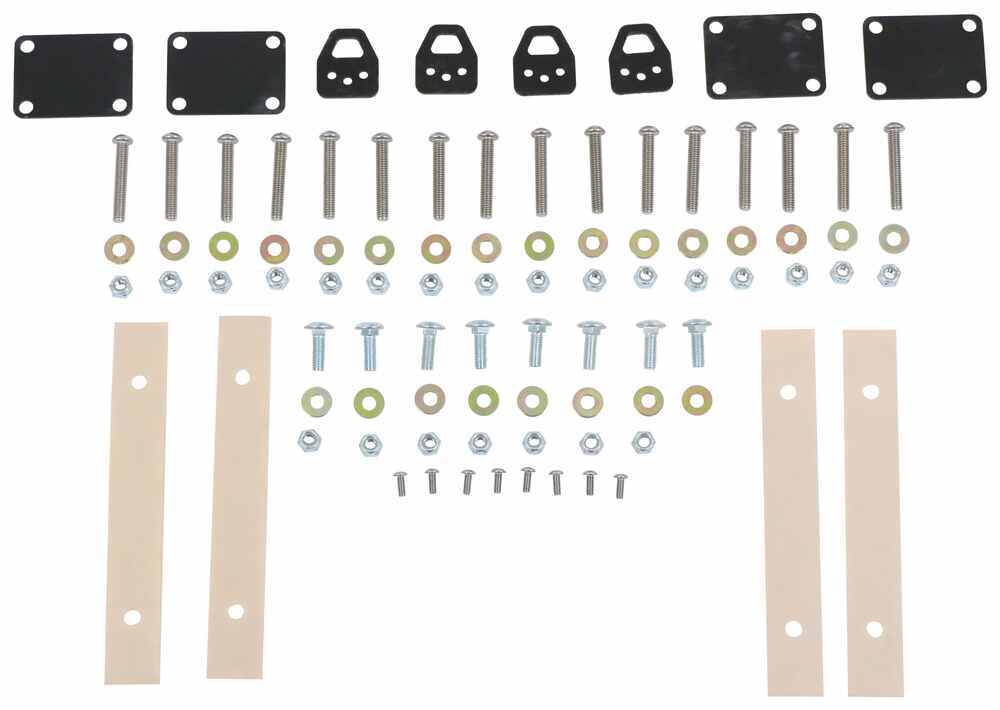
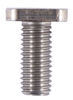
To install the cover, set the canister in your truck bed and support it with a box or other sturdy object. Slide the cover side rails into the canister until they are fully seated in the rail grips while also threading the cover into the channels in the rails. Secure the rails to the canister with bolts and washers.

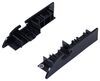
Attach the rails to the canister, then secure the rails to your truck's bed rails using 2 clamps per side. Slide the clamp onto the rail, flip the pivot arm up so it is under the bed rail lip, and tighten the clamp in place. Shims are included for trucks with tapered beds.
Each clamp at the tailgate end of the rails has a supplemental kickstand to help level the rails and prevent overtightening during installation. To install the kickstand, simply slide it into the grip handle at the bottom of the clamp. Rotate the kickstand so the foot rests squarely against the side wall of the truck bed, and tighten in place.
Mount the top cover plate to the canister with the included hardware. Install 2 drain tubes to the rear of the rails and 2 drain tubes to the canister. Route each tube out of the OEM drain holes in your truck bed.
To hold the pull strap off the floor of your truck bed, apply the adhesive hook-and-loop fastener strip onto the underside of a rail at your desired location.

To install the EL200 elevated ladder rack on the cover, secure the Thule square load bars to the uprights. Once assembled, bolt the uprights to the T-slots in the cover side rails.
ELD0101 EL200 Ladder Rack for Pace Edwards UltraGroove Truck Bed Covers - Dodge
KRDA24A55 Pace Edwards UltraGroove Hard Truck Bed Cover - Retractable - Aluminum - Matte Black
This Product Fits The Following Vehicles
- 2019 - 2024 Ram 1500 5-1/2 Foot Bed - without RamBox
California residents: click here


Video of Pace Edwards UltraGroove Retractable Tonneau Cover w Ladder Rack - Aluminum and Vinyl - Matte Black


Videos are provided as a guide only. Refer to manufacturer installation instructions and specs for complete information.


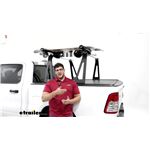
Video Transcript for Pace Edwards UltraGroove Retractable Tonneau Cover with Ladder Rack Review
Hi, I'm Matt with etrailer, and today we're gonna be talking about a Leer's Tonneau Cover with a Ladder Rack. So let's check out some of its features. So this is gonna be a great option for you of either one of two reasons. The first one is you're using this for recreational uses or you wanna put a tent on top and maybe some of your camping supplies under the tonneau cover because you don't want 'em getting wet, or you wanna use it for work purposes where you can put a longer ladder on top, and then put any supplies underneath the tonneau cover, anything like cement or tools. What makes the system stand out from amongst the competition is gonna be this built in T-track, and that built in T-track is specifically designed for this ladder rack. So you don't have to worry about figuring out any workarounds for getting a tonneau cover and a ladder rack to work together.
So this to cover is gonna be a canister style, so what that means is it's retractable. So that's gonna save you a lot of space and you don't have to worry about folding it up anywhere. You just gotta twist a knob underneath it, and then let this slide. (cover sliding) And if we see how it sits up here going from the top of our rails to the top of the tonneau cover, that's only gonna sit up an inch. So it's gonna be a very nice, clean design to your truck.
And with the design of this retractable tonneau cover, (cover clicking) I can actually pull it out just to a certain point and it'll lock into place, right about here. You'll have multiple spots to do that at 12-inch increments, and that's gonna be great if you want something just covered and something else not covered. So if I'm worried about the things in the back getting wet, I'll keep 'em in the back. But if I need to access something closer to my tailgate, I'll have that ability. And now we can take a closer look at the canister itself.
So let's put the tonneau cover completely in and take a look at it. The way this is designed is for that tonneau cover to roll up completely into that canister and keep it out of the elements. Now for how it's gonna sit in the back of your truck, if I go from the back of the tonneau canister to the front of it, it's only gonna take up about 13 inches. Now keep in mind you will have space underneath it, but that's gonna depend on the size of your bed and truck. And another measurement I'm gonna get is from the top of the tonneau cover to the bottom of our rails, or crossbars, and that's gonna be about two feet.
So that's gonna be able to work with most trucks, letting you see out of the back of your window. And taking a closer look at the outside of it, you notice we have this strip that goes along our rails, and what that's doing is preventing any water from getting in. You'll also have a strip on the backside and one against your tailgate. Now speaking about keeping water out, we're gonna have four drainage tools installed on this tonneau cover. As you can see, it's right here, you have two near your tailgate and these will go right into some factory holes you have on your bed. Now if you don't have any factory holes, you'll have to make some yourself. And then, we'll have two near the cab of the truck as well. And the way you extend your tonneau cover, you've probably seen me do it a few times, by pulling the strap. (cover clicking) And the way you're gonna secure this down to the back of your truck or by the tailgate end, is by using this hook-and-loop system. You just grab this one and find a random place where you'd like to put it, and just secure it down that way. And then, you'll just take this end and hook it onto there, just like that. And taking a closer look at the material of the tonneau cover, we're gonna have this black vinyl and it's gonna have that very sleek design to it. And then, the bars are gonna be made of aluminum, so they're gonna be weather resistant. Now if you are using this, this doesn't have a weight rating on it, but I don't recommend putting on anything too heavy on it. As you can see, it's already moving just with me tapping my fingers on it. It might be okay just to put your drink on it if you had to put it somewhere, or if you have any smaller tools, that should be fine too. Now we can take a closer look at the ladder rack too. We're gonna have this T-channel, like I said earlier, and that's how it's gonna secure down using some carriage bolts and nuts. And then, when that's secured, it's gonna extend up and connect to our crossbars. Taking a closer look at these crossbars, they're gonna be 65-inches long and they're gonna be a square bar design so they're great for clamp-on accessories like the ones we have on it right now. And, lastly, we're gonna have these load stops at the very end. They'll also have this built-in anchor point if you need to tie off anything like a kayak. And if you are using that rooftop tent, what I recommend is unbolting this, flipping it the other way so this hook at the top is facing down so you can extend that rooftop tent. Overall, like I said earlier, I think it is gonna be a great fit for anyone who plans on really using the top of the ladder rack, whether you are using it for work, for ladders, or lumber, or you wanna use it for recreational uses by putting a rooftop tent on top. And that tonneau cover is gonna be great for keeping things nice and dry and clean, especially if you have tools or any camping supplies in the back. Now if you want something that's gonna be a little bit more heavy duty, you can get a ladder rack that you can put on top of this tonneau cover and that's gonna be with the ones with overlanding bars with a weight capacity up to 400 pounds. Really the only difference between this dial and the overlanding bars is it's gonna have a T-track installed on it, so you can use T-track accessories on it too. And it's gonna sit a little bit lower. So if you have a truck with a taller cab, you just double check if it fits on or not. As for the installation, it was a little bit tedious and we did have to do some troubleshooting with it, but eventually we were able to get everything to fit on here very nicely. But if you need a hand with it, just stay tuned and we'll show you how to do it. To start off the installation, we're just gonna lay everything out. So we're gonna have the rails for the driver's side and passenger side. Along with that, we're gonna have our drain tubes. And we're gonna have our top cover foam and our clamp extensions, along with the hardware for it too. You're gonna have some recommended tools that says in your instructions, a utility knife, some masking tape, needle nose pliers, a Allen key, and Phillips screwdriver, and a socket and wrench. Now we don't have the tonneau canister over here at this moment since it is pretty large, but you'll see it in one of our next steps. Now we've got our tonneau cover out and you'll notice we have this plywood on either side, and we're gonna have to remove that. So you're gonna take a socket wrench, and that's gonna be a 3/8 one, and you're just gonna remove these bolts that are holding it in place. And you'll do the same thing for the other side. The next step is gonna be grabbing a friend and putting it in the bed of your truck. You can do this by yourself, but it is gonna be more difficult. When we are placing it in the bed, what's recommended is putting something inside so it has something to rest on. As you can see, we used some totes on either side to keep it elevated. Now we're gonna come over to the tailgate end of our bed and we're gonna grab one of our stake pockets. We're gonna remove this white plastic on the back of it, and then you're just gonna lay that over this hole. And with that covered, you'll just repeat that same process on the other side. Now we're gonna install the rails. And the way we wanna put this on, what I like to do is line it up with your own bed rails to make sure you've got the right one. We wanna make sure that this rounded edge is facing the tailgate side, and then we're gonna have a flat side too, and we want this facing your cab side. You're gonna have a passenger and a driver's side, so just make sure it fits around the contours of your bed rails. And once you have that done, we can start installing it onto the tonneau cover. What I like to do before I install this rail is you'll notice we have this tab at the very end of our tonneau cover. What you wanna do is push this in, so just out of the way, 'cause it's gonna catch on the rail if you try to install it. And then, you're gonna grab this rail. And if you notice we have this tab here, we wanna line that up with the gutters over here. We're gonna go in between the third and fourth one, so one, two, three, four, in between these two. Once it's lined up, I'm gonna push in and angle it until it catches. Once it's caught, we're gonna push, you might have to apply pressure from the backside. We wanna make sure this is flush and push against it. Sometimes you might have to come underneath, check if everything's fitting well. In my case, mine was a little bit off. Now that I've adjusted for that, I'm gonna push some more now. Now that I've pushed, I'm gonna tilt it. Once everything's looking flush and is caught on the edge of that rail, I'm gonna push it down until it's flush and push against until it makes it all the way across. You might have to push a little bit, and it's gonna stick out a little bit past the back of it. What we wanna do is make sure that underneath it's lined up with this hole where our bolt's gonna go through. And now we're gonna grab this bolt and run it up through there. We're just gonna use our Phillips screwdriver to get it on there all the way. Now we're gonna set the tonneau cover on top of our bed rails and so that's gonna involve moving those totes out. So I recommend grabbing a friend again to help you do that. So we're just gonna lift up, pull these boxes out, and let it rest. Our next step is gonna be grabbing our canister cover. So we're gonna come over to the tonneau cover itself, and we're gonna come over to this place where we're gonna make that connection screwing on our bolts. And if you take a closer look at this, this actually has the ability to go up and down. I'm gonna pull 'em both closest to me or down just so it's consistent on both sides. And then, I'm gonna grab that canister cover and place it on top of there. You wanna make sure that the holes are facing forward closest to our cab. And what we wanna do at this point is line everything up. Once it's lined up, we're gonna grab one of our black bolts and just lightly screw it in. We don't wanna screw it in all the way, because we're gonna wanna make some adjustments after this. And when both sides are loosely on, we're gonna pull on it all the way forward, make sure both sides are even. And then, we're gonna come over and look at the back, and see how we have this gap here that I can get my finger between, we wanna get rid of that and make it flush. And we wanna make sure both sides are even. And when both sides are flush, then we can tighten this down the rest of the way. We're gonna come over to our tailgate side now and you're gonna notice we have multiple notches. And what we wanna go to is this notch furthest away, or closest to our tailgate. I wanna grab this included tool, use this thin point we have on it, and we wanna make sure this is able to fit in between there and it's flush. We don't want it to be too far away. We have a gap and we don't want it to be too close either where you can't get it to fit under. So once you've adjusted that just by pulling on it, either side, the next step is gonna be installing this foam. And how we're gonna do that is by pulling back this tonneau cover. Now I'm gonna grab some masking tape, and this is gonna be used to mark where our tonneau cover was sitting. So now that we have this placed and I put this on the other side too, then we can pull this back some. Now when we have that gap, we can line up where this foam is gonna sit, 'cause this foam is used so it prevents any water from getting in. We're gonna lay out this foam on top of this sill. And when you're doing this, you're gonna remove this paper so it sticks to it and you don't have to worry about sliding around. But since we're just doing this for demonstrations today, we're just gonna lay it on top. And then, afterwards, when you have everything marked out, you're gonna come by with your utility knife and just cut this where it meets the end of the rail. And I'm just gonna lift up on this and place it on top of that foam, and I'm gonna line it back up with that tape. Now I wanna grab our clamp extenders and you wanna make sure you put these in the right locations. So FL is gonna go on the front-left, or your driver's side front, FR are gonna go on the front-right, front passenger. BL, for the back-left, and then BR for back-right. When installing the clamp extensions, we wanna make sure it's lined up with this rail underneath here. And we want this side clamp with that foam side facing towards the outside of your vehicle. Now when you are putting this on here, the directions want you to kind of slide it on or rotate it on like this. I find it easier if you just go to the very back and line it up with this rail underneath and slide it on. And sometimes it can be a little bit difficult because it'll catch. And if it does catch or if it's really hard to slide on, you can come underneath here to where that hole is and just loosen that bolt up just a little bit so you can slide it better. When you have it on here, you wanna push this, the back ones, the one closest to your tailgate, to this point where we meet this divot. And we wanna get right at the beginning of it, but not overlap it. Now when you're working on the front side, instead you're gonna push this extender all the way down past it to where it sits on the front side of it. Now we're gonna tighten this all the way, and to do that, we're gonna come to the front of this extender, we're gonna grab our 5/32 Allen key and find a hole at the very front of it, match it up to a bolt that's inside of it and tighten it. You'll wanna tighten this the rest of the way, and repeat that process for the rest of the extenders. Now we're gonna grab our clamp grips and you how you put this together is just by lining these two up until it slides in place like this. And now I'm gonna line up these two tabs and slide it on to the extension. And this can be a little bit tricky sometimes to get on. So the trick I like to do, if I'm having issues with it, I'll just remove the second half, slide this part on, and then come back around and slide that back half on. And with that in place, we're gonna grab our next items. And that's gonna be this knob with this bolt at the very end, along with this piece right here. And we're gonna align this to this rounded section here, slide that bolt through until this makes connection, and bolt them together. This is what's gonna apply that tension. And we make sure this is all the way tight, and then you repeat that process for the other ones. And now we're gonna install our kickstands. And you're gonna have two of these and they're both gonna go on the tailgate side. Now we're gonna have this bolt positioned where it goes through that hole right there. And the way we want this installed is we wanna make sure that this sits squarely and applies pressure to our bed wall. So to get it on there better, we're gonna put on these washers. And then, we're gonna come by with this wing nut and tighten this on first. And once this is nice and tight and that kickstand is positioned facing towards our bed wall, we're then gonna tighten that down. Need to get to the point where it won't tighten anymore. And at that point, you are good. Now we're gonna grab our drainage tube and the adapter that goes with it. And the way they're gonna connect is this is gonna screw on top of that tube. We're gonna come back over to our rails, you are gonna do this on both sides too. And underneath here there's a location that has a hole underneath it, that's where that water's gonna come out of. And you wanna make sure that you have the open side, line it up with those tabs until it slides on and clicks into place. And then, you're gonna run this tube through one of your factory openings. So this is a great location down here. If you don't have one, then you're gonna have to make one in a similar location to where this is. And just make sure you run it through and it sits flush with your vehicle. Now we're gonna install the drain tube on the cab side, and this is gonna be a little bit of a tight fit. But what you wanna do is grab this and make sure we have this, you wanna make sure we have this foam washer. And if you notice, we have these tabs on either side of this. And if we go underneath here, you'll notice that there's an opening with a circle and two taps on either side. So what you wanna do is line that up so it meets and fits in that. Once it's fitted in, then you're gonna make sure you take this tube and bring it over to one of the factory cutouts on your vehicle and push it through there. Now you might need to trim this if need be. Just be careful that you don't trim it too much. And then, after we have this side installed, you can go to the passenger side. Now we're gonna come over to our weather strips and we're gonna have our sweep seal at the very top, and underneath that one we're gonna have the wear strip. What we wanna do is use the UV lubricant that comes with your kit, and you're gonna lubricate underneath that sweep seal, and then on top of that wear strip. Now since we're just doing this for demonstrations, we won't be doing that today. But after when you've done that, then you're gonna fully open up your tonneau cover and make sure nothing bends in on itself. (cover clicking) And this is something we do wanna watch out for. So if we come over here, we'll notice this right here is bending in on itself just a little bit. And what you wanna do is come in, you can come in with a screwdriver and get underneath there to make sure this is flush. And the last part of the installation for the tonneau cover of this video is gonna be just inserting this hook-and-loop system. And how that's gonna work is you already have the one that's already attached to the top of the tonneau cover, which will then attach to this other one. And where you place this hook-and-loop system is your choice. We're just gonna place it somewhere on the inside of our bed closest to the tailgate so it's easy to access. Now moving over to our next step is gonna be installing our ladder rack. And so we're gonna lay out everything, we're gonna have our crossbars, the towers that go along with them, and then we're gonna have all the hardware along with the end caps. I'm gonna recommend some tools, just a few Allen keys, which I'll specify later on, and then some socket wrenches. Our first step is gonna be removing this bolt. We're just gonna twist it off. And once it's removed, we're gonna start taking this end cap apart. And to do that, you'll notice we have three tabs on it. So what you have to do is apply pressure to each one of those tabs so the centerpiece pops out. And with it popped out, you'll notice it's extended some. And what I like to do at this point is apply pressure with this bolt so it pops right off. Then you can take the bolt out and put these two pieces aside. Now I'm gonna grab that same bolt with this cylinder nut, put that cylinder nut behind like it was before, and bolt this nut on. And once this is hand tight, you're gonna grab a 7/16 socket and tighten it down some more. Then, at this point, you're stopped with that, and then torque it down the rest of the way as to what the manual recommends. And after you repeated that same process on the other three clamps, we're gonna grab our carriage bolts, there's gonna lead two per side, and we're gonna roughly place them on our T-track. And what I also recommend is grabbing that adhesive strip and lining it up with those bolts with the paper side up. And when this is in place, you'll repeat that same process on the other side. Now when we're installing the towers, we wanna make sure our vertical side on the front crossbars are closest to our cab, and it's gonna be the opposite direction for the ones on the rear side. Now we're gonna grab our towers and line 'em up with those two carriages bolts with the holes in the bottom of it and place it on. And with it on, we're gonna grab one of our washers, put it on the bolt. You do the same thing on the other side too. And then, wanna grab our nuts and thread them on just hand tight to start off with. Then we'll take our 1/2-inch socket and tighten the rest of the way. And what I recommend too, when you do have that socket wrench, I'd recommend grabbing the smaller one because this is gonna be a tight fit in here. Now we wanna take our crossbar and fit it through this hole we have on the side of the tower and slide it through until it reaches the other side. And when you have it on there all the way, what I recommend doing at this point is taking a tape measure, going from the tower to the end of the crossbar to get that overhang, and make sure it's even on both sides. Now we're gonna run these bolts through the top. And once all four of them are through, we're gonna take this square plate and push it up through the bottom. I like to put my palm on top so these bolts don't push out. And, next, we're gonna take a washer and push it up onto this bolt. The trick you can do is putting it on at an angle, like so, it'll hold itself up. And then, just hand threading this nut on. And once this is on there all the way or just at least hand-thread tight, then we can put the rest of them on. Now we're gonna take a 3/16 Allen key, put it on the top where we have a connection made. Once that connection's made, we're gonna go beneath and start tightening these bolts down with a 1/2-inch socket. (socket clicking) When both sides are tightened down on top, we're gonna come over to the end of it to put on these end caps. We're just gonna take this bolt, run it through and connect it to the hole on the backside. Hand tighten it at first. Once I get that first one started, I'll grab the second bolt and repeat the process. And then, I'm gonna grab our Allen key, and that's gonna be a 1/8, and tighten them down the rest of the way. And the last thing I recommend doing is just pulling that tonneau cover all the way out to make sure there's not any tight spots on it and it's fitting well. Another way you can tell this isn't fitting correctly is if you have any bowing on your crossbars. And if it is, then you need to loosen your bars up. And if you liked everything you saw today, that's just a look at the installation and some of the features of the Leer's Tonneau Cover and Ladder Rack Combo. Thanks for watching.
Customer Reviews
Pace Edwards UltraGroove Retractable Tonneau Cover w Ladder Rack - Aluminum and Vinyl - Matte Black - KRDA24A55-ELD0101
Average Customer Rating: 5.0 out of 5 stars (1 Customer Reviews)
Retractable tonneau cover with light-duty ladder rack lets you carry kayaks, surfboards, and other sports gear. Aluminum and vinyl deck has strength of a hard cover and seamless look of a soft cover. Offers enhanced cargo protection for your vehicle.by: David 03/09/2023
The bed cover, rack and communication was awesome. The printed instructions were a little difficult to understand so I looked at the installation video on the etrailer website which was much better. All in All, I was pleased!
1
1
See what our Experts say about this Pace Edwards Tonneau Covers
- Retractable Tonneau Cover And Ladder Rack For 2021 Ram 1500 5-1/2' Bed The Pace Edwards JackRabbit Retractable Hard Tonneau Cover w Explorer Rails # PE45CV fits your 2021 Ram 1500 5-1/2' bed without rambox. The built-in Explorer Rails are only compatible with Pace Edwards ladder racks such as the Pace Edwards Utility Rig Rack Truck Bed Ladder Rack # 311-UR3005. This ladder rack is not compatible with bike racks or any T-slot accessories since it doesn't have the T-slot channel. A better option is to use a tonneau cover ladder rack combo kit: Pace Edwards...
view full answer... - What Ladder Rack And Tonneau Cover Will Fit On My 2020 Ram 1500, 5 1/2 Foot Bed.The Pace Edwards UltraGroove Retractable Tonneau Cover w Ladder Rack - Aluminum and Vinyl - Matte Black # KRDA24A55-ELD0101 will fit your 2020 Ram 1500 with a 5 and a half foot bed. Custom-fit, retractable tonneau cover protects your cargo and your vehicle's bed from the elements and the light-duty ladder rack lets you carry up to 200 lbs of sports equipment or cargo above truck bed.
view full answer... - Ladder Rack and Tonneau Cover for a 2022 Ram 1500 w/ 5-1/2' Bed and No RamBoxI have the perfect solution for your 2022 Ram 1500 with 5-1/2' bed and no RamBox. The Pace Edwards UltraGroove Retractable Tonneau Cover w Ladder Rack # KRDA24A55-ELD0101 is confirmed to fit your truck. The # KRDA24A55-ELD0101 actually includes both the cover and ladder rack for your 2022 Ram 1500. This is made in the USA, has a no-drill installation and is designed to work together so you know for a fact that the cover and ladder rack are not going to interfere with each other.
view full answer...
Do you have a question about this Tonneau Cover?
Info for this part was:

Edited by:
Tyler C

Video Edited:
Joshua S

Updated by:
Wilson B

Updated by:
Matthew S

Updated by:
Mark S

Written by:
Erin H

Video by:
Samuel H

Test Fit:
Matthew B
At etrailer.com we provide the best information available about the products we sell. We take the quality of our information seriously so that you can get the right part the first time. Let us know if anything is missing or if you have any questions.
Product Experts Available Now!
Call 1-800-940-8924
Thank you! Your comment has been submitted successfully. You should be able to view your question/comment here within a few days.
Error submitting comment. Please try again momentarily.