
Yakima SightLine Roof Rack for Flush Rails - JetStream Crossbars - Aluminum - Silver - Qty 2
(8 reviews)
Price: $688.85
Yakima SightLine Roof Rack for Flush Rails - JetStream Crossbars - Aluminum - Silver - Qty 2
Item # Y99WB
Our Price: $688.85
Will this fit?
To see if this custom-fit item will work for you please tell us what vehicle you'll use it with.


- All Info
- Reviews (8)
- Q & A (0)
- Videos (10)
- Photos
Yakima Roof Rack - Y99WB
- Aero Bars
- Crossbars
- 70 Inch Bar Space
- Yakima
- Silver
- Overhang
- 2 Bars
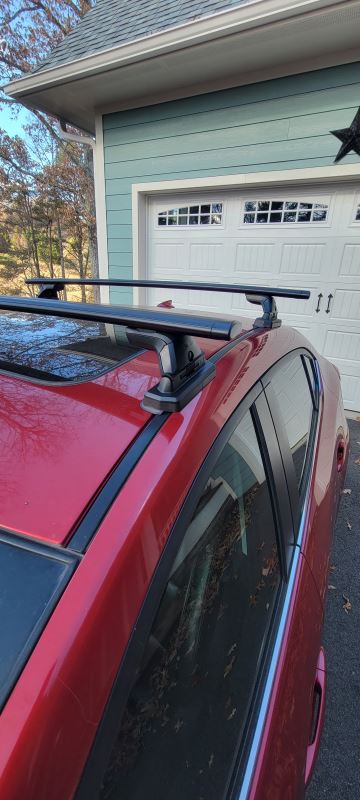
Extremely quiet, aerodynamic crossbars attach to Yakima towers to create a stylish roof rack for your vehicle. Rubber strips in T-slots push down to load carriers or accessories - no need to trim. Full-length aluminum bars maximize carrying capacity.
Features:
Yakima JetStream Crossbars - 70" Long - Silver - Qty 2:- Quiet, low-profile crossbars let you build an aftermarket roof rack for your vehicle
- Pair with Yakima towers and a fit kit to create a complete roof rack
- Asymmetrical JetFlow shape creates an extremely aerodynamic roof rack system
- Built-in WindRidges help control air flow over bars to dramatically reduce wind noise and vibration
- Aero-style bars reduce drag to help maintain fuel efficiency
- Full-length design maximizes space for carriers and accessories
- Versatile crossbars accommodate accessories that mount in the T-slots or clamp around the bars
- Works with most universal-mount bike, water, snow, and cargo carriers
- Rubber SmartFill strips in T-slots allow for easy installation of channel-mounted accessories
- Simply push down on the SmartFill strips to slide in accessories - no trimming required
- Bottom channels allow for easy installation on Yakima towers
- Fit BaseLine, RidgeLine, SkyLine, and TimberLine towers
- Etched measurements on bottoms of bars help center rack on your roof
- Lightweight aluminum bars are durable and rustproof
- Internal JetTruss extrusions provide exceptional bar strength
- Clear anodized alloy finish is corrosion resistant
Yakima SightClip 7:
- Custom-fit clips and pads allow you to mount 4 SightLine or RidgeLine towers on your vehicle with flush, factory side rails
- Inner and outer clips tighten together with a single bolt for even, secure grip on rails
- Snap into place on DropHooks inside towers
- Powder coated stainless steel clips are durable and rust resistant
- Molded rubber pads fit the contour of your side rails
- Clip onto bottoms of towers
- Protect side rails from scratches and abrasions
Yakima SightLine Towers - Qty 4:
- 4 Low-profile towers mount Yakima crossbars to your vehicle with flush, factory side rails
- Pair with 2 Yakima crossbars and SightClips or RidgeClips to create a complete roof rack
- Tower pitch can be adjusted 6 degrees forward and 6 degrees backward to level your crossbars
- Pivoting bases automatically adjust during installation to ensure towers are seated correctly
- Versatile BarBeds are curved to accommodate the elliptical shape of Yakima JetStream crossbars
- Safe and easy installation with included torque tool
- Clip holder adjusts on 3 axes for perfect fit on your flush rails
- SightClips or RidgeClips attach to hooks in tower assemblies and tighten together for even, secure grip on rails
- Torque tool clicks 3 times when clips are secure - eliminates fear of under- or over-tightening
- Lockable with Yakima Same Key System (SKS) lock cores (Y07204 - sold separately)
- Durable, weather-resistant stainless steel, glass-reinforced plastic, and elastomer construction
8000430 Yakima Jet Stream Cross Bars - Aluminum - 70" Long - Qty 2 - Silver
8006407 Custom Sight Clips and Pads for Yakima Sight Line and Ridge Line Towers
8001635 Yakima Sight Line Roof Rack Towers - Qty 4
Replaces Yakima RidgeLine Y00145
Video of Yakima SightLine Roof Rack for Flush Rails - JetStream Crossbars - Aluminum - Silver - Qty 2

Videos are provided as a guide only. Refer to manufacturer installation instructions and specs for complete information.


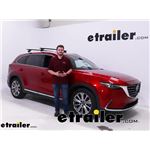
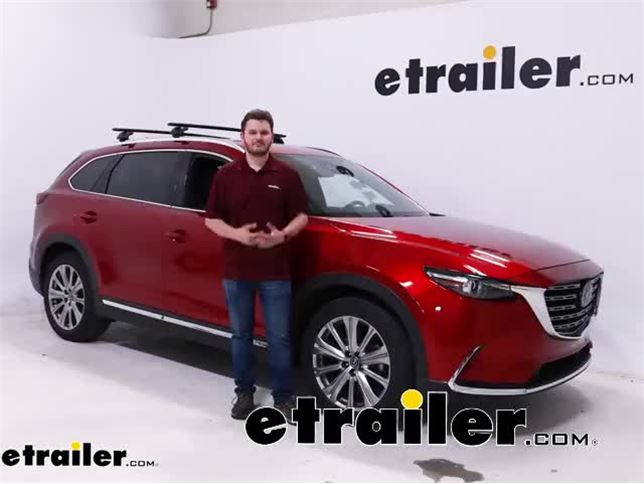
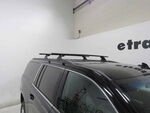
Video Transcript for Yakima JetStream Crossbars Roof Rack Installation - 2022 Mazda CX-9
Hey everybody. Cooper here at etrailer. Today we're going to be taking a look at our Yakima roof rack system and how to install it. It does come in three major components that we'll get into as we start to talk about 'em on our 2022 Mazda CX9. Now if you wanna carry around some of those longer items like skis or snowboards, maybe need some additional storage like your rooftop cargo basket, or just wanna keep some of those dirtier items outta your car like mulch or maybe fertilizer. The first thing we're going to need for all those accessories is a roof rack system.
The first component we're going to look at in our roof rack system is going to be our crossbar here. Now our crossbar is going to be the Jet Stream Yakima crossbar which just means it has this nice arrow design to it where kind of starts a little fatter in the front and tapers off towards the back. Now this is just to help with some of that wind drag and noise that usually comes with putting stuff on top of your roof. It's going to be made of aluminum, which just means it's going to stay lightweight and very rustproof as we take our roof rack through the elements. And we even do have a T track here up top and it's my favorite kind of T track where if you want to install accessory you just have to push it kind of down and set it to wherever you need.
We're not going to have to pull up our wind strip and cut it to different specs. A nice way that our crossbar does interact with our CX9 is that there is plenty of space here in case we wanna use any clamping accessories between our roof and our crossbar that they just fit right through. Don't have to worry about damaging your roof at all for that to clamp down. Also coming down to the bottom of the crossbar if you can see that there is no wind strip, your kit will come with one. But because there is no permanent installation on this we have opted not to put our wind strip in today.
Then it does fit nicely into our sightline tower here which is just what's going to be kind of the mid piece between our crossbar and our fit kit. It does have this plastic covering when you're all done. That just pops right off. Now all of our inner mechanisms and tie-down points are gonna be behind this guard which is kept in place by this plastic lock core which is just used by a flathead screwdriver to kind of unlock and lock. But you can replace this with the sand key system for Yakima, which is a metal lock core using a key in case you have any other Yakima products or just want to upgrade to a key system instead.
The last piece to talk about in terms of our overall roof rack system is going to be the fit kit which is going to sort of have that custom molding to our vehicle. You can see that there's a hole right here. There's actually one right behind our fit kit as well and there's a little piece of rubber that you'll be able to see during the install process that really helps secure it all down. And looking on the outside here too our clamp does kind of fit into a little ridge on top of our CX9 system. So overall it just allows our roof rack system to have a really secure and custom fit to our CX9. Speaking about our system overall, our crossbars are 50 inches here which I think do sit really nice and flush here with our CX9. But I think if you did want to go up to the next size just to get some more usable space if you have a lot of accessories you wanna carry around or just want more easable access to something like rooftop cargo bags, that would be possible. The only thing is remember as you go farther and farther out from your vehicle the more dangerous it is kind of getting in and out making sure you don't hit your head. Now the install process for this roof rack system is pretty involved. It might be a little time consuming but as long as you're patient and follow the step-by-step guides in the instruction you might still find yourself running to a couple of snags. But thankfully we're gonna show you how that install process works right now. Now the first thing we're gonna need to do is set up our legs so they can go onto our crossbars. Now this is how it's going to come out of the kit. So the first step is going to be that we're going to need to remove this outer shell here revealing its inner one, and we're going to go ahead and take our flathead screwdriver and unlock this which just does expose all of the internals. We're going to need to take our included Yakima tool and unscrew this right here. And that will reveal secret door that we're gonna point out later. And then we're gonna go ahead and unscrew this a little bit ahead of time because this is where we are going to set up our clamps on. And then if we flip this over we can see that this by unscrewing that first bolt this is the little secret door that we have revealed that is going to be for the top of this guy right here. We are going to go ahead and take our plastic piece here, kind of just make sure that it's centered up with that and then drop in this piece which is going to be what secures our leg to its crossbar. You just kind of have to jiggle that into place holding it in place, flipping this around and then taking our included Yakima tool and tightening it down just a little bit so that way they become secured to each other but not enough that we can't fit it into our crossbar. Now that our legs are ready we can install them on our crossbar. Looking at our crossbar we have an arrow crossbar here today which means it's gonna be a little bit fatter in the front and kind of taper off towards the back. That's going to be the easiest way to tell you which way is the front and back. But we're gonna go ahead and flip it over. And we went ahead and marked an arrow facing towards the front, which really helps us whenever we have to install using this crossbar. So if you're looking for something to help you out that could be a good idea as well. Taking off our end caps here on both sides we are then going to go ahead and grab one of our legs and then we are going to use the included measuring strips on here that you may or may not be able to see. They're kind of difficult. And then we are going to go ahead and take our included leg here, slide that in. And our measurement is 38 and seven eighths. So we're gonna go ahead and find that on our strip and making that measurement line up with the back of our leg. And now we can go ahead and take our include Yakima tool and tighten them down a little bit but we don't wanna tighten them down all the way 'cause we still need to set the pitch. So taking a look at the leg of our crossbar system we can see the little bolt down here. So what the pitch basically means is we go ahead and push our tower towards the front of our crossbar. This is going to be the A positioning, B is going to be with it kind of sitting in towards the center. And C is going to be if we move the bolt towards the back. Now the measurement here and the pitch can be different depending on the system and your vehicle specifically. So make sure that you are checking which ones you are going to need. And this case we are going to need the C so we're gonna go ahead and take our included tool and tighten it down in this position. Now with our legs installed, we're going to go ahead and put our pieces in that make up our fit kit. The first one is going to be this pad here that actually has the same number regardless of of it's the front crossbar, the back crossbar, left or right. They all have the same code on them. We're going to go ahead and take it, making sure that our arrow is pointing out of our crossbar and come to about the middle of our crossbar here where we'll be able to see where it's going to just clamp right down into place. You'll hear a little click. That'll let you know that you did that right. (click) The next one we are going to do is going to be one of the sides of our clamp and we need to go ahead and take our fingers real quick and remove the retaining clip right here. And then this guy should just slide right in. (clanging) But you may find yourself needing to loosen it up a little bit with that same bolt that we did earlier if it's giving you a little bit of trouble. (clanging) There we go. And then we should be able to fit our piece around those hooks down there and then when we give it a good tug up you'll notice that it is in place and then we'll go ahead and replace that back in. Now if we come over to the front you'll see a very similar system that we just go ahead and pinch and we'll have go ahead and loosen that up. And for this we actually want to tighten this bolt back down because we are going to be fitting this between this hole right here, which means that if we don't tighten down this bolt that our clip is not going to be able to get past that. The process is going to be the same over on this side here. I did just wanna go ahead and point out that our clip here, R9, is going to be the one that sits inside our inner crossbar and our clip R14 is going to be the one that sits outside of our crossbar. which is designated in the instruction manual. Now that our crossbar is ready to go we're gonna have to know where to put it. So by taking a soft tape measure we're going to start at the front of our front crossbar. And since we already took measurement out of our construction manual we're gonna know that that's 28 inches. We're gonna go ahead and mark that. And then reaching over here to zero, we know that this is going to be where the front of our rear crossbar starts. Now your kit is going to come with some stickers to temporarily place here for you to mark that, but since we don't have those, I'm just gonna go ahead and make a little mark with my finger knowing that's where the spot is that I have to come back to. One nice thing about our crossbar system is that one of our clamps here has a little bit of a nub on it that will actually fit into one of the holes on our rail system. So that's just nice to know as kind of a secondary measurement that you know you're placing your rails in the correct spot. And try to line it up with your mark the best you can. But make sure that you go ahead and check the other side, make that measurement, and maybe double check your measurement over here after you move that side a little bit to make sure that you didn't accidentally move your first side. Now that we've checked the measurement for our crossbars on both sides and know they're in the correct place we can go ahead and tighten them down. Now if you are doing this by yourself, you wanna go ahead and choose one side and maybe only tighten it down about 50%, then go around to the other side and do that kind of back and forth increasing in value because if you do it completely on one side, you'll end up pulling your system all one way. And we don't want that. We want it to be evenly distributed. So we are gonna go ahead and just tighten this down a little bit, until maybe we can start to feel some of that resistance. And we'll know once we are at the correct setting because our included tool is actually a torque tool, which will not allow us to tighten down anymore once we are at that appropriate setting. Now that our roof rack system is in place we're gonna go ahead and put all our covers back. The first one is going to loop around this little point right here. And swing around. There you go. And once you have that in place, we're gonna go ahead and take our flathead screwdriver that we used earlier to lock that into place. So putting our final caps on, this one just fits right on the front, (snapping) and snaps right into place. And then do not forget the one on your crossbars. And then go ahead and make sure you do this for all four of 'em and then go hit the road. Now overall I do think our Yakima roof rack system looks pretty good on our 2022 Mazda CX9. Once it's up there, I think it looks very sleek and it'll help you carry around some of those additional accessories that you're wanting to. The installation process, like we said before, is pretty involved and can be tricky at times, but if it's something that you find yourself just setting up or getting on your roof and never having to take off, it's not that big of a deal that it's only gonna be that first time installation, really setting everything up that's kind of a pain in the butt. But once you get through all that I think that's a really good option for us. But that was a look today here at our Yakima Roof Rack System on our 2022 Mazda CX9. My name's Cooper and thanks for watching.
Customer Reviews
Yakima SightLine Roof Rack for Flush Rails - JetStream Crossbars - Aluminum - Silver - Qty 2 - Y99WB
Average Customer Rating: 5.0 out of 5 stars (8 Customer Reviews)
Extremely quiet, aerodynamic crossbars attach to Yakima towers to create a stylish roof rack for your vehicle. Rubber strips in T-slots push down to load carriers or accessories - no need to trim. Full-length aluminum bars maximize carrying capacity.by: Jonathan05/24/2024
Works well, after getting them in place. On my Kia Sorrento it's very tricky to get the towers to fit the holes in the factory rails -- takes a lot of loosening and readjusting the bars.
by: Tim 10/18/2023
One quick phone call and Gwendolyn figured out exactly what I needed for our new car to use my old Yakima rack.
by: Adam K05/14/2023
Pretty straight forward installation. Instructions were easy to follow.
by: Nicholas07/11/2023
Order was easy to place and delivered in less than a week as promised. The sales advice was perfect fit despite multiple pieces having been ordered. Used the rack once and very sturdy
by: snowman5306/30/2017
As usual, Yakima quality and design are unsurpassed. Easy to mount as well. I have not used them as much as I expected for two reasons. On my pickup they are way up there. Need a ladder to access them. Also, the carwash I use requires that they be removed. So, I leave them off for the most part.
by: Mark06/30/2023
Works as expected and feels solid
by: George05/29/2024
by: Scott 05/20/2024
by: Frederick 01/13/2024
by: Gary 09/02/2023
by: Kelley 05/03/2021
by: Paul06/01/2023
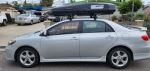
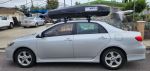
Yakima Baseline with Yakima CBX 18 Cargo Box fitted on my 2012 Toyota Corolla S Sedan 2012.
Instructions were clear and roof rack was easily installed.


by: Alvin04/17/2024
Super happy with my purchase from e trailers purchased yakima roof rack. Knowledgeable sales rep.Help me through the process on purchasing my roof rack Recommended to anyone quality parts


by: Frank02/10/2023
Not a bad setup. I dont believe you need the 60" bars i received as they hang over the edge of your Hyundai. You need to watch your head getting in and out of your vehicle. The Jetstream crossbars are very loud at speeds over 65 mph. Im probably used to it by now, but it is definitely noticeable. Much louder than an older Rhino Rack of similar dimensions i had. Install was simple and took about 30 minutes, just take your time and measure correctly like all roof racks.


by: Dave02/11/2024
Love my Yakima roof rack!! It exceeds my expectations.great product. Also thank etrailer for the tec support! great staff always there to help thanks again!!
by: Stephan02/03/2024
The SightClips with bases were very easy to use with my Yakima Ridgeline Roof Towers. When the towers are loosened and off of the vehicle the clips can come off, but it is really no big deal. I just take the off when not using the rack. When I put the the rack back on I only put the inner clips on before putting the rack on the roof. Then I add the outer clips and snug everything down. It is much easier that way.
by: John11/16/2023
For a 2015 Mazda 3, 4 door sedan.
I used the 50" jetstream bars with the skyline towers and the #22 Landing Pads.
Went together easy, great quality, very solid feeling! And, easy to remove and install when needed.


by: Vannack01/04/2020
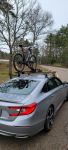
I chose Yakima because I had one in the past and they were always reliable. Thule was my next choice but didn’t like the look of 53’ crossbars on my car. I really appreciated the easy to follow instruction that made installation a breeze. The kit came complete with everything I needed to install right out of the box. I purchased the 2 Hightower bike racks to go with the roof rack system and plan to safely secure both bikes for our trips. It was a bit heavier than I anticipated (combined with the bike carriers) which will hurt my MPG but having easy access to disassemble the bike carriers when not in use made it a no brained. Additionally, I love the look of the system on my car.

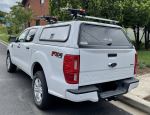
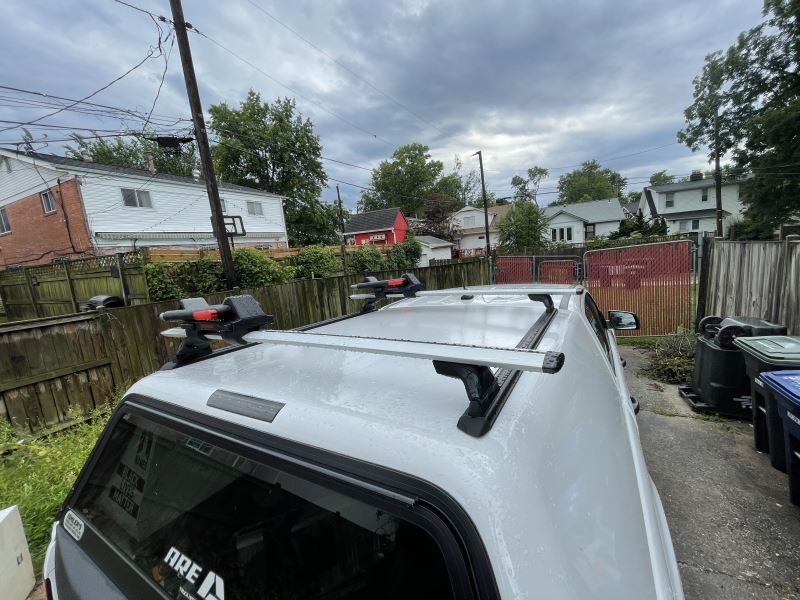
by: MB07/12/2021
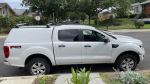
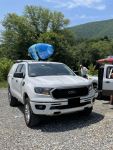
The 50” jetstream cross bars were perfect for my 2019 Ford Ranger with my ARE cap. They are paired with the Yakima Skyline towers and appropriate landing pads (protip: call etrailer when you order to ensure you have the correct setup;)
These cross bars are SILENT on my cap. Zero wind noise. My daughter and I installed them on a Friday (I do recommend watching etrailer’s installation video in addition to the paper instructions) and left for a 700 mile weekend road trip the next day to pick up a kayak, paddle with friends downstate then drop her off at summer camp.
Even with empty Yakima Jaylows on top, no wind noise. Even with a boat in the Jaylows, no wind noise.
These are the sweetest rack’s I’ve had. With the Skyline towers and landing pads, they are also easy to take off and put on. Click click done.
They look good, too;)
etrailer customer service for the win, too. When I originally ordered, I did not order all the items I needed for installation. When I realized this, I called and they got me squared away.


by: Elliott08/04/2018
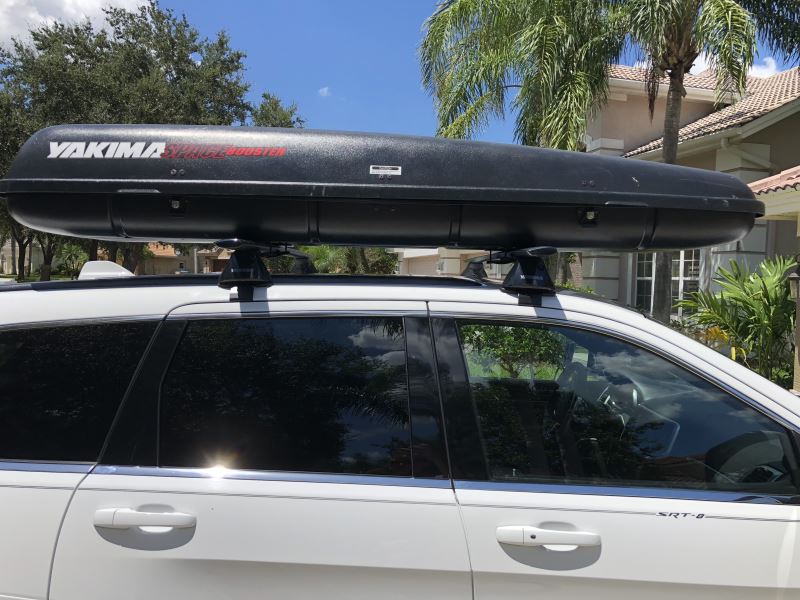
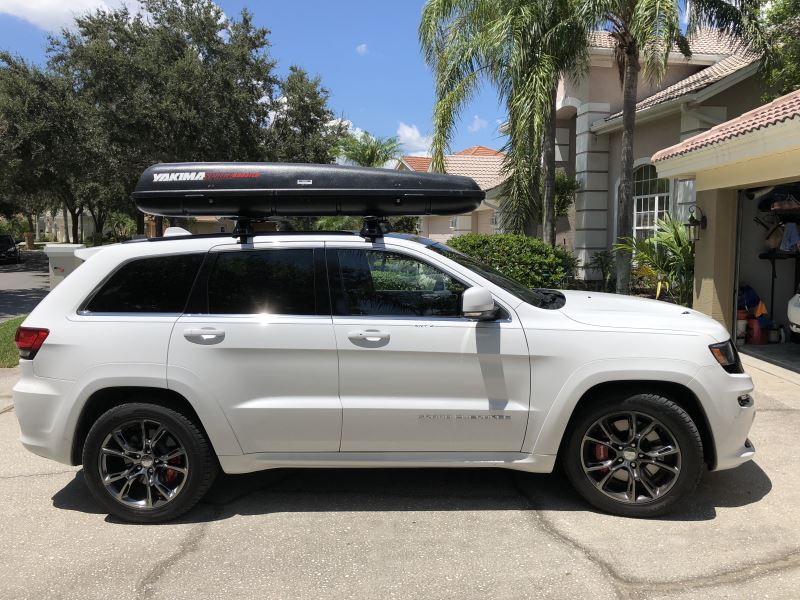
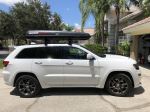
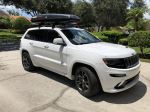
I have a 2015 Jeep Grand Cherokee SRT which has the non-functional roof side bars. Etrailer.com helped me figure this out and gave me several options that would work. As I already have Yakima bike racks - I wanted to stick with the brand. The price on etrailer.com was the same as Yakima but had free shipping and no tax - awesome. Product arrived quickly!
I went with the Yakima 60" Jetstream cross bars, baseline towers, and the appropriate pads and clips.
The Yakima product came with thorough and easy to understand instructions. I was able to get the track installed and working in about an hour - and that was taking it slow and double checking everything. I was very pleased with the fit and finish.
After a test run, there was no wind noise or issue with the rack. Looking forward to taking a road trip next month with it!


by: Josh 04/15/2017
The yakima jetstream crossbar looks beautiful. Quality is great. Took my vehicle for a test drive, and i didnt hear anything loose or broken from the bars. Very satisfied with the product and the instructions were great. It was my first time installing a roof rack too.


by: Rod12/05/2021
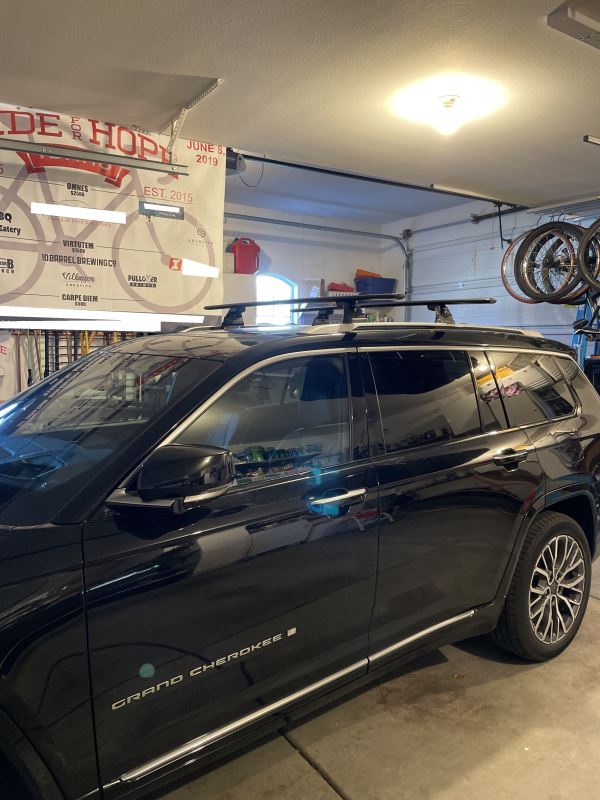
Product exactly as expected. Quality bars. Using on a 2021 Jeep Grand Cherokee L. Looks great installed. Little to no wind noise. And, as usual, top notch service by the etrailer crew! Have purchased several items from etrailer over the past 10 years and have always been impressed by how timely they are and how responsive and helpful they have been regarding product questions. They are absolutely the first merchant I go to when shopping on line!

by: Ronnie A.07/20/2017
I recently purchased a rack system for my 1979 Ford Bronco to haul our new Kayaks. And believe me it was not easy to "fit" a vehicle as old as this.
I had some interesting challenges - my truck has a 3" lift and only clears my garage entrance by about 1.5 inches, so whatever I got had to be easily removable (at least in the front). I also wanted it to be multi functional so that I could carry other stuff as well, and the Yakima/Thule systems are great for that. Lastly, I wanted whatever I put on the truck to look good as I have put a lot of time and $ into fixing up this old truck and I didn't want it to look cheezey.....
Thanks to the good folks at etrailer I ended up with somewhat of a hybrid approach (my choice) but it worked out exactly as I envisioned it. I purchased the Thule Xsporter Pro system for the rear which works well with only minor modifications to the truck. I can lower it easily so I can get the truck into the garage without removing the system altogether. I really like that the tailgate is still functional with the system installed as some others I had in mind were bumper or hitch attached and would not allow use of the tailgate.... And, lastly it looks nice enough to just leave it on all the time.
On the front I chose the Yakima JetStream cross bar held up by a pair of Yakima SkyLine Towers and Landing Pads which I chose because I can easily remove the crossbar/towers to get the truck into my garage. The Landing Pads have covers for when not in use and are small enough to not be too noticeable.
I also added the security locks for peace of mind.
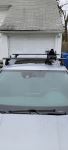
I have added 3 pictures, the first shows the Landing Pads without the towers & crossbar. You can also see the Xsporter Pro on the rear in its lowered position. The 2nd shot is a closeup of the Skyline Tower. The 3rd picture shows the entire system installed ready for my kayaks (or whatever).
Thanks again to the folks at etrailer for their expert advice and customer service.


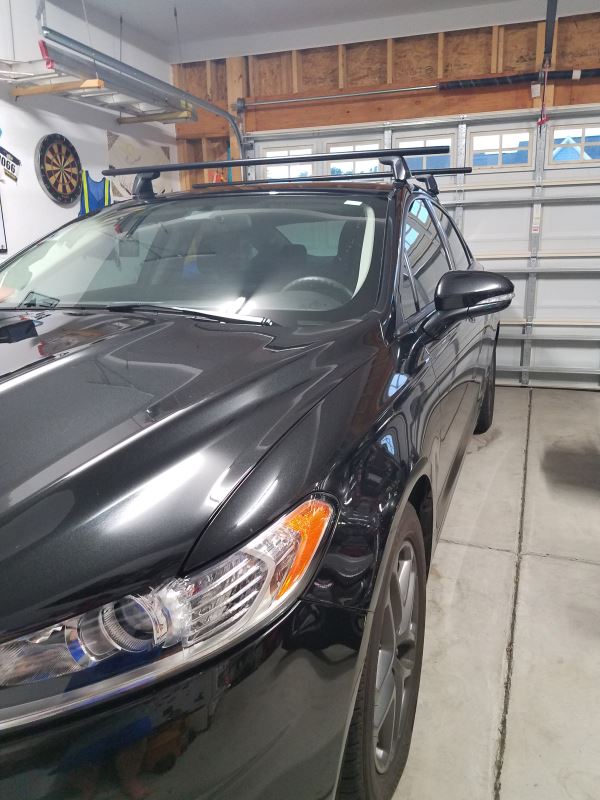
by: John 08/31/2017
The Yakima rack system for my 2015 Ford Fusion is an awesome product! I hadn't needed to buy aftermarket racks in many years. These are a super solid, beefy, and very well made product. I am very impressed with the quality and fit. Yakima has obviously put lots of design time into them. And etrailer does an outstanding job of making sure you get the right product for your specific need.
I chose this rack specifically because of the spread between the bars - 32" - and for the higher weight limit, as I'm carrying a fishing kayak.


by: Andrew07/17/2020
The installation was super easy, and despite a long time stuck in shipping the delivery itself was extremely fast, and the package arrived in spotless condition. The manuals were very easy to follow, and the end result is absolutely amazing. I love that there's a rubber piece in the top rail that doesn't need to be cut, which makes it a very flush and smooth fit. I also love the modularity and the weight that it can handle, especially for the stuff i plan on carrying.

25
388
Show More Reviews
See what our Experts say about this Yakima Roof Rack
- What Are the Dimensions of the Yakima BaseLine Towers With the Crossbars and BaseClipKason, the BaseLine Towers for Yakima Crossbars # Y28TR (4") paired with the BaseClip Fit Kit # Y27FR & # Y06124 (1"), and the Yakima JetStream Crossbars # Y00430 will leave you with approximately 6 1/2" from the top of crossbar to the top of your roof. You can take an inch and an eighth off that to get the measurement from roof to the bottom of the crossbar so that'd be 5 3/8".
view full answer... - Will Rhino-Rack Crossbars Fit On Yakima BaseLine Towers? The top channel on most crossbars like the Rhino-Rack and Yakima are similar but you should never mix and match towers and crossbars between different manufacturers. Their components are designed to work specifically with each other and your Yakima towers may not work properly with the Rhino-Rack crossbars. Instead you will want to stay with the Yakima crossbars from the list below to ensure they fit together properly and you have a manufacturer who will stand behind the warranty for the...
view full answer... - Recommended Roof Rack for a 2022 Ford Escape With Factory RailsThe roof rack that I recommend for your 2022 Ford Escape with Factory rails is the 2022 Ford Escape Roof Rack by Yakima which consists of: - Yakima JetStream Crossbars # Y00425 - SightLine Towers for Yakima Crossbars # Y64AR - SightClip Fit Kit for Yakima SightLine Roof Rack Towers # Y36AR This would provide you with a roof rack that fits your 2022 Ford Escape and would allow you to use both clamp-on and channel mounted accessories. It has a weight capacity of 165 lbs. and an aerodynamic...
view full answer... - Recommended Yakima Roof Rack for 2020 Kia Sorento with Flush Side Rails and Panoramic RoofThe Yakima roof rack I recommend for a 2020 Kia Sorento with flush side rails and panoramic roof is the Yakima JetStream Crossbar System part # Y00425, part # Y64AR, and part # Y06013. This system will give you plenty of real estate to mount roof mount accessories, aero shaped crossbars which are very quiet, and a custom fit with sleek finished install look.
view full answer... - Availability Of Trailer Hitch For 2023 Kia Soul GT-Line With Center ExhaustIf you need to carry cargo with your Kia Soul, I do have a few potential solutions for you. I will tell you there is not a trailer hitch available anywhere that will fit the center exhaust model at this time (July 2023). The receiver would go exactly where the exhaust sits and there is no way to work around that. If your goal was to carry a few bikes we could set you up with a trunk mount bike rack like the Malone hanger # MPG2139. This can carry 3 bikes weighing up to 33 lbs apiece and...
view full answer... - Will 2 of The Yakima JayLow Kayak Carriers Fit On Roof of a 2022 Hyundai Palisade?Yes, you are going to be able to use 2 of the Yakima JayLow Kayak Roof Racks # Y04073 with either the Thule Edge or Yakima Sightline FX kits listed below. Personally with the height of your 2022 Hyundai Palisade I would go with the more standard Thule EVO or Yakima Sightline kits which have the crossbar extending out further. This will also allow for the use of a Load Assist # RR-RUSL so you are less likely to drop your heavy kayak both when loading and unloading. Thule Edge Crossbars...
view full answer... - Recommended Roof Rack for a 2022 GMC Yukon XLYes, we do. The best roof rack for your 2022 GMC Yukon XL is going to be the roof rack by Yakima and it includes the following parts: Yakima JetStream Crossbars - Aluminum - Black - 60" Long - Qty 2 item # Y00426 SightLine Towers for Yakima Crossbars - Flush Side Rails - Qty 4 item # Y64AR SightClip Fit Kit for Yakima SightLine and RidgeLine Roof Rack Towers item # Y44UV This roof rack will attach directly to your Yukon's flush side rails. It has a 165 lbs capacity. I have linked an...
view full answer...
- Yakima SightClip Fit Kit For 2023 Mazda CX-5 With Flush Side RailsFor your 2023 Mazda CX-5 with flush side rails, the correct Yakima SightClip Fit Kit is the SightClip Fit Kit for Yakima SightLine and RidgeLine Roof Rack Towers # Y39AR. You will also need the SightLine Towers for Yakima Crossbars - Flush Side Rails # Y64AR and Yakima JetStream Crossbars # Y00425.
view full answer... - Recommended Bike Rack For A Turbo Vado SL On A 2021 Kia Niro PHEV Hi James, Even with your e-bike weighing only 38lbs the compatible trunk-mounted bike racks for your 2021 Kia Niro PHEV unfortunately just aren't going to have enough capacity. Even though you'd only be using one of the spots on the rack the extra weight is going to wear on the rack and eventually break it and you'd be without a warranty. Instead you'll need a roof rack: Yakima JetStream Crossbars - Aluminum - Black - 50" Long - Qty 2 # Y00425 SightLine Towers for Yakima Crossbars - Flush...
view full answer... - Roof Rack System for Thule Hullavator Pro Load Assist Kayak CarrierBoth the Thule Hullavator # TH898 and the Yakima ShowDown # Y04081 are great kayak carriers but I prefer the Hullavator. Regardless of age, after a day of paddling the lift assist is awesome when it comes to helping you load your boat on top of your roof. You do need 4"-8" of overhang on your roof rack for this carrier to work. Your current roof rack on your 2010 Infiniti QX56 will not work. The only confirmed fit for your vehicle is a Thule Roof Rack system like Thule WingBar Evo Crossbars...
view full answer... - Roof Rack Recommendation for a 2020 Kia Telluride with Factory RailsWhen Thule discontinued the old square bars, they unfortunately stopped manufacturing the compatible roof rack feet, so there won't be a Thule fit kit that would be compatible with the vehicle and your Telluride. At present, Yakima is the only manufacturer offering a roof rack fit for the 2020 Kia Telluride. The kit you'll need will depend on whether your vehicle has the side rails that run along the edge of the roof, front to back. For the raised side rails, you can assemble a rack using...
view full answer... - Best Way to Carry Two Kayaks on 2019 Mazda CX-5 With Flush Side RailsWe do have a solution for you, but for your 2019 Mazda CX-5, the issue isn't only actually the weight capacity of the roof, it is that there is no way to fit a combination of the Thule Hullavator Pro Kayak Carrier # TH898 with the Yakima ShowDown Kayak Carrier # Y04081 (or two of either carrier) on any roof rack for your 2019 CX-5 because they take up far too much space on your crossbars. Additionally, there isn't enough space on roof rack crossbars for a '19 CX-5 to fit both a Hullavator/ShowDown...
view full answer...
- Recommended Roof Rack for a 2022 Kia Soul that has Flush Mounted Rails that Run Front to BackThe roof rack that I recommend for your 2022 Kia Soul with flush mounted rails that run front to back is the 2022 Kia Soul Roof Rack by Yakima. This roof rack consists of: - Yakima JetStream Crossbars # Y00425 - SightLine Towers for Yakima Crossbars # Y64AR - SightClip Fit Kit for Yakima SightLine Roof Rack Towers # Y94UR You can also add the Yakima Same Key System (SKS) Lock Cores # Y07204 to secure your roof rack to the roof of your Soul.
view full answer... - How to Add Crossbars to a 2024 Honda CR-V w/ Flush Roof RailsYes, we do! To add a set of crossbars to the flush mounted rails on your 2024 Honda CR-V, I recommend the roof rack by Yakima which includes the following parts: Yakima JetStream Crossbars - Aluminum - Black - 50" Long - Qty 2 item # Y00425 SightLine Towers for Yakima Crossbars - Flush Side Rails - Qty 4 item # Y64AR SightClip Fit Kit for Yakima SightLine and RidgeLine Roof Rack Towers item # Y44UR
view full answer... - 2021 Kia Telluride With Flush Rails and 70 Inch Yakima JetStream CrossbarsWe only carry the Yakima JetStream Crossbars at 70" length in black as part # Y00427. The SightLine Towers are # Y64AR and a confirmed fit for your 2021 Kia Telluride. The Fit Kit is # Y34UR. You can also add theft-deterring locks with part # Y07204.
view full answer... - Yakima Roundbar Roof Rack For 2018 Subaru Outback TouringYakima does have a round bar roof rack that fits your 2018 Subaru Outback Touring; the correct bar size is the 48 inch bars part # Y00408. The towers you'd need are the SightLine # Y64AR, with round bar adapter # Y03536, and Fit Kit # Y32CR.
view full answer... - How to Transport 3 Bikes 1 E-Bike with a 2018 Subaru Outback WagonI do have a recommendation for you, but with your specific bike rack needs you don't be able to use your 1-1/4" trailer hitch on your 2018 Subaru Outback Wagon to carry all 3 bikes. Either the bike rack is way too heavy and requires a 2" receiver, like the Draw-Tite # 76227, or it doesn't have the attachment option you need, plus the weight capacity for your heavier bike. For your application you'll need to use a hitch bike rack and a roof mounted bike rack. The hitch mount bike rack I...
view full answer... - Can I Open Trunk of 2020 Volvo XC90 With Thule Force XT Rooftop Box?While we haven't test fit the Thule Force XT XL Rooftop Box # TH6358B on a 2020 Volvo XC90, I believe it will fit based off the measurements of your vehicle. You can measure yourself to make sure too if you like. Let's use the Yakima Roof Rack System fitted for your vehicle with parts # Y00425, # Y64AR, # Y67AR. When the bars are mounted to the fixed points on your roof, there is a distance of 58" from your front bar to your hatch. The hatch clearance required is only 51-1/8" so based...
view full answer... - Parts Needed to Add a Yakima Jetstream Roof Rack to a 2024 Cadillac Escalade w/ Roof Rails I would be happy to! To install a Yakima roof rack to the rails on your 2024 Cadillac Escalade you will need the following parts: Yakima JetStream Crossbars - Aluminum - Black - 60" Long - Qty 2 item # Y00426 SightLine Towers for Yakima Crossbars - Flush Side Rails - Qty 4 item # Y64AR SightClip Fit Kit for Yakima SightLine and RidgeLine Roof Rack Towers item # Y44UV This aero bar roof rack system has a 165 lbs capacity. I recommend adding the Yakima Same Key System item # Y07204 to...
view full answer... - Platform Roof Rack Available For a 2022 GMC Yukon XL DenaliRyan, currently I do not see that Rhino-Rack has any options for your 2022 GMC Yukon XL Denali. We do have the Yakima HD Crossbars # Y01157, Towers # Y64AR and Fit Kit # Y44UV which would allow you to use the LockNLoad Platform Rack # Y45UV.
view full answer... - Recommended Roof Rack for a 2024 Kia Niro EV w/ Flush RailsI sure can! To add a roof rack to the flush rails on your 2024 Kia Niro EV, I recommend the roof rack by Yakima which includes the following parts: Yakima JetStream Crossbars - Aluminum - Black - 50" Long - Qty 2 item # Y00425 SightLine Towers for Yakima Crossbars - Flush Side Rails - Qty 4 item # Y64AR SightClip Fit Kit for Yakima SightLine and RidgeLine Roof Rack Towers item # Y27AR This aero bar roof rack system has a 165 lbs capacity. I recommend adding the Yakima Same Key System...
view full answer... - Can Lock Cores Be Installed on SightLine Towers for Yakima CrossbarsYes, the SightLine Towers for Yakima Crossbars # Y64AR can be locked with the Lock Core Kit # Y07204. Yakima changed the design slightly and there are 3 pieces to this tower system (as opposed to the normal 2), with the middle piece being the part that the lock core installs on. This gives you a much cleaner aesthetic while still providing security to your roof rack.
view full answer...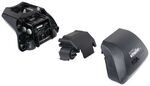
- Can Thule AeroBlade Edge Cross Bars Be Used On a 2023 Kia Niro Or What Option Is ThereI contacted the manufacturer and there is not an option that will allow you to use the Thule AeroBlade Edge Crossbars on your 2023 Kia Niro. The Fit Kit for Thule Evo Flush Roof Rack Feet # TH57JV you asked about, which works with the Evo Flush Rail Feet for Thule Crossbars # TH710601 does work with the AeroBlade crossbars but they do not work with your 2023 Kia Niro. We do not currently have an option from Thule for your 2023 Kia Niro, but we do have an option from Yakima. 2023 Kia...
view full answer... - Will Roof Rack Work with a 2020 BMW X3 with a SunroofIf Thule warns against using the Thule AeroBlade Edge Roof Rack on your 2020 BMW X3 with a sunroof, then I will second them. Instead, I recommend going with a system that has been shown to work with your sunroof. It's the Yakima Roof Rack. The crossbars are the JetStream Crossbars, part # Y00425. The towers are the SightLine Towers, part # Y64AR. The fit clip is part # Y62CR.
view full answer... - Height of JetStream Roof Rack and LockNLoad Platform on a 2024 Kia Telluride with Flush RailsThe Yakima JetStream roof rack will add about 4-1/2" to the height of your 2024 Kia Telluride, and then the Yakima LockNLoad # Y05045-39 sits about 2-3/4" tall so you're looking at 7-1/4" overall. Here are the parts you need to accomplish this: JetStream Roof Rack - 50" JetStream Crossbars # Y00425 - SightLine Towers # Y64AR - SightClip Fit Kit # Y34UR - Lock Core Kit # Y07204 (optional) - 60" x 54" Yakima LockNLoad # Y05045-39
view full answer... - Will the Rhino-Rack Roof Rack Legs-Gutter Mount Fit a 2014 Hyundai Santa Fe with Flush Mount RailsNo, the Rhino-Rack Roof Rack Legs # RRRL150GMC-2 will not work with the flush mount rails on your 2014 Hyundai Santa Fe. The # RRRL150GMC-2 is a gutter mount style, which is different from flush mount rails. If you are needing a roof rack for your Santa Fe with flush mount side rails, I recommend the 2014 Hyundai Santa Fe Roof Rack by Yakima which consists of: - Yakima JetStream Crossbars # Y00426 - SightLine Towers for Yakima Crossbars # Y64AR - SightClip Fit Kit for Yakima SightLine...
view full answer...
Do you have a question about this Roof Rack?
Info for this part was:

Edited by:
Daron K

Written by:
Alex H
At etrailer.com we provide the best information available about the products we sell. We take the quality of our information seriously so that you can get the right part the first time. Let us know if anything is missing or if you have any questions.
Thank you! Your comment has been submitted successfully. You should be able to view your question/comment here within a few days.
Error submitting comment. Please try again momentarily.