
THIS ITEM IS NOT A FIT FOR
2019 Ford F-250 Super Duty
Custom Fit Roof Rack Kit With INK680 | INXB108 | INXB115 | INXS200
Item # IN77CR
Our Price: $485.96
2019 Ford F-250 Super Duty
Will this fit?
To see if this custom-fit item will work for you please tell us what vehicle you'll use it with.
In Stock


- All Info
- Reviews (95)
- Q & A (0)
- Videos (40)
- Photos
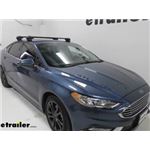
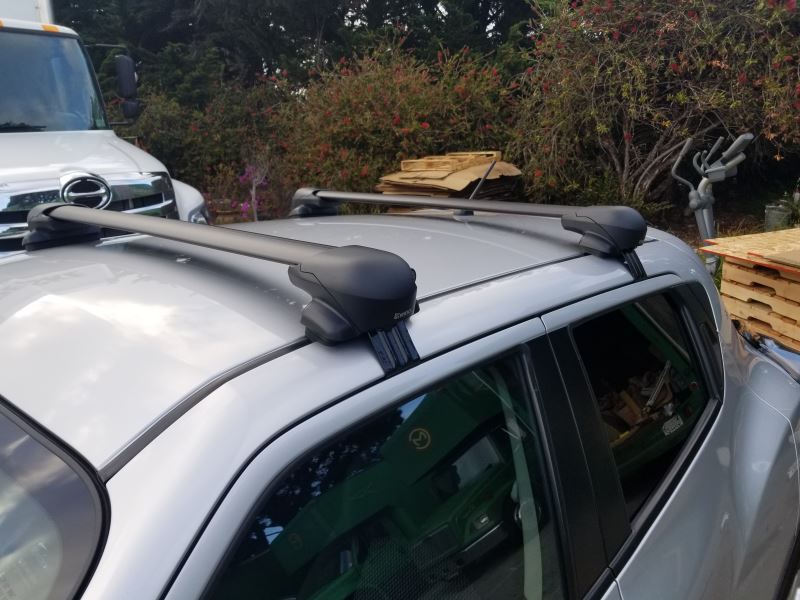
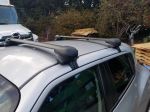
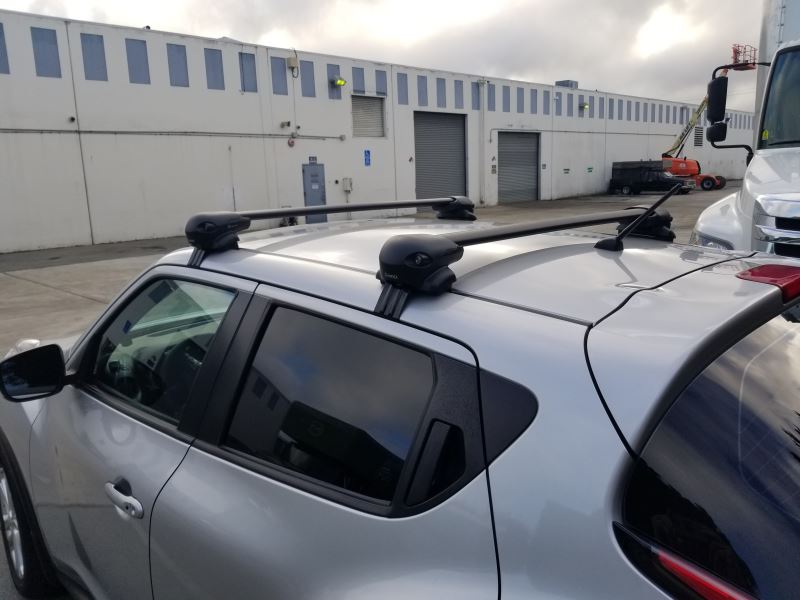
Inno Roof Rack - IN77CR
- Crossbars
- Aero Bars
- 2 Bars
- 42 Inch Bar Space
- Inno
- Black
- Overhang
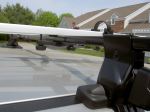
Low-profile, aerodynamic crossbar lets you build an aftermarket roof rack for your vehicle. Aluminum bar has a T-slot that lets you mount channel-mounted carriers and accessories. Rubber strip in T-slot keeps out dirt and won't need trimming.
Features:
Inno Aero Aluminum Load Bar - Black - 42" Long - Qty 1:- Low-profile crossbar lets you build a roof rack for your vehicle
- Pair with Inno feet (sold separately) to create a complete roof rack
- May also require a custom fit kit (sold separately)
- Elliptical shape helps to create an aerodynamic system with no need for a fairing
- Integrated T-slot makes it easy to slide channel-mounted carriers and accessories onto the bar
- Clamp-on accessories conveniently wrap around bar
- Flexible rubber strip keeps out dirt and allows for simple mounting in T-slot
- Press down on strip and slide accessories into slot - no trimming required
- Plastic coating on strip allows T-bolts to slide easily along channel
- Bottom channel allows easy installation to Inno roof rack feet
- Simply clip the foot into the crossbar and slide it along the channel
- Lightweight aluminum construction is durable and rustproof
- Internal extrusion provides exceptional bar strength
- Glass-blasted powder coat finish resists corrosion, scuffs, and scratches
- Matte black color
Inno Custom Fit for XS200, XS250, and INSUT Roof Rack Feet:
- Custom-fit clamps and pads let you install Inno roof rack feet on your vehicle with a naked roof
- Works with XS200, XS250, or INSUT feet
- Pairs with 4 feet and 2 crossbars (sold separately) to create a complete roof rack
- Clamps are designed specifically to fit the curves of your doorjambs
- Mount to roof rack feet with bolts
- Molded pads are custom designed to fit the contours of your roof
- Protect your roof surface from scratches and abrasions
- Press onto the bottoms of your roof rack feet
Inno Aero Aluminum Load Bar - Black - 45" Long - Qty 1:
- Low-profile crossbar lets you build a roof rack for your vehicle
- Pair with Inno feet (sold separately) to create a complete roof rack
- May also require a custom fit kit (sold separately)
- Elliptical shape helps to create an aerodynamic system with no need for a fairing
- Integrated T-slot makes it easy to slide channel-mounted carriers and accessories onto the bar
- Clamp-on accessories conveniently wrap around bar
- Flexible rubber strip keeps out dirt and allows for simple mounting in T-slot
- Press down on strip and slide accessories into slot - no trimming required
- Plastic coating on strip allows T-bolts to slide easily along channel
- Bottom channel allows easy installation to Inno roof rack feet
- Simply clip the foot into the crossbar and slide it along the channel
- Lightweight aluminum construction is durable and rustproof
- Internal extrusion provides exceptional bar strength
- Glass-blasted powder coat finish resists corrosion, scuffs, and scratches
- Matte black color
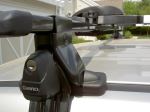
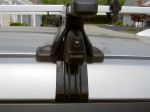
Inno Flush Feet for Aero Crossbars - Naked Roofs - Qty 4:
- 4 Feet let you mount Inno Aero crossbars on your vehicle's naked roof
- Pair with 2 crossbars and a custom fit kit (sold separately) to create a complete roof rack
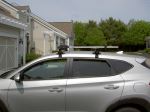
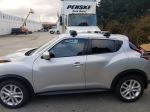
- Flush design helps create a rack with a streamlined, from-the-factory look - bars don't extend past feet
- Integrated hand knobs secure feet to your roof
- Easy, slide-on installation to channels in bottoms of crossbars
- Locking covers secure system to your roof
- Also secure T-slot-mounted accessories to your crossbars
- 2 Keys included
- Durable, weather-resistant AES plastic construction
Specs:
Inno Aero Aluminum Load Bar - Black - 42" Long - Qty 1:- Quantity: 1 crossbar
- Weight capacity: 165 lbs
- Always observe your vehicle's maximum roof load capacity
- Dimensions: 42" long x 3-1/8" wide x 1-1/8" tall
- T-slot dimensions: 13/16" wide x 7/16" tall
- T-slot top opening: 3/8"
- Underbar slot: 10"
- Limited lifetime warranty
Inno Custom Fit for XS200, XS250, and INSUT Roof Rack Feet:
- Quantity: 4 clamps and pads
- Limited lifetime warranty
- Quantity: 1 crossbar
- Weight capacity: 165 lbs
- Always observe your vehicle's maximum roof load capacity
- Dimensions: 45" long x 3-1/8" wide x 1-1/8" tall
- T-slot dimensions: 13/16" wide x 7/16" tall
- T-slot top opening: 3/8"
- Underbar slot: 10"
- Limited lifetime warranty
Inno Flush Feet for Aero Crossbars - Naked Roofs - Qty 4:
- Weight capacity: 165 lbs
- Always observe your vehicle's maximum roof load capacity
- Limited lifetime warranty
K680 Inno Fit Kit Hooks for Flush, Through, and INSUT Stays
XB108 Inno Aero Aluminum Load Bar - Black - 42" Long - Qty 1
XB115 Inno Aero Aluminum Load Bar - Black - 45" Long - Qty 1
XS201 Inno Aero Bar Flush Stays for Bare Roofs - Qty 4
Replaces XS200
Video of Custom Fit Roof Rack Kit With INK680 | INXB108 | INXB115 | INXS200


Videos are provided as a guide only. Refer to manufacturer installation instructions and specs for complete information.


Video Transcript for Inno Aero Crossbars Roof Rack Installation - 2022 Dodge Durango
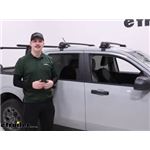
Hi, everyone. Aiden here with etrailer. Today we're gonna be taking a look at and showing you how to install this Inno roof rack system with the flush-mounted crossbars on our 2022 Dodge Durango. Now, when I say flush-mounted, what I mean by that is that the crossbar, that piece up top that we're gonna attach our accessories to, ends inside the foot pack here, meaning that nothing overhangs off the side of the vehicle. A lot of people prefer this style because it is a little bit more clean and custom looking. And if you only plan on mounting up one accessory on your roof, maybe something like a box for a road trip or a basket, then this is gonna be plenty of room.
We don't need all that extra crossbar space just for one thing. Plus, if you're a bit taller, it's going to be less risk of maybe hitting your head as you're getting into the vehicle because if there is a bar right here, that might be something to worry about. But depending on the accessory you plan on carrying, sometimes you need crossbar overhang. For something like a load-assist kayak carrier that will come down, let you load up the kayak at an easier height, and push it up onto the roof easier, you need that overhang to make those systems work. So take a look at what you plan on carrying with your roof rack or what you think you might end up carrying and decide whether this or the overhang is going to work better for you.
And one other thing you need to consider is what type of roof you have on your Durango because there are multiple options. Ours is a naked roof, which means that there's no existing rails or crossbars on the top. It's just the roof with this ridge here on the side, meaning that we need a roof rack that can attach that way. And the way we do that is with our fit kit. The fit kit is going to consist of this custom-molded rubber pad on the bottom that matches the contours of this lip and custom-length clamps that will reach down from that base and into the door jamb here, hooking in place and giving us a firm attachment point.
If you have a different type of roof where you've got some rails, it's gonna be a different kit for you. But just plug in your vehicle information and your roof type into our fit guide and find the right kit for you. This kit is gonna use Inno's Aero Bar, which is a longer, wider bar that's a bit thicker up front and tapers off towards the back. That's gonna help with wind drag and wind noise as we're going down the road and offer a lot of options for mounting up accessories because it is going to work with the most things. That wider base means clamp-around accessories are gonna work and sit on there really well.
It's a pretty standard size. And if we take our included keys and pop off these covers here, that's going to expose the T track up top where we can channel mount accessories if we want to. That T track is gonna be the way that we just maybe mount some things up a little bit more cleanly. If you have one accessory that you use all the time and you want it to look nice without any clamps or extra pieces hanging below it, that's the way I would do it. And I like the way Inno sets up their channels because it's got one long rubber weather strip in there that's going to keep the wind noise down and that we don't have to cut to length. You just slide your accessory in and push it to where you want it and you're good to go. One thing to note up top is that the roof rack can hold up to 120 pounds, which is a little bit lower than some options out there. But one thing you always want to check is your own Durango's roof capacity and go by the lowest rated component. Oftentimes the roof on most vehicles is the limiting factor, and you don't wanna load up too much weight up top on your vehicle anyway. This is gonna be more for your lightweight items, maybe some bikes and kayaks, things like that. And as far as some measurements go, we are gonna be working with a 32-inch crossbar spread. That's the distance from the center of one bar to the center of the other. That's gonna be a pretty good in-between range for most rooftop accessories, but depending on what you plan on putting up here, just check it and make sure that it'll work with that crossbar spread because everything in the kit, from those pads to the clamps, are designed to work in these specific locations. Some other measurements are our clearances, because this is a very low-profile roof rack. From the roof to the top of the rack, it's only adding about two and a half inches to the roof of our vehicle, which is great for things like garages. Depending on what you plan on mounting up here, do check that after the fact because if you put a box up here, there's no way it's gonna fit in your garage. Just depends on the accessory you have here. And from the bottom of the crossbar to the roof, it's only gonna be about one and a quarter inches, which is really low clearance. Depending on the accessories you go with, if they have clamps, if they're really thick clamps, I'd be worried about making contact with the roof or just being hard to tighten down. So check on that. And in those cases, a channel-mounted accessory might be the favorable option just to save space underneath the bar. And if your vehicle does have a sunroof or something, I would be cautious of opening it. Personally, I'd recommend just not bothering with it at all because, one, you might hit it, but two, having anything mounted up on your roof is gonna create wind noise. So if we plan on driving with this open, we're gonna hear a lot more noise and it's gonna be pretty obnoxious. So I just wouldn't do it for that reason anyway, but I would advise against it for risk of damaging your vehicle. And if you think the roof rack is gonna work for you and the things you plan on putting on top of your Durango, I think the best part about all of this is that it's a very easy and non-invasive install process. So let's walk through that whole thing with you step by step right now. Starting off the installation, we're gonna be on a table, somewhere where we can lay out all the parts for our roof rack and take note of everything. The crossbar, just keep in mind where the thicker part is. That's the front of the crossbar. And as it tapers off to this thinner section, that's the back. You will need to know that for when you're attaching things like your feet and the clamps. So for now, just take the crossbar and flip it upside down where we can see the track underneath. So on the track underneath, there's gonna be this sliding piece here, and if we push it all the way out, there's a rectangular slot that can match up with our plate. Now, our plate is gonna have a small notch in the top that will line up with a small tab on this hole. So just get those two lined up together, push it in, and slide it into that channel on that track underneath. And if we slide it all the way over, pushing this button here so it actually slides into the crossbar, this is gonna be the place where we need to attach our foot. Now, the feet are side specific. There's an L or an R depending on the one you're looking at. And it'll give you a little diagram of that crossbar. You can see the thicker part should be towards the front here and the thinner part should be over here. So we've got it all lined up already. And up top we can see a bolt poking through with the threads, a small tab, and this T shape. The threaded bolt is going to line up with this threaded hole right here, the tab will be right next to that, and the T will go into this slot back here. So flip it upside down, get that T lined up, and drag it out so it holds itself in the thinner part of the channel there. And when you get to the outside of the crossbar, the foot will kind of drop down and we can take the included tool and tighten down that bolt into the threaded hole. So just give it a few turns, and if it doesn't pull up anymore, then you know that the thread's caught. We can leave it slightly loose right now as we make some adjustments side to side. Now, as for the exact spacing of that foot, we kept it loose to move around. In our instructions, there's going to be a measurement that goes from this middle point on the crossbar where Inno has put a sticker out to the foot pack. So you can find that measurement in your instructions. It's gonna be different for the front and the rear crossbar. And in our experience, for the front crossbar that we already installed, the measurement wasn't super accurate. So take it with a grain of salt, use it more as a start point, and when you've got it where you like it, tighten it down the rest of the way and repeat that process on the other side. Depending on how it fits on the roof, we might need to come back down, loosen it, move it in or out, and then re-tighten it. Once it's tight side to side, you'll notice there's still a little bit of movement kind of angling the foot. That's okay. Leave it like that for now. We'll adjust that later. For now, we need to get the fit kit into place. You can probably see right now those tabs will line up with those notches. And on the bottom of that fit kit, the thicker part is going to be facing in towards the middle of the crossbar or towards the middle of the vehicle. And all of these number codes are the exact same for all four fit kits, so no need to keep any of those straight. They're all the same. Once it's been done on both sides, we can go to the roof. If you've got a friend on hand, it's really helpful to have that extra set of hands on the other side of the vehicle, but not necessary. We're gonna line this up as best we can and break the tape measure out later to get the spacing front to back more exact. But you want that pad to be fitting around the lip on the roof right here on both sides. We'll go ahead and check it out from the front of the vehicle, make sure it's looking even, and if we're happy with the spacing, then we can go forward and tighten things up. If we're not happy, again, we can take it down and adjust those feet if we need to. The measurement that we're taking can be found in your instructions. It just goes from this seam between the front and the back door back to the center of where we want our crossbar to be lining up. And we want to take that measurement on both sides, making adjustments as we need to. And make sure it's the same on both sides to ensure that these bars are running parallel to one another and perfectly perpendicular with the car. And if you notice a small gap under your fit kit like this, just remember we've got our foot loose so it's kind of pivoting side to side like that. We left it loose so that we can adjust it and make sure that we take that weird gap away. When you're happy with how everything is pivoted, take the other Allen key, slide it underneath this red tab. There's a bolt hidden in there. It's tucked back pretty far, but you can use the included tool to tighten that up and secure that side to side. The clamps and the bolts that secure those clamps are going on next. The bolt will feed through the clamp and into the cylinder right here where there's a threaded block behind it and the top of the clamp will line up with this ridge right here. So get those put in, pass this through, and thread it in by hand. I like to go until it touches and we're not really able to turn it much more. And repeat that on both sides. And once we're happy with it making contact, tighten it up, making sure to evenly do it on both sides so you don't pull the whole crossbar over to one end of the roof. Now, as we're tightening these down and you're going back and forth, there's no need to overtighten this. Just get it nice and snug where the crossbar isn't moving and make sure that the clamp here doesn't have any strange gaps with the door jamb. We want that sitting nice and flush on both sides. When you're happy with how tight everything is, close the door on those clamps and take your covers, pop them into place, making sure to line up the lock core on the right-hand side. Lock it in, make sure it's secured, and you're good to go. Once you've got those covers in place, I like to go through and just do one final shake test to make sure that nothing shifts or moves on me. But I'd say we're looking pretty good. It's a really easy install process. Inno lays everything out pretty well. There's not that many components to adjust and the end result is a pretty nice looking roof rack. I'm not the biggest fan of Inno's flush feet here, but it is going to be pretty functional and give you that extra cargo space on top of your Durango. And that'll do it for our look at and installation of this Inno roof rack system on our 2022 Dodge Durango. Thanks for watching.
Customer Reviews
Custom Fit Roof Rack Kit With INK680 | INXB108 | INXB115 | INXS200 - IN77CR
Average Customer Rating: 4.8 out of 5 stars (95 Customer Reviews)
Low-profile, aerodynamic crossbar lets you build an aftermarket roof rack for your vehicle. Aluminum bar has a T-slot that lets you mount channel-mounted carriers and accessories. Rubber strip in T-slot keeps out dirt and won't need trimming.by: Anne07/13/2023
I bought these last summer to affix my kayaks to the roof of my corola. my husband, who is decidedly not a handy person, installed them in an hour and they've been great. no issues– slight whistling at times on the interstate, but that's to be expected. highly recommend!
by: Cliff 04/01/2024
Great profile. Looks good on truck.
Locking and unlocking very easy.
by: Michael11/08/2023
Volkswagen Golf
2016 Golf R MK7
Love it so far


by: Cullen05/19/2023
Ford Edge
I am writing this review in the context of an owner of an old Yakima roof rack system from many vehicles before the 2021 Hyundai Tucson on which I just mounted four INNO separate sets of components to carry two bikes on top of the Tucson. Note that you need at least three sets of components to have a "base rack" system, including the hooks, in this case the INNO INK680, the INNO INSUT Feet and the INNO INB137 set of crossbars. The feet are rubber coated metal so that they will not mar the paint where they clamp to the edge of the roof just above the doors. The rubber pads are also substantial to provide a slip-proof and paint protecting bottom for the INSUT feet. Read through all the directions for all the components before beginning installation, perhaps even "rehearsing" all the steps before actual installation with tightening everything. The instructions could be clearer, but with practice walking through all the steps they make sense. Once installed, I could grab any part of the completed system and pull upwards, sideways, forwards, and backwards without any play or slack in any of the components. In fact, it was easy to rock the whole car side to side without budging the INNO components at all. Compared to the old Yakima system, the INNO is just as sturdy and substantial if not more so. Just to replace the Yakima "feet" to use my old round Yakima crossbars would have cost more than the total of the three INNO components needed to get the base system. Even better, the INNO system came with included locks to lock the system to the vehicle. Many years ago, the Yakima four lock cylinders were $[XX] extra - probably much more now. So, I think the INNO is at least as sturdy and capable for much less money.


by: Lori W.08/13/2018
By far the best service I have received in a very long time. I recieved my inno flush feet areo crossbars, sooner than expected and the assembly was just as specified. I especially liked having the video with the tutorial.
I like the look of the low profile and the quality is outstanding. I have used this for my kayak and the low profile helps with the loading and unloading.
I would highly recommend this product and Company.


by: Young07/12/2023
Josh is the greatest! Thanks for all the help!
by: Sara06/14/2019
I really love these roof racks. Easy to put on as long as you have a tape measure. I can put mine on in the spring and not have to worry about them coming loose with the torque wrench that was provided. If you are worried about getting the right ones, customer service is great and fast. I had lost the instructions so couldn’t remember the measurements to install, one quick email and I had the PDF copy.
by: Donna 08/16/2021
Honda
I bought the whole kit for 2008 honda fit for a cross-country trip, and it performed great. Made it with two surfboards on top with no problems. Instructions for installation are atrocious, but youtube videos can fill in the gaps. Shipping was quick. I didn't use any of the customer service options, but it seems like they would be useful if needed.
by: TW04/15/2022
Toyota Prius
I like that the feet don't extend too much beyond the width of the vehicle (2012 Toyota Prius V). No noticeable wind noise or fuel economy change. They held two bikes just fine. The tightening process feels very secure, but took me a while to do. I wasn't in a hurry so it was fine.
by: Joe04/13/2023
fast shipping, great customer service, and easy to install
by: CAV06/28/2022
Easy and worked well with the total kit for our vehicle. Feel sturdy and strong. We’re happy with them.


by: Gabriel05/23/2018
Thank you etrailer my car looks great I spent 4 hours to ensemble this cross bar and the bask rack but finally I made it now I have more cargo space in my car I really recommend etrailer good quality items and good service thanks again


by: Kimberly04/22/2022
Shipping and packaging was very good and delivered on time!
Love the flush bar look!


by: Steve07/11/2017
Great product and figment, the service was great as well, the only suggestion I have is if there is a product that cannot be shipped to Canada it should be told when you try to order it, however the follow up call was appreciated .


by: Pat06/16/2022
Easy install, build quality is really nice as is fit and finish. Almost no wind noise at highway speed.


by: Denis06/12/2022
Heavy duty and well designed feet. Love the locking feature, and instructions were clear.
by: David12/07/2022
Great product. On time delivery.
by: Steve 10/01/2022
These are really aero dynamic with a sleek design. It doesn’t cause a lot of of air drag like the super known brand.


by: David 11/24/2020
Fiat
I bought this for my 2016 Fiat 500X which has two glass sunroofs, and it fits perfectly! Follow the directions, put the bars where it says to, and your glass will be safe. You can't open the sunroof while this is in place, but hey, at least you can haul gear on your roof without breaking the glass.
by: Greg S07/17/2017
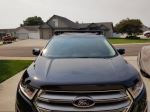
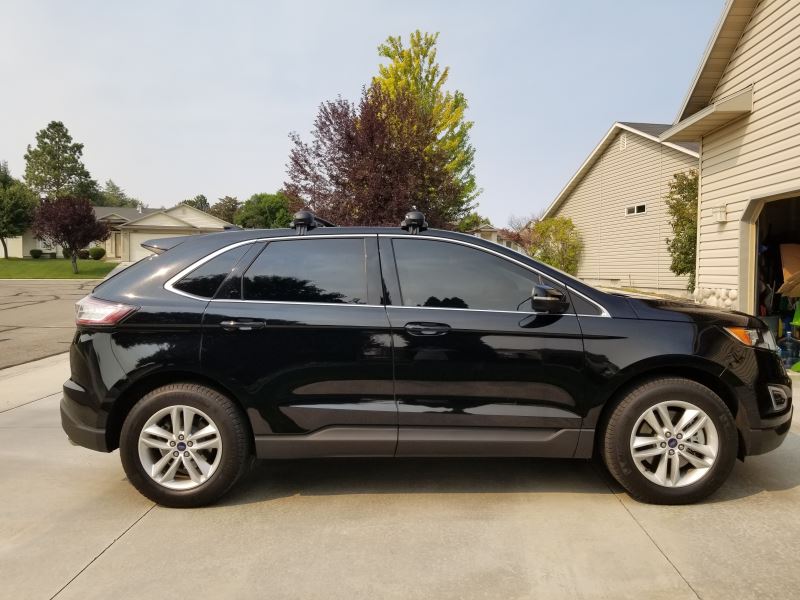
2000 Ford Edge
Everything about this kit met my expectations.
- Perfect fit for my Ford Edge, as advertised.
- Lowest bar height that was still high enough for the Edge Vista roof to clear. The glass does clear when nothing is attached to the bars.
- Aero bar shape. I haven't done a lot of miles yet with only the bars and no other attachments.
I attached an Inno roof box (which still fits through my garage door!) and did a 2000 mile road trip at insterstate speeds. Except the box noise (expected), and a bit of a mileage hit, I had no issues. Secure fit the whole way.
by: Patrick01/18/2022
The roof rack arrived days before it was scheduled to. Everything ordered arrived intact. Assembly and installation were pretty easy per the directions included and the video on the etrailer site. The rack looks fine on my Maxda CX5 and the additional noise from the rack is not too bad. Haven't had my cargo box on the rack yet but anticipate no problems with it. My experience with etrailer has been first rate.
by: Vern03/26/2021
The Inno racks have handled an assortment of different loads without problems. They are quiet at highway speeds. The lack of tie down points are the only drawback with these racks.

by: Alice01/26/2019
Thank you so much for providing the below information! My experience with etrailer.com has been great so far and I appreciate the follow up.
The crossbars fit perfectly and I will definitely be writing a review. However, I realized when I opened the bike racks that I purchased the wrong rack for my car/bars.
Would you be able to provide me with information on how to return the bike racks???
25
95
Show More Reviews
Info for this part was:

Video Edited:
Chris R

Edited by:
Daron K

Written by:
Ashley K
At etrailer.com we provide the best information available about the products we sell. We take the quality of our information seriously so that you can get the right part the first time. Let us know if anything is missing or if you have any questions.
Product Experts Available Now!
Call 1-800-940-8924
Thank you! Your comment has been submitted successfully. You should be able to view your question/comment here within a few days.
Error submitting comment. Please try again momentarily.