
THIS ITEM IS NOT A FIT FOR
2012 Ford F-150
Custom Fit Roof Rack Kit With INK533 | INXB100 | INXS200
Item # IN69KR
Our Price: $485.96
2012 Ford F-150
Will this fit?
To see if this custom-fit item will work for you please tell us what vehicle you'll use it with.


- All Info
- Reviews (85)
- Q & A (0)
- Videos (3)
- Photos
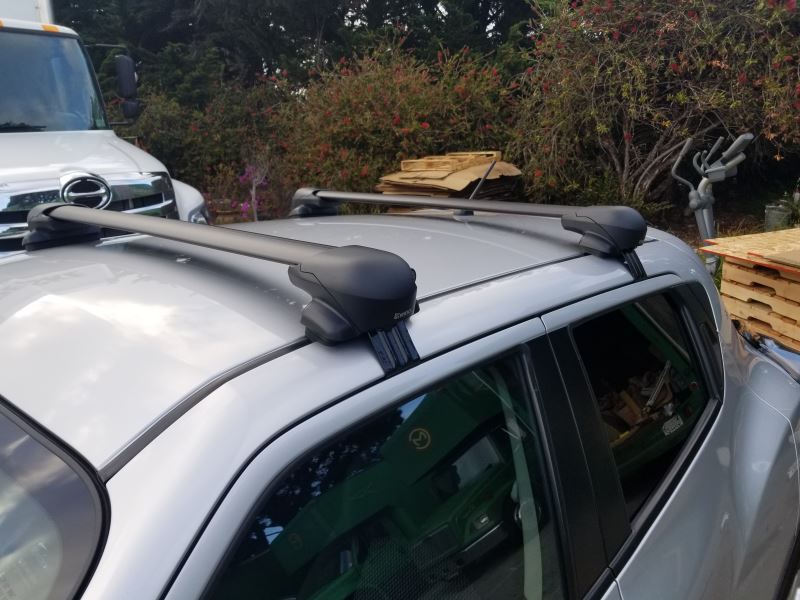
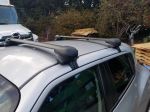
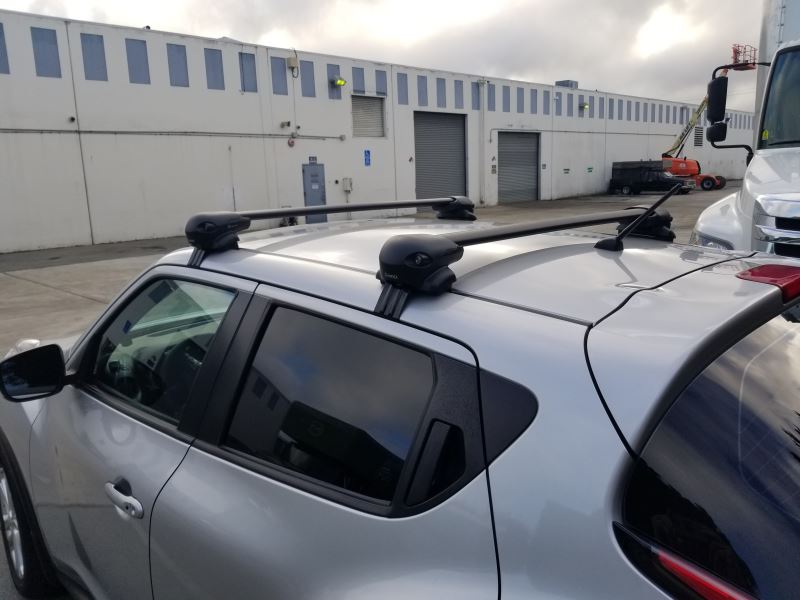
Inno Roof Rack - IN69KR
- Crossbars
- Aero Bars
- 2 Bars
- 39 Inch Bar Space
- Inno
- Black
- Overhang
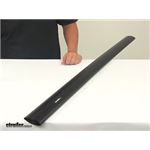
Low-profile, aerodynamic crossbar lets you build an aftermarket roof rack for your vehicle. Aluminum bar has a T-slot that lets you mount channel-mounted carriers and accessories. Rubber strip in T-slot keeps out dirt and won't need trimming.
Features:
Inno Aero Aluminum Load Bar - Black - 39" Long - Qty 1:- Low-profile crossbar lets you build a roof rack for your vehicle
- Pair with Inno feet (sold separately) to create a complete roof rack
- May also require a custom fit kit (sold separately)
- Elliptical shape helps to create an aerodynamic system with no need for a fairing
- Integrated T-slot makes it easy to slide channel-mounted carriers and accessories onto the bar
- Clamp-on accessories conveniently wrap around bar
- Flexible rubber strip keeps out dirt and allows for simple mounting in T-slot
- Press down on strip and slide accessories into slot - no trimming required
- Plastic coating on strip allows T-bolts to slide easily along channel
- Bottom channel allows easy installation to Inno roof rack feet
- Simply clip the foot into the crossbar and slide it along the channel
- Lightweight aluminum construction is durable and rustproof
- Internal extrusion provides exceptional bar strength
- Glass-blasted powder coat finish resists corrosion, scuffs, and scratches
- Matte black color
Inno Custom Fit for XS200, XS250, and INSU-K5 Roof Rack Feet:
- Custom-fit clamps and pads let you install Inno roof rack feet on your vehicle with a naked roof
- Works with XS200, XS250, or INSU-K5 feet
- Pairs with 4 feet and 2 crossbars (sold separately) to create a complete roof rack
- Clamps are designed specifically to fit the curves of your doorjambs
- Mount to roof rack feet with bolts
- Molded pads are custom designed to fit the contours of your roof
- Protect your roof surface from scratches and abrasions
- Press onto the bottoms of your roof rack feet
Inno Flush Feet for Aero Crossbars - Naked Roofs - Qty 4:
- 4 Feet let you mount Inno Aero crossbars on your vehicle's naked roof
- Pair with 2 crossbars and a custom fit kit (sold separately) to create a complete roof rack
- Flush design helps create a rack with a streamlined, from-the-factory look - bars don't extend past feet
- Integrated hand knobs secure feet to your roof
- Easy, slide-on installation to channels in bottoms of crossbars
- Locking covers secure system to your roof
- Also secure T-slot-mounted accessories to your crossbars
- 2 Keys included
- Durable, weather-resistant AES plastic construction
Specs:
Inno Aero Aluminum Load Bar - Black - 39" Long - Qty 1:- Quantity: 1 crossbar
- Weight capacity: 165 lbs
- Always observe your vehicle's maximum roof load capacity
- Dimensions: 39" long x 3-1/8" wide x 1-1/8" tall
- T-slot dimensions: 13/16" wide x 7/16" tall
- T-slot top opening: 3/8"
- Underbar slot: 10"
- Limited lifetime warranty
Inno Custom Fit for XS200, XS250, and INSU-K5 Roof Rack Feet:
- Quantity: 4 clamps and pads
- Limited lifetime warranty
Inno Flush Feet for Aero Crossbars - Naked Roofs - Qty 4:
- Weight capacity: 165 lbs
- Always observe your vehicle's maximum roof load capacity
- Limited lifetime warranty
K533 Inno Fit Kit Hooks for Flush, Through, and INSU-K5 Stays
XB100 Inno Aero Aluminum Load Bar - Black - 39" Long - Qty 1
XS201 Inno Aero Bar Flush Stays for Bare Roofs - Qty 4
Replaces XS200
Video of Custom Fit Roof Rack Kit With INK533 | INXB100 | INXS200


Videos are provided as a guide only. Refer to manufacturer installation instructions and specs for complete information.


Video Transcript for Inno Aero Crossbars Roof Rack Kit Installation - 2023 Ford F-150
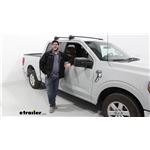
Hi, I'm Matt with etrailer, and today we're talking about the inner roof rack system on top of our 2023 Ford F-150. That's gonna be a great option for you if you are trying to haul anything that's longer that you maybe can't fit in the bed of your vehicle, anything like a kayak, you're gonna be able to put this on top of your roof and it's gonna work greatly, especially if you have a ladder rack that can work in conjunction with it. Another thing that's nice about it too is if you're looking for something that's gonna be a little bit more clean or have more of a flush designed to it, this is gonna be a great option for that too. So let's check it out. Our system today is gonna be comprised of three parts. The first one is gonna be our 51-inch arrow crossbars up top.
Next to that, we're gonna have our flush towers and that's gonna connect to our fit kit. So let's take a closer look at the crossbar, I mean. So this crossbar is gonna have this arrow designed to it that's gonna help it be more aerodynamic to reduce that wind noise. It's also gonna have this weatherstrip on top that's also gonna help reduce wind noise, but it's also gonna help keep debris from entering in here. The whole purpose of this weatherstrip is to help protect that T-channel we have at the top and that T-channel is gonna be used for your T-channel accessories.
And then next to that, we're gonna have the towers that it attached to. This is going to be more of a flush design. So what that means is our crossbar is gonna stick past it, it's gonna give you more of a clean design overall. And beneath that, we're gonna have our fit kit. Our fit kit's gonna be what makes us a custom fit for our vehicle today and it's gonna attach to our gutters within our vehicle and grab hold.
It really does give us a very good secure fit and the only way to access this hardware is to remove the end cap on the back of your tower, which has a lock core to it. To give you a close look at what's inside, we'll unlock this, get this out of our way. The way that fit kit operates is we're gonna have this bolt that attaches or secures down to our tower, and this clamp is gonna be in between the tower and that bolt, holding it in place. And that clamp is gonna attach to the inside of our door jam. And you can see it does cover quite a bit of a distance.
So I am a fan of that design. We're gonna get a few measurements now. The first one I'm gonna get is gonna be the clearance beneath their crossbars to our roof, and that's gonna be at about an inch of three quarters, which isn't a whole lot of space. Now if you want a little bit more space, you can go next to that if you have the chance, which is gonna give us about more like two inches of space underneath here, which is still gonna be very limiting, especially if you are trying to get those more bulky clamps on here. If you are doing that, I'd still recommend sticking to that T-channel if you can. But the overall height, we're gonna get, I'm gonna get from our tower because our tower sticks up a little bit more than our crossbar does and that's gonna be a little bit over three inches, isn't too bad. That's actually a really low profile. So what you lose out on the clearance underneath the crossbar, you gain with how height sits. What I recommend is taking the total height of your vehicle plus your crossbars, and if you have any gear on top of that, include that too so you know what errors you make it under. As for the crossbar spread, we're gonna have a specific number that is gonna work for our vehicle today that you probably can play around with it a bit, but I would still recommend sticking to what the manufacturer recommends. So I'm just gonna go from the back of our front crossbar in the back of the rear crossbar and that's gonna get us a little bit under 29 inches. So that's gonna be mounted in space. You gotta think about when you do put gear up here. You are gonna have the ability to load this up to 165 pounds, which is quite a bit. It's something I do recommend in checking what your roof is rated for on your vehicle. You can find that in your owner's manual and then going from the lowest rated component. But overall, I think this can be a great option for you, especially if you do like something that's more flush and more low profile. Now if you want something that's gonna have the crossbar stick out a little bit, Inno does make another system that does have those bars stick out a bit. That's gonna be a great option if you have any ski carriers that are kind of hard to reach, especially grabbing something right here is gonna be much easier than reaching in, and grabbing something at this point. Or if you wanna check out some of our other roof rack systems, we have plenty from Yakima and Rhino Rack, but if you're curious about the install process, just stay tuned and we'll walk you through it. To start off our installation, we're gonna lay everything out. So up front, we're gonna have our crossbar and the towers on each end, with the end caps in the center, we're gonna have our clamps and then the bases that go on our towers. We're gonna have these two adapters that go into our crossbars so you can attach your towers. We're gonna have some included tools. We're gonna have two different size Allen keys. One's gonna have this built-in torque device to let you know when it's all gonna be tightening down, and we're gonna have a set of keys. What I do recommend is grabbing a tape measure. Your kit will come out with a little tiny paper ruler. I'm not a big fan of using those. I think a regular tape measure is gonna help you out a lot more. Where I wanna start is putting on my tower to my crossbar. To do that, we need to do for a few things first. I'm gonna unlock this so I can remove the end cap. I also wanna make sure this is gonna go on the correct side. So you notice there's an L right here, letting us know it's gonna go on the left side. The end cap's also gonna have a label like that too. So we wanna make sure this goes on the left side of the bar. A good way to figure this out is to orient your bar. So this is gonna be facing forward, so you wanna make sure this thicker side is facing in front of you. Once you've done that, we know this is gonna be our left side, so I'm just gonna flip this over and start prepping the bar. To do that, I'm gonna push this channel forward without do it, I just usually put my finger here and push against it so it sticks all the way out. You're gonna have this square gap. We're gonna put our adapter, this piece right here in there and we're gonna do that through the bottom. You notice we have this notch right here and that's gonna fit perfectly into that square and lock into place and we're just gonna push this all the way back in. It is a little bit of back and forth, but you notice I can't push it in anymore. What I gotta do is press this square down, push it some so it locks in place. The reason why we have to have this all the way in, is when we place our towers on it, we're gonna have two notches that are gonna go into the adapter and that thicker side can't fit into the channel in the thinner areas. That's why we have to have it all the way back here. So I'm just gonna flip that around, line up that notch with that opening right here and place it down. I might have to change my angle just a little bit, but you'll notice it's not grabbing all the way. The fact side's not on there, so we do have to push it all the way back out until it grabs on. And from this side, from this point, I just recommend tightening this slightly so it grabs on. So we're gonna have this channel at the bottom of your tower, you're gonna grab your larger Allen key and tighten that down. Like I said, you just wanna do that just slightly enough for it to grab on so it's not fleeing it all over the place. And once you have that done, you can repeat that process on the other side. With built towers on, we can move on to putting the bases on them. So what I like to do is when I grab that base, you'll notice we have these holes, little divots on them. These are just gonna match those divots to the bolts or screws we have on here right now. And these tabs are gonna go right into those holes too. This is gonna sit on here pretty flush, so if you have any gaps, you know this isn't on there quite right. That's about what it should look like. You just do that on the other side and we have both on there. We can get the distance between the towers. Now that distance that I have today is gonna be 51 or 51 inches or 25 and a half from the center to one of the towers. So I'm just gonna double check, see what mine is. I'm a little bit short, so I'm gonna have to extend these out. So I did tighten these down all the way. So what I can just do is grab my crossbar and pull on the tower, extend that out. I'll do that on both sides and then remeasure everything. Before we get this up on a roof, the last step is just gonna be tightening those bolts, the rest of the way down. And once you do this on both sides, we can finally get it up there. Make this process a lot easier. I recommend just getting in your bed because putting it up here, like I said, it's just gonna be a lot simpler. So when you place this on top of your roof, you wanna make sure that this thicker side is facing forward and this thinner side is facing behind us. After when you've done that, we're just gonna roughly place this where we need it to sit. We're looking at around 20 inches from that door frame, but this doesn't have to be perfect quite yet. Back from when this is roughly on here, I recommend checking both sides, making sure that base is grabbing on to those gutters or that divot we have on top of our roof. When everything's looking pretty good, I recommend just making sure everything's spaced out correctly. It's gonna be the same process for both your crossbars, for your front and rear one. The only difference is gonna be the measurement you use. The measurement we're looking for at rear crossbar is gonna be 19 and three quarters. Now just make sure you go from that point right here between your two doors, measure out to the center of your crossbar and make sure everything's lined up on both sides. At your front crossbar is gonna be sitting at seven and three quarters, so just keep that in mind when you measure from that same distance. We'll make sure that these bars stay up here, so it'll help hold 'em in place, we are gonna have to put on our clamps. And before we can do that, we've gotta remove this bolt. When this bolt is removed, we just set it off to the side, we'll grab it in just a second again, but we wanna put our clamps up here, put that outta the way. You can grab that clamp and you are gonna just line it up to the contours of your tower, and you are gonna push that bolt right through there into where you got it from, and bolt it back down into place. You wanna make sure when you do this too, that this clamp is around your gutter and you're pushing on and against it towards your vehicle. With that hand-tight now, I wanna grab our included tool with that torque device on it and start tightening this down. And the best way to do this is to tighten this a little bit, going back and forth to each side so it doesn't pull too much to one side, making it uneven. But the way it's gonna let you know if it's tightened all the way is when you hear that click that we just had. Finally, our last step is just gonna be putting on our end caps. Just make sure you have the correct one for the correct side so it goes in there correctly. Sometimes they can be a little tricky to line up, but once it's flushed all around, we'll lock it in place. And this is a good point, just give it a shake test, make sure nothing's moving, everything feels pretty solid. And if it does, you can load it up with whatever gear you have, you take it out for a ride. But that was just a look at the installation and some of the features of the NL roof rack system on top of our 2023 Ford F-150. Thanks for watching.
Customer Reviews
Custom Fit Roof Rack Kit With INK533 | INXB100 | INXS200 - IN69KR
Average Customer Rating: 4.8 out of 5 stars (85 Customer Reviews)
Low-profile, aerodynamic crossbar lets you build an aftermarket roof rack for your vehicle. Aluminum bar has a T-slot that lets you mount channel-mounted carriers and accessories. Rubber strip in T-slot keeps out dirt and won't need trimming.by: Anne07/13/2023
I bought these last summer to affix my kayaks to the roof of my corola. my husband, who is decidedly not a handy person, installed them in an hour and they've been great. no issues– slight whistling at times on the interstate, but that's to be expected. highly recommend!
by: Cliff 04/01/2024
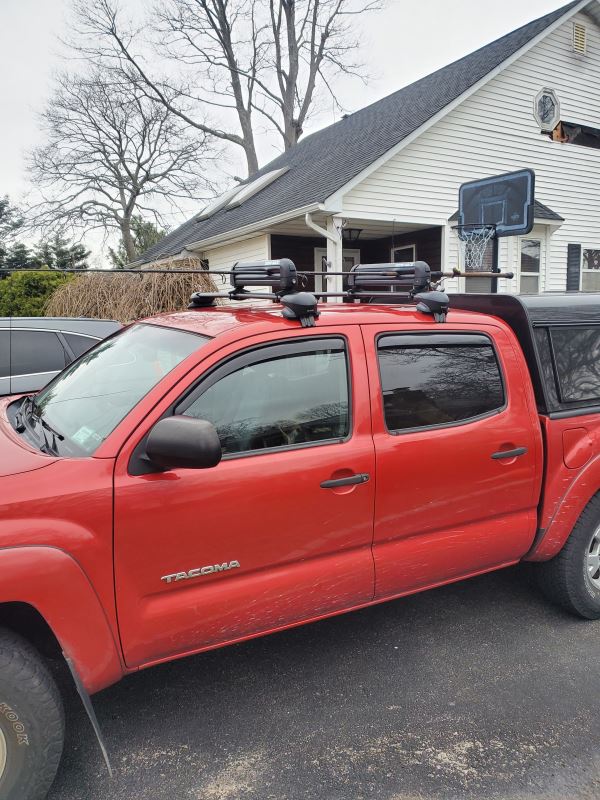
Great profile. Looks good on truck.
Locking and unlocking very easy.
by: Michael11/08/2023
Volkswagen Golf
2016 Golf R MK7
Love it so far


by: Lori W.08/13/2018
By far the best service I have received in a very long time. I recieved my inno flush feet areo crossbars, sooner than expected and the assembly was just as specified. I especially liked having the video with the tutorial.
I like the look of the low profile and the quality is outstanding. I have used this for my kayak and the low profile helps with the loading and unloading.
I would highly recommend this product and Company.


by: Young07/12/2023
Josh is the greatest! Thanks for all the help!
by: Joe04/13/2023
fast shipping, great customer service, and easy to install
by: TW04/15/2022
Toyota Prius
I like that the feet don't extend too much beyond the width of the vehicle (2012 Toyota Prius V). No noticeable wind noise or fuel economy change. They held two bikes just fine. The tightening process feels very secure, but took me a while to do. I wasn't in a hurry so it was fine.
by: Mark 07/08/2021
2010 Subaru Forester
The rails completed the parts I needed to install my roof rack on my 2010 Forester. What was particularly important were the buying and installation guides and video for the products I selected. Order placement was simple, and the order follow up from eTrailers was greatly appreciated.
by: CAV06/28/2022
Easy and worked well with the total kit for our vehicle. Feel sturdy and strong. We’re happy with them.


by: Gabriel05/23/2018
Thank you etrailer my car looks great I spent 4 hours to ensemble this cross bar and the bask rack but finally I made it now I have more cargo space in my car I really recommend etrailer good quality items and good service thanks again


by: Kimberly04/22/2022
Shipping and packaging was very good and delivered on time!
Love the flush bar look!


by: Steve07/11/2017
Great product and figment, the service was great as well, the only suggestion I have is if there is a product that cannot be shipped to Canada it should be told when you try to order it, however the follow up call was appreciated .


by: Pat06/16/2022
Easy install, build quality is really nice as is fit and finish. Almost no wind noise at highway speed.


by: Denis06/12/2022
Heavy duty and well designed feet. Love the locking feature, and instructions were clear.
by: Rowell05/22/2018
2017 Nissan Rogue
The quality of this product is 5 start and fit exactly with my 2017 nissan rogue..


by: Steve 10/01/2022
These are really aero dynamic with a sleek design. It doesn’t cause a lot of of air drag like the super known brand.


by: David 11/24/2020
Fiat
I bought this for my 2016 Fiat 500X which has two glass sunroofs, and it fits perfectly! Follow the directions, put the bars where it says to, and your glass will be safe. You can't open the sunroof while this is in place, but hey, at least you can haul gear on your roof without breaking the glass.
by: Greg S07/17/2017
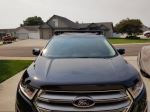
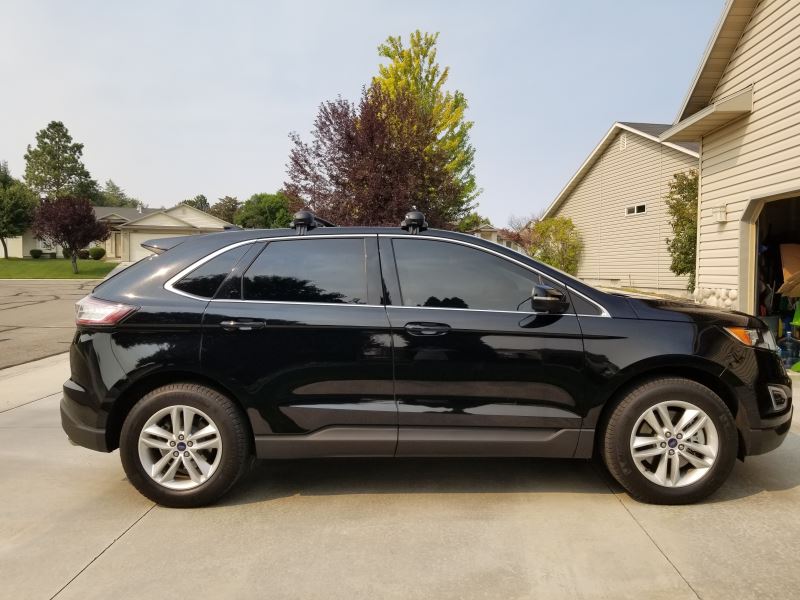
2000 Ford Edge
Everything about this kit met my expectations.
- Perfect fit for my Ford Edge, as advertised.
- Lowest bar height that was still high enough for the Edge Vista roof to clear. The glass does clear when nothing is attached to the bars.
- Aero bar shape. I haven't done a lot of miles yet with only the bars and no other attachments.
I attached an Inno roof box (which still fits through my garage door!) and did a 2000 mile road trip at insterstate speeds. Except the box noise (expected), and a bit of a mileage hit, I had no issues. Secure fit the whole way.
by: Donna 08/16/2021
Honda
I bought the whole kit for 2008 honda fit for a cross-country trip, and it performed great. Made it with two surfboards on top with no problems. Instructions for installation are atrocious, but youtube videos can fill in the gaps. Shipping was quick. I didn't use any of the customer service options, but it seems like they would be useful if needed.
by: Patrick01/18/2022
The roof rack arrived days before it was scheduled to. Everything ordered arrived intact. Assembly and installation were pretty easy per the directions included and the video on the etrailer site. The rack looks fine on my Maxda CX5 and the additional noise from the rack is not too bad. Haven't had my cargo box on the rack yet but anticipate no problems with it. My experience with etrailer has been first rate.
by: Vern03/26/2021
The Inno racks have handled an assortment of different loads without problems. They are quiet at highway speeds. The lack of tie down points are the only drawback with these racks.

by: Claire 08/13/2021
These are great! Easy to use and easy to install. Thanks George!
by: Harold 05/30/2021
Works great
25
85
Show More Reviews
Info for this part was:

Video Edited:
Chris R

Edited by:
Daron K

Written by:
Ashley K
At etrailer.com we provide the best information available about the products we sell. We take the quality of our information seriously so that you can get the right part the first time. Let us know if anything is missing or if you have any questions.
Product Experts Available Now!
Call 1-800-940-8924
Thank you! Your comment has been submitted successfully. You should be able to view your question/comment here within a few days.
Error submitting comment. Please try again momentarily.