
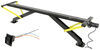
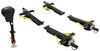
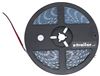
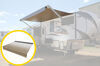
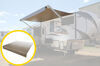
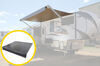
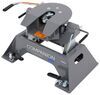
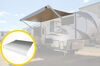
Replace your RV's old or damaged awning roller and fabric with this assembly with a built-in LED light strip. Fits Solera 18' power awnings that extend 8' from your RV. Installs more easily than replacing just the fabric.
Features:
Specs:
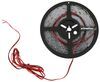
Note: You must already have the switch from kit LC674282 or LC674283 to use the LED lights.
To determine what size roller and fabric you need, measure from the center of your Solera awning's left arm to the center of its right arm. You can also measure the width of your old roller and replace it with a roller that's the same size, but measuring the distance between the two arms will give you the most accurate dimension. Do not order based on the old fabric width, as it will be too short.
Can you replace just the awning fabric without the roller tube? The answer is absolutely yes - but do you really want to?
To replace just the fabric on your awning, you will have to disassemble your whole awning anyway, just like you would if you were replacing the roller and fabric assembly. When you get your new fabric, you will have to unfold it and let it lie out for a good while to get rid of the creases. Then you'll have to painstakingly feed the fabric into the roller tube and into the awning rail on the other side. Once your awning's put back together, you'll still have to extend and retract it multiple times, tweaking and tugging at it to try and get the fabric centered and wrinkle-free between the roller and the rail.
If you get the roller/fabric combo right from the get-go, it's going to make it so much easier. You just have to feed the other end of the fabric into your awning rail and attach the new roller to the heads on your awning arms. Roll the awning in and out a couple of times to get the fabric even and you're done. Save your weekend and get the roller and fabric kit.
Videos are provided as a guide only. Refer to manufacturer installation instructions and specs for complete information.
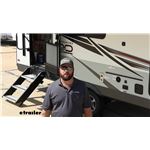
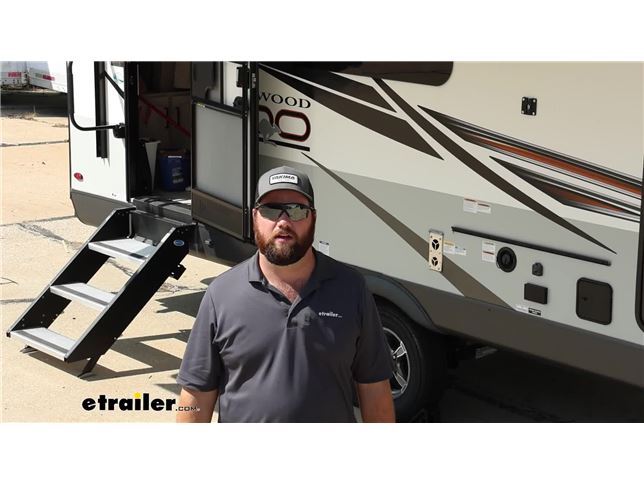
Hey, guys, it's Jake here with etrailer. Today, we have a 2022 Forest River Roo Travel Trailer and we're gonna be taking a look at and I'm gonna show you how to install the replacement Solera Awning Roll and Fabric. Now, there's a few different reasons why you would need to replace just the fabric and the roll of your awning. Typically, if you're not dealing with a storm setting, you're just gonna need to replace the awning and the roll itself. If you're dealing with a storm, chances are you're gonna need a whole new kit and we do have those available on our website. But if you're in the same case as we have here, they ended up needing new arms before this, but then came back and decided that they wanted to go ahead and replace the fabric and the roll tube.
There was very little damage to the fabric itself. The roll was perfectly fine, but what had happened to the owner of this camper is that they we're pulling out of their campsite and they made contact with a tree on this arm, which tweaked this arm and kind of put a little bit of a tattering at the other end of our original awning. So they decided they wanted to go ahead and go with a whole new awning and roll. If you experience a storm, it's probably gonna tear everything up. So you can get a whole new kit.
But another reason why you would need just this is if you get some stronger winds, that extrusion rail that the awning is actually tied into on the camper can tear. If the awning is flapping too hard, the extrusion rail can actually tear that awning. So that would be another reason why you would just need new fabric in a roll. You can get just the fabric to add to your roll. My personal opinion is don't mess with having to put the fabric on your old roll 'cause the grooves that your fabric is in right now is probably gonna be really dirty.
It's gonna be very difficult to get that fabric to go in. But if you get it on the roll, it's very, very simple to put it on. You can take the old one off and put the new one on in about 30 minutes. And you can see here the color option we went with is it called a Black Fade. So it starts out dark by the camper and slowly fades to appear white out here at the end.
There's many different color options available so that you can match it to your camper as best possible. Our camper is essentially all black, gray, and white accents all over it. So this one matched really, really well and looked good. What I like about this one compared to our old one is that our old one was solid black top and bottom. And believe it or not, out in the sun, you can feel that heat coming through being that half of this, essentially half of the awning on the top is going to be white, it'll help deflect some of that heat and some of the sun. And then underneath, if you put party lights or anything under here, this particular awning does come with a new LED strip. This white is really gonna help to reflect that light to give you more light at night when you're at the campsite. The roll itself, the aluminum roll, is going to have a black finish to it, which will help to hide that mildew and mold over the years. A lot of times, that natural aluminum color can start to collect that or if you have a white one, that a white roll will definitely collect a lot of that mold and mildew. I really like the black roller 'cause one, it looks really, really slick, and two, it just kind of blends in and it just. everything about this really matches the side of our camper. Now, when it comes to the installation, you're first gonna have to remove your old one. That might be a pretty easy process if it's already been damaged or ripped off. If you don't have any plans on saving your old awning, you can just take a knife and you can cut it and you can pull each section off. You can take your roll off and just slide it out of the extrusion rail. Where you really have to be careful is if you have a spring-loaded awning, you're going to. so a manual awning. You're gonna have to roll the awning in and then lock the end bars with like a small screwdriver or something to be able to keep that spring tension tight 'cause if you pull that roll off, that spring is going to unwind and you will not get it re-rolled back up and you'll have to buy a new kit. With the motorized ones, they're great 'cause they're not under any tension because it's just a motor that rolls it in and out. There's no spring tension. So you just have to be careful if you are putting it on a spring-loaded one or if you have a manual awning. But with the motorized one, we'll go ahead and show you how we did ours. Now, in order to get this removed, it's actually not too bad when you've got a powered awning. We'll have a screw here at the end of. Or on each arm. You'll have one screw, that's just a set screw that holds the actual roll itself on the end. And then you're gonna have one screw in the end of each up by where your awning actually attaches to the side of your travel trailer. So we're gonna get those screws removed, and what we're gonna do is we're gonna pull this in, put some zip ties around these arms because they do have these shocks here that will try to push the arms back out. So we'll get those locked in, take those screws out, and we should be able to slide our awning off. Now, this is a screw we we're talking about that is into the rod for our motor here. And then the screw that's going into the extrusion rail, it's usually right underneath here. You just need to pop that out. It's just drilled into the bead so that the awning doesn't slide when you're driving down the road. So we got the one out of our extrusion rail. We just need to take this one out and then get the other side out. (drill whirring) Now, what we're gonna do is we'll take the hole awning. We've started a little bit here and you'll this one slide it all the way out to the end until it pops out of the extrusion rail. Now, with our new awning, we're just gonna do the reverse of what we did to get our old one taken out. You'll definitely want some extra hands when you're doing this. It's just the safest way to do it. Slide it in. And then when you get it to this point, your best bet it's just slide it back into your motor. Now, if you need to relieve some stress of holding it, you can always set it up on the roof. You just wanna make sure it doesn't roll back off. Our extrusion rail was a little pinched there from when they hit the tree. So we'll get that opened up and then we can slide our ends in. Here we go. And now we just need to put that hardware back in to hold our roll on. Now, with these, you just wanna make sure you get that hole lined up. We'll take our screw and put it back. (drill whirring) Now, what we need to do is we'll take our awning. We'll put it out and in a few times, and we're trying to just watch the roll to make sure that our fabric is rolling up straight. If it's not, we'll need to take the awning and move it in the extrusion rail, whichever direction we need to in order to get to roll straight on our roll here. So we've got our awning rolled out, rolled back in. These are the ripples you're looking for. You do not want those in the roll. So it means that we have to pull it one direction or the other. But you can find that out by looking at how it's rolling up on the end. So you can see we can see the underside of the awning, so we need to pull it this way. And on the other side, you can see the whole awning has shifted that way. We'll pull it over about. It looks about a half inch, run it out, run it back in, and just keep checking it like that 'cause you want this to be straight. Otherwise, wind gets under there when you're driving and it ends up ruining your awning in the future. Now, we've made our adjustments, and you may notice there are still a few wrinkles in the middle. That is partially due to the awning being new. So it still needs to stretch out a little bit in the sun. Once it gets warm, it'll become a lot more pliable, and it can move a little bit smoother. Because it's cold, we just pulled it right out of the shop. It'll warm up, hopefully work out some of those wrinkles. The other reason is because it's new, in the center, this is such a long a awning, it's a 17'5" awning, so it's gonna have a little bit of a dip in the middle. We do have a bracket, a support bracket, that you can get that'll support the middle, but that's another part of why it's doing a little bit of the wrinkling in the middle. But this is not permanent. You can roll it out. And later on in the future, if you can't get rid of those wrinkles, you can try stretching it. But you're kind of limited to how much you can move it because of how it is attached to the roll. It comes from the factory attach to the roll. If you want to take those screws out and try to adjust it a little bit more finite, you can do that. Now, we'll take our self-tapping screws put them back through the extrusion rail. (drill whirring) And then on our front side here, we can take our new lighting. We left the old one here so that we can hold onto the wiring. Take this, toss that away. We'll plug in our new lights. (drill whirring) Well, guys, once you get all your screws in place, that's gonna do it for the installation of our new awning.
Info for this part was:
At etrailer.com we provide the best information available about the products we sell. We take the quality of our information seriously so that you can get the right part the first time. Let us know if anything is missing or if you have any questions.


Thank you! Your comment has been submitted successfully. You should be able to view your question/comment here within a few days.
Error submitting comment. Please try again momentarily.