
To see if this custom-fit item will work for you please tell us what vehicle you'll use it with.


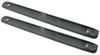
The aluminum bases of these step boards are covered in molded polymer for sure footing. Integrated light assemblies turn on when doors are open. Boards sit close to your vehicle's frame for a streamlined look. Custom mounting kit included.
Features:
Specs:

California residents: click here
Videos are provided as a guide only. Refer to manufacturer installation instructions and specs for complete information.
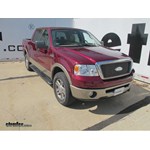
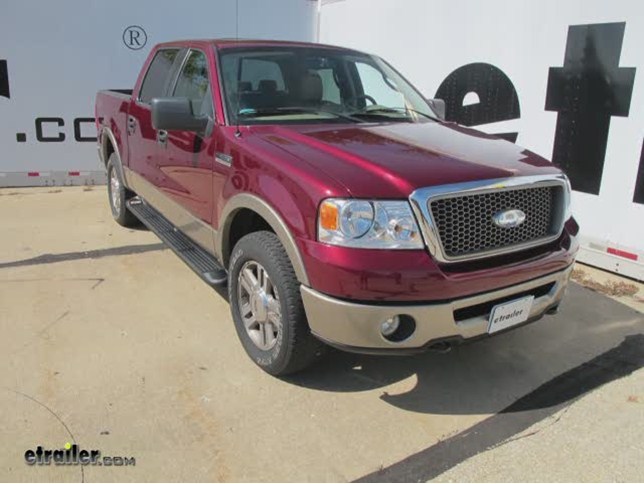
Today in our 2006 Ford F150 Supercrew Cab, we're going to be installing the Westin Molded Lighted Running Boards with custom installation kit part number 27-0025-1535. In addition to the running boards, we're also going to be installing the Westin Gas Strip for Westin Molded Running Boards part number 27-9901. Now here's what our Westin Lighted Running Boards look like installed on our vehicle. Now, we'll go ahead and show you how they function. We pull the door open, the lights light up, gives you a nice sturdy step to get in the vehicle. When the dome light goes out, the lights will go off as well.
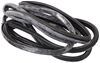
Now let's go ahead and begin our installation. Now we're going to begin our installation by taking our Westin Running Board, we're going to need to add the gap strip onto it. It is designed for these 93-inch long boards and it has a groove right here, as well as the cushioning part, it just slides right on to the running boards. Go ahead and start here at the end, just line up the groove with the edge of the running boards and slide it in place, working your way all the way down the running board. For now, we're not going to trim off any excess until we're able to test fit the boards up to the underside of the truck and then we'll see exactly how far back we'll need to trim the exter 00:14:06 gap strip here. We'll go ahead and repeat the same process for the other running board. Next, we'll go ahead and go underneath the vehicle.
We're going to point out the mounting locations that we'll be using to secure our running boards. So we'll be using this hole here and this hole here, here and here, and here, and here. And this is for the driver's side. Next, we're going to need to install this little clip here that has threads built into it in the top mounting location here for each of the sets. Just slides over the top like this.
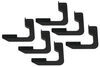
You want it to line up with the hole. Go ahead and repeat the same process at the other two locations, the middle on the forward mounting location area. Now that we have our clip installed, let's go over what the bracket looks like. It's the same bracket at all 6 mounting locations, we'll be using 3 on each side. Slide up in there like this, so the upper slot here will line up with the clip we just installed. And this hole here will line up this one.
Now the hardware that we're going to be using to attach to the upper mounting location is a 5/16 bolt, a 5/16 lock washer, a 5/16 flat washer. Just go ahead and loosely install that for now, go ahead and thread that in. Now for this location right here, we'll be using a 3 Ace hex bolt, a flat washer, go through like this. We'll install another flat washer on top, a lock washer and a hex nut. Again, we'll just leave these all hand-tight for now. We'll go ahead and repeat the same process for the middle and the rear mounting location here on the driver's side. Now, anything we just did over here on the driver's side we'll go ahead and repeat the same process over on the passenger side. Next we're going to need to install these square head bolts into the bottom track here on our running board. Now we'll be installing 3 per slot, for a total of 6 per running board. Just go ahead and line it up like this, go ahead and slide all 3 in, go ahead and lead one towards the back, one towards the middle and one towards the front to line up with our brackets. Go ahead and repeat this for this slot right here. Go ahead and repeat the same procedure for the other running board. Next, let's go over how you can tell which is the driver and which is the passenger side running board. Now, Westin recommends to put the running board with the longer wiring harness on the passenger side. This one here has the shorter one, so this one here, or this side, would be the driver side. Next, we're going to need to put the covers here on the underside of our running boards. Now we've already gone ahead and installed one here, notice that there's some slots cut in the underside. This is what allows the wires to pass through, and depending on which end of the board, you may need to adjust the wires or bend them around so that the slots line up. And they just simply snap down into position like that. You will need to repeat the same process at the other 3 locations, one on each end of the running boards on the underside. On this end, there is an extra wire that comes off. It's part of wiring harness here. Go ahead and tuck that wire down in. Go ahead and get our cover lined up.Now we've gone ahead and just temporarily set our driver side running board and place on the brackets. You'll notice that this weather strip here is a little long on both the rear and the front, so we're just going to go ahead and take a paint marker and mark on the back side or we need to trim the weather stripping. We'll do that up here on the front side as well. Now with our gap strip marked, go ahead and remove the board, go ahead and set it back over on our cart so we can trim at the length. We're just going to take a pair tin snips because there is some metal in this lower half. Now with the gap strip trimmed, we'll go ahead and push it back on. We'll go ahead and need to repeat that same process for the other side running board. We're ready to go ahead and re-install the running board under the brackets. Now with our running board in place where we like it, need to go ahead and install a 5/16 flat washer, 5/16 knot unlock nut in each of the 6 mounting locations for the running board. Our quick tech tip here, if you take the wiring here, has a 2 prongs, slide it through the screw and run it underneath here, it will allow your connection points to be right here at this bracket which would give you something to secure the wires to. Now go ahead and lift this back up, put the screw back in place. Next we're going to go ahead and tighten down the hardware that secures the brackets to the vehicle's frame. Now, once we have all the hardware tightened down we can go ahead and come back and torque it to the manufacturer's specification. We'll repeat that same process over on the passenger side, then we'll concentrate on the wiring. Next, we're going to route our long wire harness in on the passenger side over to the driver side. We use a spare piece of airline tubing to help us route this. Next, we'll go ahead and add a zip tie in here as well. This will help keep the wire from moving around too much. Now with our wires secure, we can go ahead and trim off any excess zip tie. Over here on the driver side, you can go ahead and use a zip tie to help secure our wires as well. Take the wire that runs over from the passenger side running board, and we're going to connect it to one of the 2 connectors coming off the driver side.Now there is a little tab right here, it will line up with the lock here on the plug. Going to make sure that it fully engages. Now the other plug will plug in to the other section of wiring harness that comes with the kit. So this end will go to there. You'll notice right here there is a built-in in-line fuse that we'll need to secure. And the other end of the wiring harness, we'll be grounding the black wire to the vehicle's frame, and the red wire will get tied in with the vehicle's dome light circuit. Now well go ahead and connect a wire here, making sure that the tabs are fully secured. Now that we have our connections made, go ahead and use a couple of zip ties to help secure things.Next we're going to go ahead and take a self-tapping screw and we'll need to attach a fuse holder here to the vehicle's frame. Now we'll continue with securing our wires, again trimming off any excess when done. Now we have 2 wires left that still need to be hooked up. We're underneath the drivers side door area. Heres a grommet that goes into the cab of the vehicle and that's how we're going to run our power wire into the vehicle. So we're going to go ahead and lower the vehicle back down and go on to the door area and show you where to find this grommet, as well as where to find the dome light wire that you'll be connecting to. Now we've gone ahead and opened up the driver's door, we're going to need to remove this threshold cover piece right here. Now sometimes you can just get your finger underneath the edge of it, work it up, other times you might need to use a trim pen remover tool or just a large flat head screwdriver. Now be careful, underneath here there's a lot of wires, so you dont want to put anything underneath that could damage the wires. You may need to trim this tape that's holding all the wires together to get to the wire you need. Next we'll test to see which wire we'll be using. We'll take our test light, ground that. Now with the door open, you can see we have power going to our test light. Now with our tester connected to the wire and the dome light on, we'll reach up here on the dash, we'll turn the manual override off, so we'll turn off the dome light. And now you'll notice that the light here on our tester has gone off, so we know we have the correct wire. So it looks like we'll be using a black wire with a blue stripe. Now when we first went into a wire bundle this wire was all the way at the bottom of the wire bundle. Now since there's more than one of these in the bundle, we'll put a piece of electrical tape around it so we know which one to use. Next we're going to need to lift the carpet up a little bit and find that grommet that we looked at or pointed out underneath the vehicle. So we're going to need to put a hole or a slit in it, just big enough to allow our wires to be pulled through.Now for this particular installation we have a little bit of extra wires, so we're going to need to trim some down. So we'll go ahead and figure out where we can cut it down. Go ahead and pull our wires out of the wire loom here. Separate out the red and the black wire. The red wire we'll be feeding up into the cab of the vehicle. So since we're only going to need to push through this small wire, just going to use a tool here just to put a small hole through it. Go ahead and go in the vehicle and pull the wire up into position.Now with our power wire pulled up into position we'll go back underneath, we need to connect the black wire to the frame, because that will be the ground. Go ahead and tape off our wire loom here to keep everything separated. We're then going to put the black wire back in the wire loom a little bit so we can route it over to where we're going to ground it to the frame of the vehicle. Trim off any excess wire loom. Go ahead and cut any excess black wire off as well. Go ahead and strip some wire back. We're then going to be adding a ring terminal that you will need to supply. It does not come with the kit. The ring terminal that we'll be using today is part number DW05702-1. We'll then use a self-tapping screw and secure it to the vehicle's frame. We'll then use a few zip ties to secure up any loose wiring. Next, we can make our connections with the dome light. I will go ahead and trim our power wire down, dont need this much, comes to the grommet, we're going to go ahead and go underneath. A bit of the tape here still just to help keep the wire in place. Now to make our connection here we're just going to use a quick splice connector it will tie in with our wire that we've marked along with our red wire. Now the quick splice connector that we're using today is part number 564. To use these, you just simply slide it over the top, put the other wire in place then take a pair of pliers and squeeze the connector down. And as you can see, right when I did that, put power to our boards.Go ahead and close the top on this one, then we'll put a little bit of tape around that connector, help protect it, make sure it's stays closed. Go ahead and put all the wires and push the connector down into the tray here that holds the other wires. We can then reinstall the threshold piece back over the top of the wires. With that inaudible 00:13:45 conclude our installations of the Westin Molded Lighted Running Boards with custom installation kit part number 27-0025-1535 on our 2006 Ford F150 Supercrew Cab. .
Average Customer Rating: 4.6 out of 5 stars (5 Customer Reviews)
The aluminum bases of these step boards are covered in molded polymer for sure footing. Integrated light assemblies turn on when doors are open. Boards sit close to your vehicle's frame for a streamlined look. Custom mounting kit included.The original shipment was sent missing bracket components necessary to accomplish the running board installation. Thank goodness etrailer had in stock the complete package of hardware and shipped it quick only delaying the installation a week. The sad part was the actual running boards had nothing for wiring installation instructions. We were forced to contact Westin directly then what they provided was basically useless. Others companies provided color illustrations and videos that made self installation a snap. We basically completed the installation after several failed attempts over a 2 day period. Why the etrailer sales representatives were super to deal with, the installation of the product was horrible. This information was shared with Westin in great lengths.

The running boards are great on our 2022 4Runner Limited.
I haven’t been able to figure out how to hook up the lights, so they come on when I open the door.
I requested help from e trailer for help and they did respond, but it didn’t work.
So if folks aren’t concerned about lights on their boards, I would just get unlit ones.
The item was ordered and delivered quickly. Company follow up was awesome. I found the video on installation was super valuable, compared to reading the printed instructions, what a time saver. Thanks for providing videos for us DIY's . The item looks and performs wonderfully. Will patronize etrailer again. Thanks
Info for this part was:
At etrailer.com we provide the best information available about the products we sell. We take the quality of our information seriously so that you can get the right part the first time. Let us know if anything is missing or if you have any questions.


Thank you! Your comment has been submitted successfully. You should be able to view your question/comment here within a few days.
Error submitting comment. Please try again momentarily.