
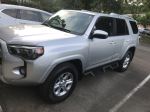
To see if this custom-fit item will work for you please tell us what vehicle you'll use it with.


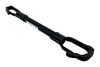
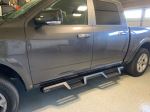
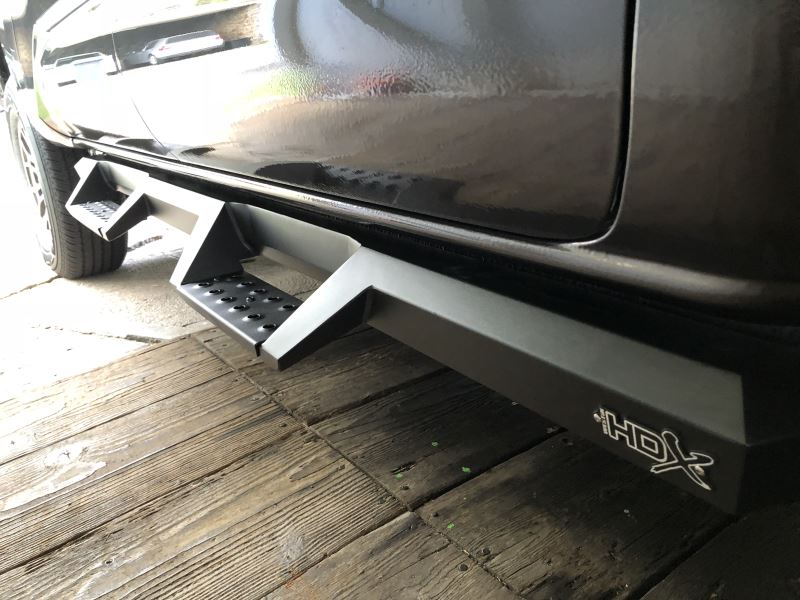
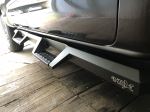
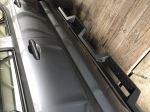
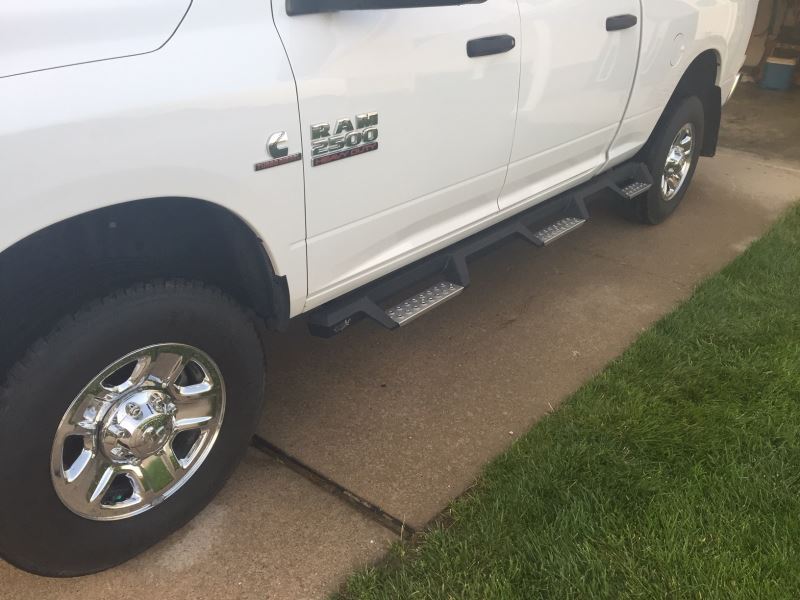
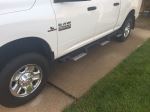
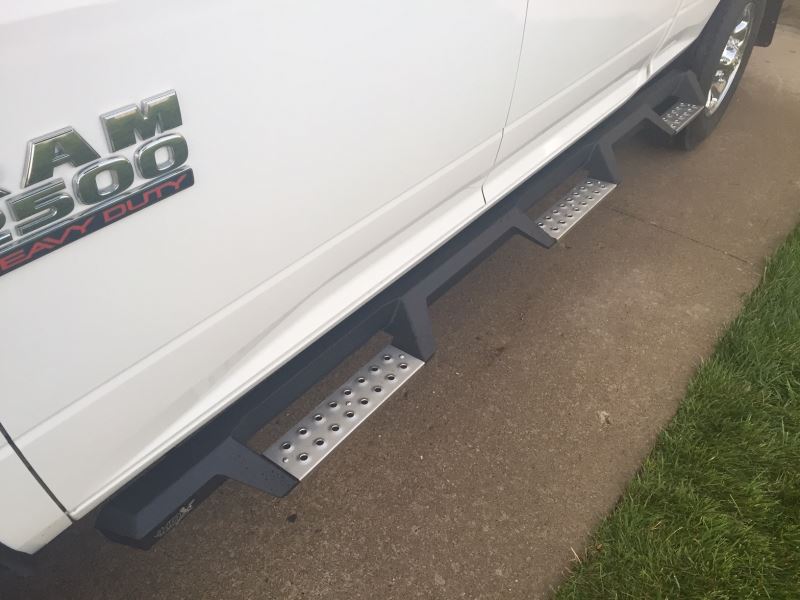
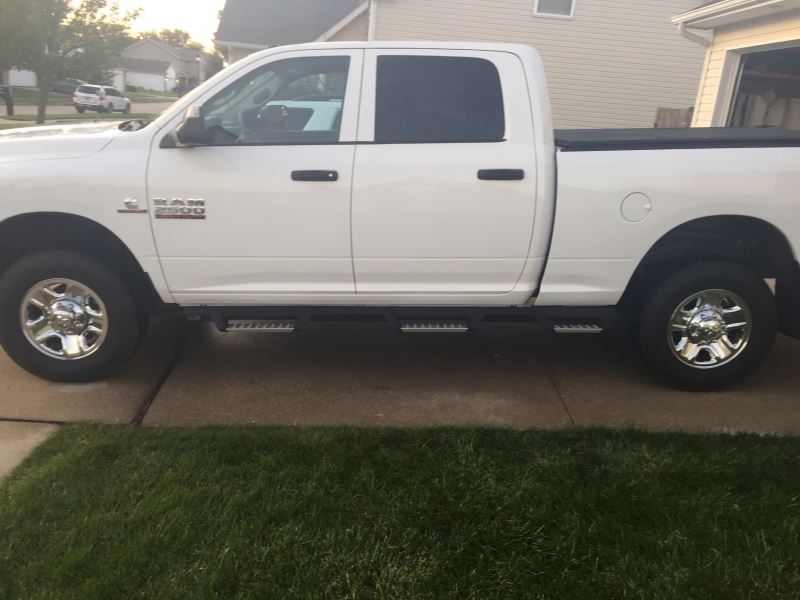
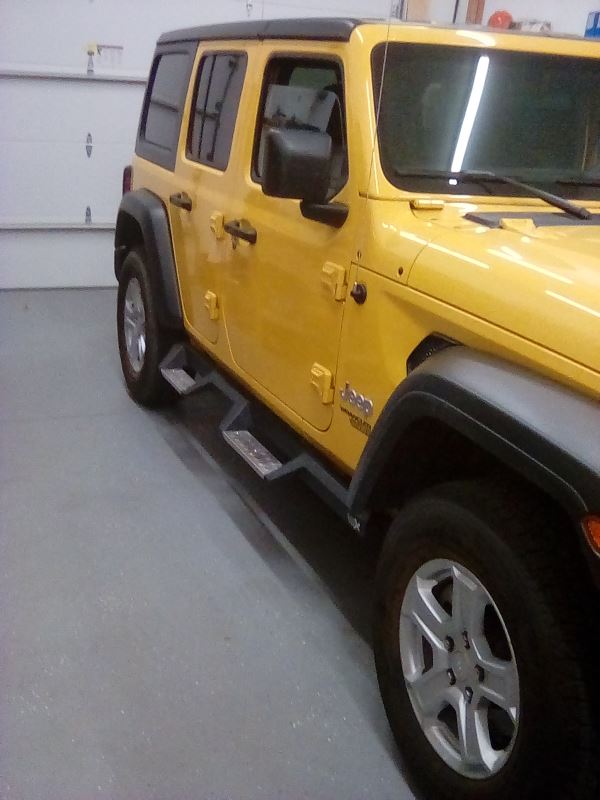
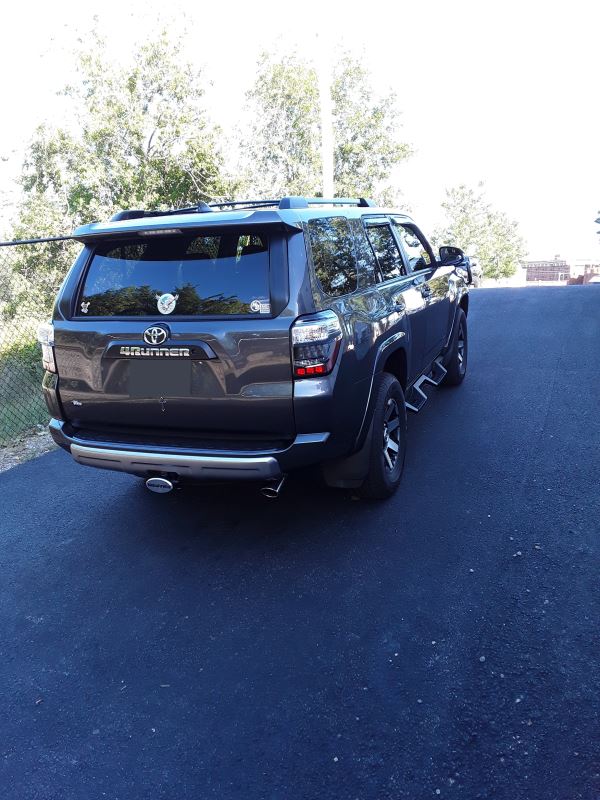
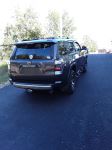
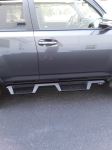
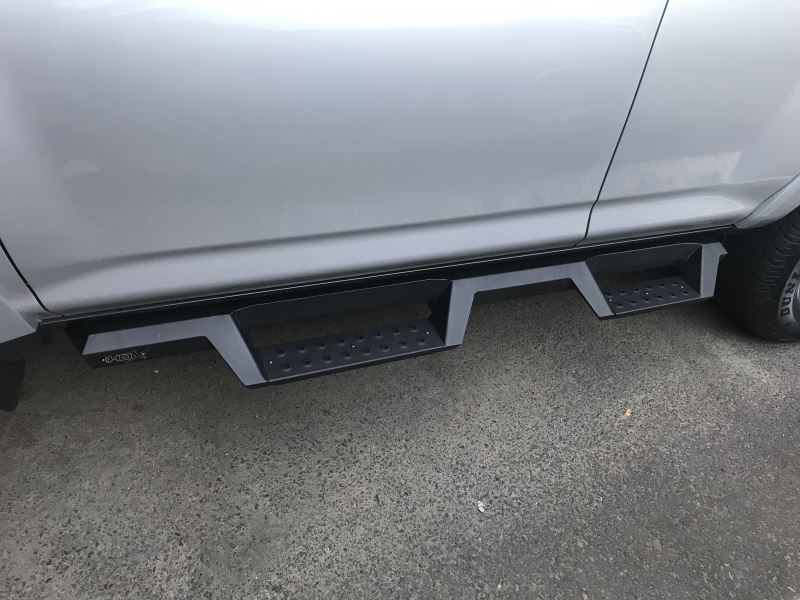
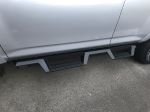
Black powder coated steel nerf bars feature drop steps and an angular design for a rugged look. Wheel-to-wheel length allows easy truck bed access. Removable steel step plates are rustproof. Hardware is included.
Features:
Specs:
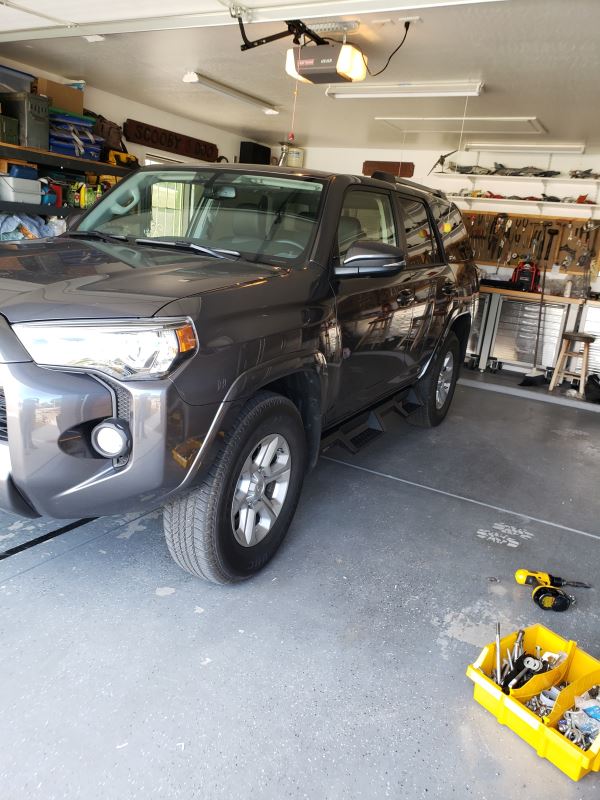
Westin's HDX custom-fit, full-length nerf bars help you enter and exit your vehicle with ease. The steel steps drop down 2" from the bar, minimizing the step-up distance as you get into and out of your vehicle. The bars fit tightly to your vehicle's frame, and the straight style and angular design provide a rugged look. The wheel-to-wheel-length allows easy access to the truck bed.
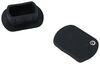
The black, steel step plates are rustproof, and they are removable for easy cleaning. The die-stamped step area offers maximum traction, giving you a safe, stable surface, even in wet and muddy conditions. The steps are also extra wide, allowing you plenty of stepping area to easily get into and out of your vehicle.
This solid, 1-piece construction offers long-term durability. The black powder coated steel is corrosion resistant, ensuring that the bars stand up to the elements over the life of your vehicle.
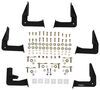
Isolator brackets are included to provide support for the section of the step bars that extends past the truck cab. Designed to eliminate any unwanted creaking sounds, these brackets provide increased stability for the rear steps, which give you access to the truck bed.
Installation is made easy with the included mounting kit. The bars bolt directly onto your vehicle's rocker panels using the included brackets and hardware. No drilling is required.

Videos are provided as a guide only. Refer to manufacturer installation instructions and specs for complete information.
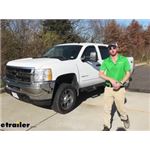
What's up everybody, Adam here with etrailer. Today we have my dad's 2012 Chevy Silverado, 2,500 HD. And we're gonna be taking a look at the Westin HDX running boards. The HDX running boards are gonna be made of a steel construction. They have a nice powder coated finish, which is a flat black, which I really like. It's like a matte type.
And it really does mimic the OEM trim, which I really like. It adds to the look, but I really like these just because they are really cool looking. But the nice thing about these is the wheel to wheel step. So we have one for the front, one for the back, but also one for the truck bed. So if we wanted to get anything out of the back, step on this, grab whatever you need, if you have a fuel pump or something back here for your farm equipment, and that'll be very, very handy.
But also for your tool boxes that you have. I really like that, I really wanted my dad to be able to get in and out of his truck bed all of the stuff, and this is definitely gonna help it do it. The cool thing about this, is it's a one-piece design, so it's nice and solid and it's super, super clean and tight to the bottom of our rocker panels. This truck is lifted. So what I really like about these steps is it gives you an extra two inches just to make sure you're not having to really step up a bunch to get into your truck.
And I really like that, just because it makes it a lot easier to get in and out. And when it comes to the step, it's about 15 and a half inches long and about four inches wide. So I got big old work boots on, so I'll be able to get in here. If you have stuff on your roof, you'll be able to get up like that. And it's totally fine.
You kinda have to hold yourself up a little bit, but there's plenty of room there, especially if your boots are bigger than mine. Another thing that I like about these is the grip. So these are die stamped. And what that means is they basically just take a big piece of steel and they just stamp it in there. So if I we're to compare these to let's say like the Westin Nerf Bars, they just have these rubber pads that go on top. And that's what was actually on here before, but they start cracking, and plastic just doesn't really give you the grip that you want. With this, it's actual extrusions in the steel which is gonna give you a lot of grip. This isn't the most grip you can get. if you wanted to get extreme grip, but maybe not have a running board that looks as cool. The Westin Great Steps are gonna have the best grip possible, but all in all, I just love the looks of these. It adds a really good look and it just covers all the bases I need. I've had a lot of different running boards on a lot of different trucks, but with these, there's not a whole lot of flex. So when you get those Nerf bars and the brackets are super long, they start to flex out. But with this, like there's a little bit of flex, but that's just normal, but this is nothing compared to some of the other ones. So the brackets are really, really good and strong. They're really, really small too. So it just basically goes to the under side of your rocker panels and it doesn't reach all the way to your body mounts. That is something I like. I just don't likes to step on a step and it just gives so much. I always feel like I'm breaking it, but this is rugged, it's tough, and it's extra, extra strong. I've installed a lot of running boards in my days and the directions aren't the best. So I hope I did a really good job kinda going through the steps to make it as easy as possible for you. 'Cause I struggled a little bit, but I figured it out and hopefully in the video it'll get everything nice and clear. So you won't have any issues when you install. So if you want to see how we did it, stick around, we're gonna show you. First thing you want to do is take everything out of the box. Make sure that you have everything that you need. And then take a very, very close look at the directions. They could be a little confusing, but what you want to do is just kinda get all your brackets set out. So I have all the brackets for the driver's side, all set out where I think they're gonna go, but what we're gonna do is start with the front. And some of the diagrams, it's gonna be a little different for different types of trucks. So you kinda just have to get a feel of what's really going on underneath there. So let's go underneath and check it out. Let's notice our first bracket here. So what we're gonna need is a hole and they need to be aligned with each other, both of them. So in step one, it says to remove a plug, which I first, I was like, okay, here's the plug over here, but there's no hole underneath of it. So, and that's kinda where the directions get a little weird. So we're gonna be using this right here and we're not gonna have to remove a plug, but we're only gonna have to use one of the little clips that they say. And these are the little clips right here, but notice this bracket, on how it goes up there. We're gonna have the two little holes facing out and then what we want to do, and I'm gonna put a bolt up through, in this threaded hole. And what we're gonna do is use the bolts included with the kit. There's about 26 of them, and we're gonna put a lock washer and a washer on there. And we're going to thread this in. I already went ahead and kind of cleaned up these threads. So you can get like a little thread cleaner here at etrailer. Get a little bit of penetrating oil, put that in there just so it doesn't give you a whole lot of trouble. And this way you just know you're not gonna be messing up your threads. So now that that's done, we can do the same exact thing for the bottom one. This is gonna be a little bit easier just because it's brand new threads. So put that in, and we're not gonna tighten these down at all, because we'll do that at the very end. Just kinda get them on there, just like that. And look at that, first bracket is in place. Now you want to look at your diagram and grab your bracket for the second one, but notice the distance between the two. So there's actually less distance between the first and the second bracket then from the second to the third bracket. When we go underneath here, you'll see what I'm talking about. We have two different options, we can either do it here or right here, but since it needs to be closer to that bracket, we're gonna do it right here. We have a little threaded portion right here and again with the little hole. So what we're gonna do, it's the same thing as last time. And notice again, the bracket is completely closed. So we're gonna have to put the threaded portion down, like that, put this up, and then the same hardware combination as before. And just loosely thread it in. And now for our third bracket where you are gonna have to remove a plug. And again, it's gonna be a little bit farther back than the distance between the front and the second bracket. Here's the plug, let's take that out. You might need to grab like, a tool or something, I can get it with my hands. So you can put that to the side, we're not gonna need that. So what we're gonna do is take this little retainer clip. Line it up with that second hole. And then, since this bracket actually has a gap, we can actually go ahead and put the threads up like that. And then the same hardware combo as before. This last bracket's gonna be a little bit different than the other ones. So basically, we're gonna take two factory bolts out. We're gonna put this bracket up, and then we're gonna connect this bracket with the little bumps and thread them in like this. So this is what it's gonna look like once we remove those and put it all in, so let's get under there and take a look. Our end result is gonna look like this. Hopefully you guys can see it, but pretty much where this lines up is this bolt right here to 13 mil. And then we have this one up here, which is about an 18 millimeter. We do not want to use power tools when taking this out, because on the inside we have a weld nut. On the other side I used an impact, and I broke the weld nut. So trust me do it by hand, trust me. So when I remove these two so I can put this bracket in. One little quick tip, before you do this, I would say maybe step one, before you do anything, is just kinda spray this with some penetrating oil. And you can get a little tube and go in there and spray the top end as well, just to make sure it's gonna come out. 'Cause you really don't want this to be seized up. As you can see, we have a decent amount of service rust on this truck. So you can only presume that the rust is in the spots that we don't see as well. So just taking precautions, just so we don't break anything. Now with this, we can put it two different ways. We can have the open side facing the front, but what we want is the open side be facing the back. So we're gonna actually replace the big factory bolt let me put that in there where you guys can see. And if your truck is as dirty as this one, use some eye protection or something, 'cause there's stuff falling all over me. So you can thread that in. And then with the other one, let me get this threaded in a little bit. But with the other one, we're not gonna replace the factory bolt. Why, well, it doesn't really have any pressure washers on it. So the same exact hardware combo that we used for all of our other brackets. And this is just our little bolt, and then a lock washer and a washer and I'm gonna put that on the other side. I would just put a lock washer on the factory bolt, but the washer is actually seized on there, so I can't. But this is what they say to do, 'cause it's a little stronger. So this one we're gonna actually fully tighten up once we get it all in place. With the last bracket we're gonna have to assemble a little bit. So what we want to do, is we're gonna take these out of the kit and you're gonna pull them apart. The one with the shaft is gonna go on top. So put it in there, that one kinda fit right into place, like that. And then on the inside, gonna go like this. And you grab those big old long bolts with the massive, massive washers and a lock washer. And that's gonna go like this. And we're gonna screw that to that bracket we just installed. And when we put this up there, we want the flat face to be lined up with the flat face. So this is facing towards the front of the truck. I'm gonna try doing both at the same time. Kinda just wanna thread them in by hand. And then when we tighten these up, we want to tighten them up evenly just to make sure it's nice and completely level because we do have these little rubber pieces in here. So we wanna make sure that they're tightened down real evenly. I'm just gonna need an 18 millimeter socket for this. Now's a good time to take your running board and slide it and make sure that everything lines up. So you can see our bracket and our holes here lining up. This is lining up, this is lining up, and that as well. But one other thing to kind of note, if you look down here, the majority, so three of the four threaded holes are gonna be out at the very, very farthest point. Go right here, they're actually recessed in. So the second bracket from the front, you want to stick out a little bit farther than the others because it needs to make up for that distance. And we're gonna use the same exact hardware combo for the three. But the one that sticks out a little bit farther, there are gonna be four shorter bolts. And that's what we're gonna use for this bracket right here. So there isn't really much adjustments that we have to do, or need to do, or can do because all the holes are kind of how they are. They're a little elongated so we can adjust a little bit. But what we wanna do, is we're gonna take all of our bolts that go into our running boards and tighten all those up. And then once we tighten these up, we're gonna tighten up the brackets on this bolt right here. 'Cause that's gonna suck the bracket up to the cab of the truck as much as it can. And then at the very end, we're gonna tighten up this top bolt. So just take your 13 mil and start wrenching. And that'll do it for our look at the Westin HDX running boards on our 2012 Chevy Silverado..
Average Customer Rating: 4.5 out of 5 stars (51 Customer Reviews)
Black powder coated steel nerf bars feature drop steps and an angular design for a rugged look. Wheel-to-wheel length allows easy truck bed access. Removable steel step plates are rustproof. Hardware is included.Excellent product , easy installation with instructions provided. Separate the left and right side parts , start with driver side which is shown in the instruction photos, then the passenger side will be easy. The product is sturdy when assembled and provides a good height to step into and out of the vehicle.

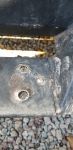
Ordered these in spring of 2021. By fall they were already starting to rust on the treads. By the next spring (1 year after install) there was significant rust on the treads, espousing the drivers as it got the most action. I’m now at a little over two years and all the treads are rusted as well as significant rusting on the corners and edges. These do not hold up well at all.
Many other reviewers mentioned this early rusting as well. One response from etrailer mentioned contacting customer service as these would be under warranty. I contacted customer service today and was told rust is not covered.
The Westin nerf bars are already rusting. This is not what I expected at all. The bad part is that I talked my brother into buying all of his equipment from etrailer also.
As recommended in another review, the night I received the bars I opened the packages, matched up all the parts (brackets, bolts, washers, etc.) and made several piles for the mounting project. The Westin instructions are not easy to follow, referencing back and forth to various pictures and figures. Fortunately I watched an install video on their website for a similar set of bars on a similar vehicle to get a better idea of what the instructions were trying to say - like what is a rivcert and how does it work.
The actual mounting of the brackets went fairly smoothly until I went to hang the first bar and discovered I had swapped the rear bracket between driver and passenger side. The instructions showed a difference between the front, mid and rear brackets, but not that there was also a distinct left/right to the rear ones. Once that was solved, installing the second bar went quickly.
Overall the product looks great on my Ram 1500 and seems pretty sturdy. My wife and kids like the nice wide steps to get up and into the truck.
Bob and the team at e-trailer were 5 star. The ease of the transaction, shipping pricing to Hawaii and the Lightning fast delivery. Nerf bars are installed and look amazing.
I'm 6'4" tall, but still could not easily get in or out of this stock Ram 2500. These solved the problem completely. I chose them for the different look, and the complete wheel to wheel protection. I also weigh 250 pounds, and these feel very sturdy.
I can think of very few cons, but one would be the decreased ability to hand wash/wax the bottom of your body panels after these are installed, and the other would be the obvious reduction of ground clearance.
Overall, I'm very satisfied.
Easy install. I actually installed on a 2012 4Runner, then decided to sell it, so I took them off and installed them on a 2018 4Runner. Fit was perfect, no issues. I might add, the 2012 model comes standard with the rocker skirts. I took them off to install these.
Installed the steps today. So happy I got this step, ample room for your foot on a nonslip surface. Just the right amount of drop. They look great. Installed on 2021 Toyota Tundra Double Cab
I am glad I got the stainless steel steps, as the powder coat flaked in a couple places while installing bolts.
As others have said, the instructions are terrible. Attach the brackets to the step first, with the bolts just finger tight. Then hang the step on the truck with the bolts finger tight. Cycle through the bolts a few times tightening incrementally, then torque them.
I have a Jeep Wrangler and the Weston HEX step bar works great. I was hard for my wife to get in my old truck, but this step bar makes it easy for her in our new Jeep. It also has a non slip strip made out of steel not a glued on one, perfect!
Thanks
Great look. Right height. This is my second truck I have installed these on.
Easy to install and built well
Easy to install. Looks great!
Just installed these last night and snapped a mount bolt using a 3/8" drive ratchet. I was much more careful when tightening the remaining bolts but the hardware is definitely sub-par. Installation was easy, the bars look good and are solid however I imagine they will require paint every couple of years to control rust. For the price I believe there are better options out there.
The nerf bars are a nice addition to the look of the 2018 4Runner. I needed them for my wife to enter and exit easier.
I wanted to put on sliders but they would not have provided the lower step access needed.
Easy to install only needed help to I hold up one end to get a bolt started then I was on my own again.
Nice product. Install took longer that necessary due to a misaligned screw hole that had to be filed . Excellent communication. Answered my emails almost as soon as I sent them. They look amazing.
Bought these for my 2018 Tacoma - needed a little step up and help with protection of the rocker panel - as well as dealing with the frustration of mud & dust always coating inside door. These solved all 3 nicely. They are sturdy, well built, and very easy to install.
At least on my truck - only had to find pre-drilled holes and insert brackets. Found it easier to install bars attached to brackets then try to get bar on brackets after they were installed on truck.
Great price - cheaper than anywhere else - and free shipping!!
these Nerf bars are super easy to install and look wicked cool. We really jumped on to make sure they had no movement and they did not!
Westin typically makes a solid product.
The instructions are not all that great. Pictures help. But it would be best to have the picture showing the driver's side have a note that says the view is from under the truck. Also, the steps themselves were miss marked for which side went where. A clearer mark on the package would help. It looked like 77D or 77P.
Installation was good once I figured out which way I needed to look at the brackets to install them.
The bars are exactly what I wanted and mount well.
My one gripe is that the powder coat was covering the threads at the mount point of the bars. After spending an hour trying to follow the instructions I had to disassemble the system to clean out the threads. After that it went in as written.
E trailer is a awesome company to work with, they go up and above to help you out.. so glad we had the chance to work with them
I like the steps, only issue is the color faded very quickly and I am now probably going to have to take them off and get them line-xed.
Great customer service
Easy install but drilling was required for the extended section although it did say no drilling required
Info for this part was:
At etrailer.com we provide the best information available about the products we sell. We take the quality of our information seriously so that you can get the right part the first time. Let us know if anything is missing or if you have any questions.


Thank you! Your comment has been submitted successfully. You should be able to view your question/comment here within a few days.
Error submitting comment. Please try again momentarily.