
California residents: click here
Videos are provided as a guide only. Refer to manufacturer installation instructions and specs for complete information.
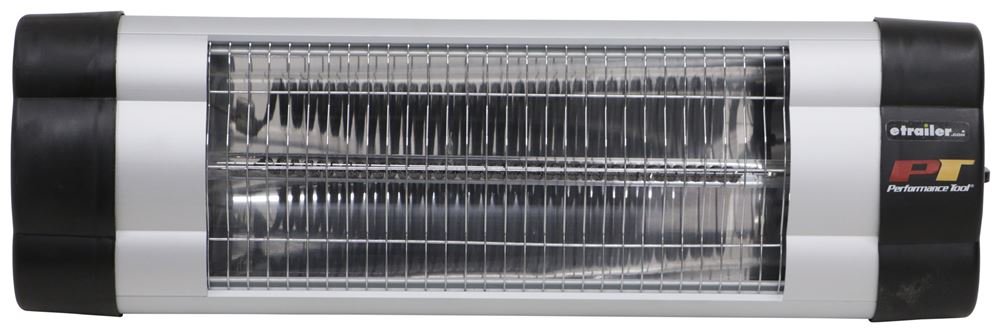
Adam: Hi everyone, Adam with Etrailer.com. Today, we're going to be taking a look at Performance Tools Infrared Shop Heater. So whether you are winterizing your mower or just working on a four-wheeler or side by side. This is going to be a great way to keep yourself a little warm whenever it's really cold outside and make these jobs just a little bit more enjoyable. So this is going to be an infrared heater, and it's going to be a tube-style heater with a carbon fire coil on the inside. An infrared heaters are going to be ideal for keeping the costs down while getting a good amount of heat out of it.
The cool thing about infrared heaters is it kind of works like the sun. It's going to be like a campfire really cozy, but it's not going to be blowing air around, which is going to keep the dust low.And just to keep that smell down as well. Whenever you have a heater that has a fan and a coil, eventually it gets dusty. And that's that smell that you get when you turn it on. This way right here is just emitting that heat, which is going to be ideal for keeping your shop nice and clean and warm.
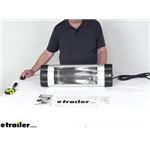
This is going to be moisture resistant so you can put it on your indoor uses or even a covered porch to keep you nice and warm. It does have an aluminum housing, which is going to resist against that rust and corrosion over time if you do plan on putting it outside. And on top of that, it doesn't make any noise, but is kind of like a T-track on the back. So by loosening these, we will be able to move these brackets back and forth just to get that perfect fit and angle for whatever you may be doing by loosening these up as well.We are going to be able to rotate these around and we do want to let you know, we are supposed to mount this like so, and not vertically. Just so you guys know this heater will be about two feet long and with the mounts completely extended out, we are going to have about five inches of mounting distance between our wall and our heater here.
And we are going to have about seven and a half inches from this section to here. And we will have our thermostat adjustments on the side. So, all the way on is going to pull that 1,500 watts, which is the max output for this heater. And even standing right here, it's honestly getting pretty toasty pretty quick. So last winter, I went out and bought a very expensive heater.
I had to run it to a 240 outlet, which was a pain.It does suck a lot of energy. And these coils in here, it just smells after a while. It gathers all that dust from my shop and it just isn't really that enjoyable. And to be honest, it really didn't work too well. I usually kept it here right next to my fuse panel and I'm working back there. So having that infrared heater honestly, would be ideal. And it's a fraction of the price. Now that we've gone over some of those features, one thing I do want to let you know, is the difference between these infrareds. We do want to make sure we mount it to where it's going to hit us. It does it heat up the air and heats up objects and me. So I plan on doing some work to this mower. So I put it right next to me so that I'm going to get the benefits of all this heat. So let's just go ahead and show you how we mounted this up. So when mounting up our heater brackets, what we want to do is make sure at least a yard away from any curtains or furniture, anything that's going to be susceptible to heat and maybe catch on fire. You want to make sure to put them somewhat level. I'm just going to make it level with this top edge here, try to put that in a place and screwed in. This is the included hardware. You don't have to worry about going to store and find anymore.So no matter other brackets undo our heater, all we have to do is basically just thread these screws in. And it's kind of like a T-track. So we don't really have to worry about manic mounting our other brackets too close together, because we will be able to move these down that track there. So I'm loosen up a little bit, get it down low here, slide them to where they match up, I'm going put on the inside here. As you can see that little tab needs to fit in this little groove here. And once we do that, we're going to grab our hardware and mounted into place. We're going to go washer on each side. I'm going to push it in through this side here and put a washer on the other side and then our wing nut.Now that I have these brackets here nice and even, I'm going to go ahead and tighten those down. As you can see here, we will have a decent amount of range. It's going to be perfect, once we get it to where we want. We have these grooves here, which these two brackets are going to catch, and then it's going to stay in place pretty nicely. So they do recommend that you plug this directly into your outlet and not using any sort of extension cords or fuse protectors. So just so you guys know, we do have seven feet, eight inches of cord length. So just be sure to mount it up really close to an outlet. So once you get your heater ran to the proper outlet, all you have to do is turn it on and watch it work. And that'll do it for a look at the Performance Tools Infrared Heater..
Info for this part was:
At etrailer.com we provide the best information available about the products we sell. We take the quality of our information seriously so that you can get the right part the first time. Let us know if anything is missing or if you have any questions.


Thank you! Your comment has been submitted successfully. You should be able to view your question/comment here within a few days.
Error submitting comment. Please try again momentarily.