
ARB Safari Off-Road Snorkel - Custom Fit
Item # ARB56NR
Our Price: $680.00
Confirmed to Fit
2019 Jeep Wrangler
Will this fit?
To see if this custom-fit item will work for you please tell us what vehicle you'll use it with.
In Stock


Need help with installation?
Locate installers near me- All Info
- Q & A (0)
- Videos (1)
- Photos
2019 Jeep Wrangler - ARB Safari Off-Road Snorkel - Custom Fit
- Tube Included
- ARB
- Snorkel
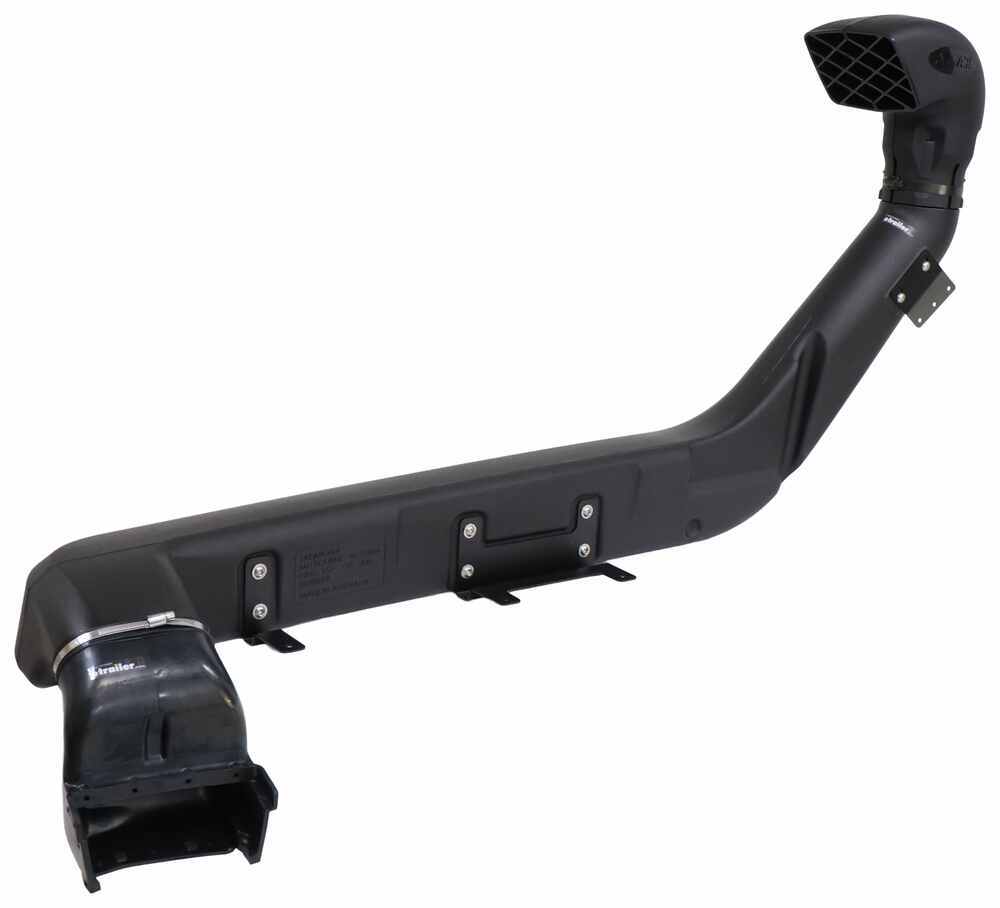
Go confidently though deep water crossings by moving your air intake above your Jeep Wrangler's hood. Snorkel improves overall engine performance by preventing water and dust from getting into your engine, giving you better air flow.
Features:
- Off-road snorkel takes your air intake from a vulnerable low position to above your hood
- Reduces the moisture and dust reaching your engine to provide you with cooler and cleaner air
- Scoop at the top of the snorkel funnels water from the airstream giving maximum airflow
- Rotates 360 degrees to minimize exposure from strong rains and snowstorms
- High-flow air ducts and body ensure your engine has a surplus of air
- UV stable polyethylene body holds up harsh off-road conditions
- EPDM molded duct connections can withstand temperatures up to 266 F
- Included stainless steel hardware is corrosion resistant
- Custom installation ensures a seamless transition
- Attaches to your factory airbox
- 3-Year warranty
SS1080HF ARB Safari 4x4 Snorkel - Custom Fit - VSPEC
Video of ARB Safari Off-Road Snorkel - Custom Fit


Videos are provided as a guide only. Refer to manufacturer installation instructions and specs for complete information.

Video Transcript for Review of ARB Cold Air Intakes - Snorkel - ARB56NR
Hello neighbors, Steven here with etrailer.com. Today we're looking at our ARB Safari Off-Road Snorkel. Now folks, this will be a nice custom fit, it's gonna fit a couple different years and makes of the Jeep GL Wrangler, the Wrangler Unlimited, and the Gladiator, excluding the Ecodiesel. So want you to go ahead and double check with our fit guide here at etrailer.com. Top server homepage, enter things like your make and model, engines type and that kind of stuff. Whatever it asks you to make sure you get the right parts the first time.
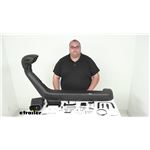
Also, keep in mind that videos can be outdated and it could possibly fit newer years than what's listed on this video. So getting into it, again, nice off-Road snorkel kit. Here's an image of what it could look like when it's installed after you've got it all put together. Now folks, I don't wanna sugarcoat anything, I will tell you up front, this is a nice, tedious install. So some snorkels that we carry for different vehicles, they're pretty simple, you get a template, you cut a couple holes, you drill, you install it, no big deal.
With this Jeep one, it is very in depth. I'm not trying to scare you away, I'm just saying take your time, double check the instructions. I recommend number one, you read the instructions thoroughly all the way through, it's a pretty quarter inch thick pamphlet that comes with it. There's a couple things in that instruction book that you're gonna need. You do get stencils that are included with the kit, but also in the instruction manual, there's a couple pages that are also used as stencils.
One of them is even cutting a hacksaw blade to make a custom blade to cut through the engine hood. So again, lots of tedious stuff. I think you can do it, you just need to take your time and I don't wanna scare you away, but again, I just wanna make you very clear from the front that it's very in depth. So getting into it, why a snorkel Well, the off-road snorkel will take air intake from the low vulnerable point under your hood and put it up higher above your hood and about halfway up the A pillar or the window frame, depending on what vehicle it's going on. Now, it's gonna reduce the moisture and the dust that reaches the air box and reaches your engine then and provides you with much cleaner, cooler air.
The scoop here at the top can rotate 360 degrees. Now keep in mind there's a hose clamp that goes over this. So basically, more likely than not, it's gonna be facing this way parallel with the snorkel as you're going down the road. But if for some reason, you knew you we inchesre going through heavy snow or heavy rain, you could technically twist it to the side if you need to, to get cleaner air without getting as much rain and water in there. Now, the design up here should eliminate most of that moisture and water, but again, it is possible to get moisture and stuff in there. Now again, that's also gonna give you the maximum air flow and it does have a high flow and the body itself is gonna ensure that the engine has a nice surplus of air going through it. It's made of a very, very stable, UV stable rather polyethylene, and it's gonna hold up to all harsh off-road conditions. So this guy here, again, nice big, long, when it's installed, it's gonna look something pretty much like that on your Jeep. Now, there is a connection here that goes to the air box itself. This is made of an EPDM molded duct connection and it can withstand temperatures all the way up to 266 degrees Fahrenheit. So keep in mind, that's the main component under the hood, so it needs to be nice and robust. You're gonna get all the included stainless steel hardware and rivets. So yes, you're gonna be riveting, drilling holes, cutting. Again, it's a tedious, time consuming install, but you can do it. So you get all the hardware here, all the rivets, there's a couple different colors and sizes. You get the stainless steel fasteners that can mount this to the fender, you're gonna get brackets for the fender, all the different hose clamps here to install on the air duct at the top and under the hood. You get different brackets here and here. You are gonna get all these little stainless steel attachments here. Those are gonna be for the air box itself, and we'll get to that in a minute. You also get this template. This is just one and you can kind of see there, hopefully with the lighting, you're gonna get about six different templates inside of this guy alone, just for the air box. And then besides that, let me zoom back out here. Hold this guy, you're gonna get a main template for the main body of the snorkel here, and that's gonna go align to the lower edge of the hood and you'll be marking holes for the hood cutout and that kind of stuff. So that is included as well. Now, I got this in my hands, let me go ahead and carefully turn it around and I'll show you the other side. So you have, yeah, it's pretty big. You have all these brass fasteners inside this polyethylene body and a lot of your screws are gonna be holding on that way and the bracket up here on the A pillar are gonna be held in with those mounting points. So we went over all the hardware and stuff. Again, it's a custom install, everything here again stainless steel, so it should not rust corrode on you and anything, it's gonna attach to your factory air box, has a nice three year warranty. So now a quick, a very quick overview of the install folks. I don't have enough time to go over the complete install, but again, some things you're gonna need, a 4.5 millimeter, five millimeter and 5.5 millimeter drill bits. You're gonna need a pop rivet gun, a drill, and it's recommended that you take one hacksaw blade. And like I mentioned before, there's a template in the instruction guide, it's like a little template, you'll cut it out, it's the exact size you need, you'll lay it over the hacksaw blade and you'll cut the hacksaw blade to that shape. Now that's recommended if you have a body blade, then you may not need that. You're gonna need some touch up paint. You wanna make sure that any place you cut through your fender, your hood and that kind of stuff, or drilling holes even through the window frame, the windshield frame that you're touching up all those bare metal spots you've now created so that you don't get rust and corrosion. Now, different hoods may need different spacers. So there are spacers included here with the hardware. If you don't need them, great, you may need them. And the instructions, again, will let you know which ones those are. You're gonna need some adhesive sealant, maybe some silicone, something like that to install the hood bezel with the rivets and everything too. So you wanna make sure you're getting a nice watertight seal when you're installing all that. Now, probably to me from what I read in the instructions and talking to our installers is the air box modification, that's probably gonna be the most time consuming and the most critical thing you're gonna modify. The air box has lots of modifications. You're gonna use either a body saw, the hacksaw blade you made, a knife, or even a small pneumatic cutting wheel or dremel tool or something like that. Again, you'll have the templates, you'll mark them on the air box, you'll carefully cut them out. Again, please read the instructions many times when you get to that point, make sure you're understanding where you're cutting, what overlays to what, and double check before you make that cut. You know what they say, Measure twice, cut once, In this case you have a template, so it's a little easier, but just double check it. Now, another thing that's kind of in the instructions that I noted was kind of, I won't say odd, but I wanted to point it out, You must seal the factory water drain holes in the bottom of your air box per the manufacturer instructions, that's just so it gets the right kind of suction and all that. And the last kind of tip, you will end up drilling two holes in the top of this main air duct here and that's gonna get one of these brackets here and that's gonna be drilled through and you're gonna mount your antenna mount clip to where your antenna can then connect to that on the air ram assembly. So just keep that in mind as well. There is some drilling required through the windshield frame itself as well. So again, folks, I do honestly think that anyone that knows how to do some basic mechanical work, cutting, some touch up paint work, that kind of stuff with those little touch up paint pins, you should have no problem doing this. Just again, take your time, read the instructions thoroughly, make sure you're doing it correctly. Well folks, a lot of information, I hope that it's been helpful for you. As always, you can contact us here at etrailer.com or the manufacturer will be more than happy to help you. I'm Steven, thank you so much for watching and have a great day.
0
0
See what our Experts say about this ARB Cold Air Intakes
Info for this part was:

Installed by:
Steven C

Edited by:
Daron K

Written by:
Alex H
At etrailer.com we provide the best information available about the products we sell. We take the quality of our information seriously so that you can get the right part the first time. Let us know if anything is missing or if you have any questions.
Product Experts Available Now!
Call 1-800-940-8924
Thank you! Your comment has been submitted successfully. You should be able to view your question/comment here within a few days.
Error submitting comment. Please try again momentarily.