
Front Runner Pro Stainless Steel Camp Table with Under Rack Storage Bracket
(0 reviews)
Price: $663.00

Front Runner Pro Stainless Steel Camp Table with Under Rack Storage Bracket
Item # FR76RV
Our Price: $663.00


Need help with installation?
Locate installers near me- All Info
- Q & A (0)
- Videos (1)
- Photos
Front Runner Camping Table - FR76RV
- Free-Standing Table
- Folding
- 46-5/16L x 29-1/2W Inch
- Front Runner
- Stainless Steel
- Silver
Enjoy the convenience of a table while traveling without sacrificing rack space with this Pro camp table and under rack storage kit. Brackets install to bottom channels of your Slimline II platform rack. Table loads from the side or rear of vehicle.
Features:
- Enjoy the convenience of a table while camping, tailgating, or overlanding with this table and under rack bracket kit
- Folds and stores under your Slimline II platform rack on included brackets - conserves precious rack space
- Stainless steel top is durable and easy to clean
- Aluminum table legs lock in place
- Rounded nylon table corners prevent accidental nicks
- Under rack bracket installs to bottom channel of your Front Runner Slimline II platform rack with included hardware
- Attaches parallel or perpendicular to the slats so you can load from the side or rear of your vehicle
- Rubber T-slot inserts prevent rattling and damage to table
- Spring-loaded latch mounts onto the side channel of your rack
- Clamps onto the lip of the table to keep it in place
- Works with small accessory lock (sold separately) to deter theft
- Black powder-coated steel and aluminum resists corrosion
Specs:
- Application: Front Runner Slimline II platform rack
- Dimensions:
- Table opened: 46-5/16" long x 29-1/2" wide x 28-11/16" tall
- Table closed: 46-5/16" long x 29-1/2" wide x 1-5/16" tall
- Under rack bracket: 34-11/16" long x 7-3/8" wide x 1-13/16" tall
- Latch: 1-7/8" long x 2" wide x 3-5/8" tall
- Weight:
- Table: 26.1 lbs
- Under rack bracket: 5.3 lbs
- Latch: 6.7 oz
- 3-Year warranty
Notes:
- Not compatible with Slimsport racks.
- Requires a minimum clearance of 2-1/2" between the underside of rack and the peak of your roof.
- Side mounting requires 5 open slats.
- Rear mounting requires a minimum of 7 slats (53-1/2").
- Rear mounting not suitable for vehicles with a rear roof antenna.
TBRA017 Front Runner Pro Stainless Steel Camp Table with Under Rack Storage Bracket
Installation Details
Video of Front Runner Pro Stainless Steel Camp Table with Under Rack Storage Bracket


Videos are provided as a guide only. Refer to manufacturer installation instructions and specs for complete information.

Video Transcript for Review of Front Runner Camping Table - Under Rack Mount Stainless Steel Camp Table - FR76RV
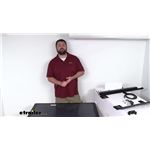
Hi there, I'm Michael with Etrailer.com. Today we're gonna take a quick look at this Front Runner Pro stainless steel camp table with under-rack storage brackets. This setup is going to allow you to enjoy the convenience of a table while you're camping, tailgating, or overlanding, and then when it's time to pack up, you just simply fold the table and it will store under your Slimline II platform rack so that you can use the included brackets, save space in your rack by storing it underneath there. This does have a stainless steel top, which you can't really see, 'cause it has this protective film on it for shipping. But if I turn it to the underside, you can see that stainless steel construction under there. That stainless steel top is gonna be very durable and easy to clean.
If we're looking at our table dimensions, this is 44 1/2 inches long by about 29 1/2 inches wide and approximately 29 inches tall. Now, I'm about six foot two inches tall, so you can kind of see how this lands on me. So it is going to be very convenient to prepare your food or sit and eat your food while you're out camping or enjoying the outdoors. And then when it's time to pack up, our aluminum legs here will fold in, which will be a little bit difficult for me to do here one-handed, but they will fold in there, give you a nice low profile. So when the table's closed, it's only about 1 3/8 of an inch tall, so it's gonna slide right into those brackets underneath your rack very easily.
These legs will lock into place, so it's gonna give you a very solid, sturdy table there. You can see our corners are a rounded nylon, so that's gonna help prevent any accidental nicks. And I will say that this is going to be a really nice size for sitting and eating. There's also another option that's a prep table, so it's got a little bit narrower dimension to it. So if you're just looking for a place to set up your dishes, get your meals prepared, you can go with that option.
That'll give you a little bit narrower surface area. But this one is gonna be a nice option if you are wanting to have a good-sized table to use while you're out. Getting this loaded up is going to be pretty simple. Like I said, you just fold those legs up and then you'll be able to slide the table into the brackets here, which are gonna be installed into the bottom channel of your Front Runner Slimline II platform rack. They do include all the hardware that you're gonna need to get this installed.
I do want to point out, again, this is gonna be compatible with the Slimline II platform rack. It's not gonna be compatible with the similar slim sport rack. So make sure you're getting the right kit for your setup. So this can be attached either parallel or perpendicular to the slats on your rack. So you can load your table from the side or the rear of your vehicle, whichever works better for you. The brackets are about 35 inches long, seven inches wide, and approximately two inches tall. It is gonna require that you have a minimum of 2 1/2 inches of clearance between the underside of your rack and the peak of your roof. If you are gonna be mounting from the side, it is gonna require five open slats. If you're mounting from the rear, it's gonna require a minimum of seven slats or about 53 1/2 inches. Keep in mind, if you are wanting to mount from the rear, that's only going to work if your vehicle does not have a rear roof antenna. If you do have a rear roof antenna, this won't be suitable to load from the rear. These brackets are a black powder coated steel construction, so they are gonna be very sturdy, reliable for you. They'll resist rust and corrosion, so they'll last a nice long time. The rubber insert here is gonna install into a T slot to help prevent any rattling and damage to your table during transport. And then we do also have this spring-loaded latch that's going to mount onto the side channel of your rack. That's going to clamp on the lip of the table to keep it in place. You can see we also have a small hole there. So if you wanted to pass a lock, small accessory lock, through to help deter theft, we do have a few options available for you here at etrailer.com that would potentially work there. But very simple way to help secure your table in place, make sure that it's not gonna slide out during transport. Now obviously, anytime you're mounting anything on your roof, you do wanna be mindful of the weight. So our table is gonna be about 26 pounds, just a little over, 26.1 pounds. Our under rack brackets are about 5.3 pounds, and our latch is less than half a pound. So altogether we're gonna be sitting at a little bit less than 32 pounds. So won't add a whole lot to your load, but make sure that you're abiding by your roof's weight capacity, your rack's weight capacity, with all the other gear that you're planning on taking with you. So if you are wanting to have a very convenient way to have a table out at the campsite and then be able to store it away, transport it with you without taking up any of the space in your rack, this is gonna be exactly what you need. And that completes our look for today. Again, I'm Michael with etrailer.com. Thanks for watching.
0
0
See what our Experts say about this Front Runner Camping Table
Info for this part was:

Updated by:
Wilson B

Edited by:
Daron K

Written by:
Alex H

Installed by:
Michael B
At etrailer.com we provide the best information available about the products we sell. We take the quality of our information seriously so that you can get the right part the first time. Let us know if anything is missing or if you have any questions.
Product Experts Available Now!
Call 1-800-940-8924
Thank you! Your comment has been submitted successfully. You should be able to view your question/comment here within a few days.
Error submitting comment. Please try again momentarily.