
Summer Starts Here - Save up to 70%


Customers prefer these similar products
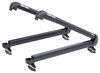
Easily secure gear on your Yakima LockNLoad platform with these perimeter rails. Modular rails can be arranged for a custom setup. Built-in side channels let you add accessories directly to the rails. Simple bolt-on installation.
Features:
Specs:
This accessory was tested to ensure that it is able to handle regular adventuring over rough terrain. Yakima extensively tested it with worst-case-scenario lab simulations and real world driving to make sure it exceeded ISO requirements. This accessory is built to handle evasive maneuvers, swerving, speed bumps, emergency stops, and whatever else you encounter while off the beaten path.

Videos are provided as a guide only. Refer to manufacturer installation instructions and specs for complete information.
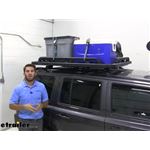
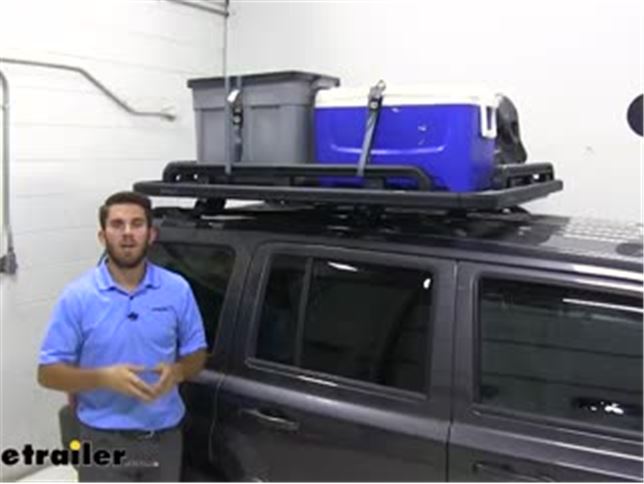
Colin: Hey everyone, it's Colin here at etrailer, and today we're going to take a look at a pretty cool accessory that goes on your Yakima lock and load platform rack. These are the raised perimeter side rails. Now, one thing you want to keep in mind is that these are going to be available in different sizes depending on the size of your lock and load rack. So just make sure you check the description and make sure that the dimensions of these perimeter side rails match the dimensions of your lock and load platform rack.Now this is one of the smaller set of side rails that we have. Some of the other ones might have more connection points, more support points, but they're still going to have the same features, have the same construction, same amount of T-slots that we're going to go through. A lot of times, it's really nice to have a more basket feel or look to your platform rack just so that when you load and have a bunch of cargo, like we've got a Toad cooler, some duffle bags, it's just nice to have that peace of mind knowing that it won't slip off, and that this side rail is going to protect it from sliding off of the rack.
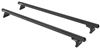
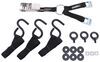
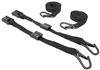
And they're going to provide nice tie-down points. You can see we've got our straps running right underneath of them, just really helps secure all your cargo to make sure it doesn't shift too much.The side rails are going to have the same aluminum construction that your platform rack does. It's going to be very nice and durable and still lightweight, so you're not going to have to worry too much about weight being added onto the top of your roof. We're also going to have a black zinc coating on it, just like the platform rack, so that'll help resist rust and corrosion. The front of each bar is going to have a T-slot, so you can get a lot of different accessories up here.
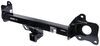
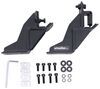
Whether you want a light bar on the front, maybe a shovel or paddle holder on the side. You're not going to lose that ability to customize your rack.Now the side rails connect by these T-slots on the outsides of your lock and load rack. And what's nice is that you're not limited to just the outside T-slots. So let's say I want to get a Yakima SlimShady Awning mounted on the side of my platform rack, right now I can't do that, but I could just move this side rail in a notch and then I can use that outside for my SlimShady Awning. That'll work for any other side mount of things, such as the high-lift jack holder.Your kit is going to come with four of these perimeter side rails.
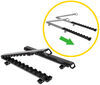
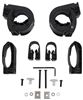
The two for the front and the back are most likely going to be shorter than the ones on the sides. And again, make sure you check the description and make sure the application fits your size platform rack.Now these side rails are going to be pretty easy to install. We'll go ahead and walk you through that process right now. Now you'll see we have our platform rack sitting on a table right now, this is for video purposes, it's just a lot easier to show you guys what I'm doing. This is something that you can still do when it's installed on top of your roof.
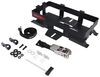
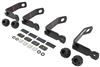
It might just make it a little bit easier to have it at your chest level though. So what we're first going to do is take our two channel nuts. This is going to be the same for all four sides, just drop it in and then we're going to slide one all the way to the back and then one all the way to the front. And now we'll get our rail supports assembled and installed. We have two of them assembled right here, all it is, is a bolt. Then we have a lock washer that goes on there and then a flat washer.And now on the inside of this, there's going to be a hole. You can see it right there. We have to drop it through from the inside, so reach in, just drop that bolt through, just like that. And then we'll put another channel nut on there. You can see how this one kind of has a curve to it. You want to make sure that curve is facing up. And then we'll just thread it on slightly. And now we'll feed them all into the track. Now one of them is going to go towards the left side, one of them will go in the center and the other one will go towards the right side. And again, if you have the bigger side rails, you may have more of these to install and if you have a smaller set, you may have a couple of less to install, just depends on the size of your rack, it's still going to be the same.And now we're just going to slide our side rail onto the tops of our end supports, the side without the T-track right there, is going to be facing up. Then you see we have one on the back side, the front side and the bottom. The bottom is what's going to feed onto these tracks. And you also want to make sure that this rounded edge is facing the outside of your track. We'll just slide that on, may be a little difficult at first, just because that track on the inside is not tightened down yet. We'll just slide it over and get the other two installed as well. And then be sure you spread your end supports out evenly, you just want to make sure they have a max spacing of 11", which with this set of side rails we're doing, that's not really going to be a problem.Now we're ready to get our corner piece installed, but first we need to put this channel nut into the slot right here, just like that. Now it's snug. Now we'll just feed it into our perimeter side rail and then repeat this for the other one as well. Now this is where those channel nuts are going to come into play, that was the first step we did. Just going to slide those over, underneath our corner. And then with another bolt that has a lock washer and a flat washer, we'll drop that through down there and get it installed on there. This may be a little bit difficult at first, just because it's kind of hard to see down there, but just take your time, line them up and then get it threaded on.Now, from here I'm just going to go ahead and tighten each one up as far as I can with my fingers. And then repeat this for the other side. We'll just take our tool and tighten it down and get it snug. This may take a little bit just because there's not a lot of space for your tool to get down in there. So if you got some type of socket wrench or something like that, may be beneficial to use one of those. And make sure you just get every single one snug.Now, when you're all done, just go ahead and give it a good shake, make sure it's secure. And lastly, we'll just get our end caps installed. It's pretty easy. We just push down on it and then once you get it in place, we'll take a bolt with a washer, just a flat washer, and we'll install it on the channel nut that we have on the inside of our cap. Just make sure you have everything in place. And then with that same tool, we'll go ahead and tighten it down. Now from here, we'll be ready to throw it up on our roof.Well, thank you all for watching and I hope this information helped you out, but that's going to do it for our look at the perimeter side rails for the Yakima lock and load platform racks..
Info for this part was:
At etrailer.com we provide the best information available about the products we sell. We take the quality of our information seriously so that you can get the right part the first time. Let us know if anything is missing or if you have any questions.


Thank you! Your comment has been submitted successfully. You should be able to view your question/comment here within a few days.
Error submitting comment. Please try again momentarily.