

Can You Give Detailed Step By Step Instructions For Brake Controller Install On 2001 Toyota Tundra
Question:
I have talked to a few guys at the local Toyota store and Trailer Source. None of them seems to have any idea how to successfully install a brake controller on a 2001 Toyota Tundra. I was sold a wiring harness to install behind the drivers side kick panel, but I could not find a factory plug to connect it to!?!? I was reading on the internet that I have to Hard wire it. Well, I could not find any detailed pictures or videos explaning how or where to tap into the factory wiring. I want to be well informed before I start clipping factory wires. Because: A few years ago I had a 92 Lexus ES300 and I had a very rough time getting an aftermarket stereo and amplifier installed. It litterally took me about a year to get everything correct. Please email me any wiring diagrams, pictures, etc...
asked by: Stephen P
Expert Reply:
To install a brake controller on your vehicle you will need Brake Controller 7 & 4 Way Installation Kit, part # ETBC7 and the Tow Ready Custom Fit Vehicle Wiring, part # 118378 on your 2001 Toyota Tundra.
If your 2001 Toyota Tundra has an existing 4-way connector, you will not need to install part # 118378.
For installation of part # 118378, start by disconnecting the negative terminal on the battery and remove the battery hold down bracket and slide the battery towards the motor. Next, find the gray connector in between the battery and front fender and install the trailer harness fuse holder connector and zip tie the gray connector and fuse harness to the vehicle wiring and move the battery back where it was. Then, with the negative battery terminal still disconnected, connect the fuse holder ring terminal to the positive battery terminal. Then, re install the battery hold down and install 10 amp fuse in fuse holder and reconnect the negative battery terminal.
Next, you will need to find the eleven-pin tow plug which is located underneath the vehicle on the driver side, near the frame rail. Remove the cap and plug the T-Connector harness of part # 118378 into the vehicle harness. Test the functions at the end of the 4-way connector with a circuit tester, part # PTW2993. Then, mount the black box with double sided tape after cleaning the mounting point, you can also use zip ties, just make sure the box is secure and out of the way of moving parts or heat. Then, just secure any loose wiring with zip ties.
Now, for installing part # ETBC7, first you will begin by mounting the included bracket to the bumper or hitch of your vehicle and mount the 7-way connector into the bracket. Then, plug the 4-way on your vehicle, into the 4-way adapter plug on the 7-way connector. For the wiring, the white wire coming out of the 7-way is the ground wire, and should be attached to the vehicles frame. The purple wire is for reverse lights, and can be taped off and tied out of the way if there are not reverse lights on your trailer. The blue wire coming out of the back of the 7-way will be connected to the white wire that is inside of the gray duplex wire and will be ran up and connected to the blue wire coming out of your brake controller. The black wire coming out of the 7-way will be connected to the black wire inside the gray duplex wire and will be ran to the engine bay to a 40 amp circuit breaker which should then be connected to the positive terminal on the battery. I would recommend wrapping all the connections that were made with connectors with electrical tape.
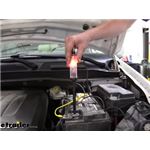
After installing part # 118378 and part # ETBC7 you can install your brake controller. The white wire on the brake controller will need to be ran to the negative battery terminal. The black wire will run to a 20 or 30 amp circuit breaker depending on what is specified in the instructions of the brake controller and then attached to the positive battery terminal. The red wire will be attached to the stop light wire on the brake switch, to find this wire you will need to use a circuit tester, part # 3808. The red wire needs to attach to the wire that only has a signal when the brake pedal is activated.
I have linked an FAQ on brake controllers, and one on brake controller installation. There is also a video review on part # ETBC7 which may be of good reference for installation of your brake controller.


Products Referenced in This Question
T-One Vehicle Wiring Harness with 4-Pole Flat Trailer Connector

- Custom Fit Vehicle Wiring
- Trailer Hitch Wiring
- Powered Converter
- Custom Fit
- 4 Flat
- Tekonsha
more information >
Universal Installation Kit for Trailer Brake Controller - 7-Way RV and 4-Way Flat - 10 Gauge Wires

- Accessories and Parts
- Trailer Brake Controller
- Installation Kits
- etrailer
more information >

Product Page this Question was Asked From
Tekonsha POD Trailer Brake Controller - 1 to 2 Axles - Time Delayed

- Trailer Brake Controller
- Time Delayed Controller
- Electric
- Automatic Leveling
- Under-Dash Box
- Dash Mount
- Up to 2 Axles
- Indicator Lights
- Up to 360 Degrees
- Tekonsha
more information >
Featured Help Information
Instructions
Miscellaneous Media


Continue Researching
- Article: Brake Controller 7- and 4-Way Installation Kit (ETBC7)
- Article: Trailer Wiring Diagrams
- Article: Brake Controller Installation: Starting from Scratch
- Article: Towing a Trailer? Let's Talk About Brake Controllers
- Q&A: What is the Difference Between a 4-Way and 7-Way Trailer Connector
- Article: How to Choose the Right Trailer Hitch Class
- Q&A: Can Sway Control Be Used on a Trailer that Uses a Pintle Hitch Set Up
- Q&A: Installing Brake Controller on Farm Tractor For Moving Trailer Around
- Article: Troubleshooting Brake Controller Installations
- Q&A: How to Determine Correct Replacement For Sagging Trailer Leaf Springs
- Q&A: Recommended Replacement Rooftop Condenser Unit For A Dometic RV Air Conditioner System
- Article: Determining Trailer Tongue Weight
- Q&A: Replacement AC Recommendation for a Dometic 57915.331
- Q&A: Parts Needed to Convert 2003 Jayco Eagle Pop Up With Surge Brakes to Electric