
To see if this custom-fit item will work for you please tell us what vehicle you'll use it with.
Replace a damaged crossbar or add another bar to your existing roof rack with this half kit. Aerodynamic crossbar clamps to Thule Edge feet. T-track with dual rubber strips lets you easily install channel-mount accessories - no trimming required.
Features:
Thule WingBar Edge - 30-1/2" - 1-pack:Videos are provided as a guide only. Refer to manufacturer installation instructions and specs for complete information.
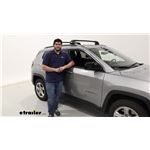
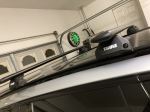
Hi, I'm Matt with etrailer, and today we're talking about the Thule Roof Rack on top of our 2024 Jeep Compass. Now this is gonna be a great option for you if you are running out of space in the back of your vehicle, because the Compass is a smaller vehicle and you're probably gonna run out of space at some point. A good place to place any of that extra gear or luggage is gonna be on top of your roof. Especially with the one we have today, this is gonna be more ideal for your roof boxes and baskets since this is a flush rack. So let's check it out. And what I mean by this being a flush rack is that we don't have any overhang on our crossbars.
What happens is the crossbar is going directly into your tower, so we're gonna have less crossbar space and we won't have any good tie off points to haul anything like a kayak, or anything else along that realm. But really this is gonna be ideal for those roof boxes or baskets. And there are a couple benefits to having a flush rack, and one of those is, since we don't have any overhang when you're getting into your vehicle and if you are a taller person, you're gonna be less likely to bump your head on it. And it's also gonna provide more of this clean look, and then more of this factory look to our vehicle overall. Our rack today is gonna be comprised of three parts.
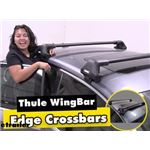
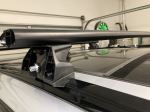
They're gonna have the crossbars, the towers, and the fit kit. So taking a closer look at the crossbar, this is gonna be a 34 inch crossbar, and it's gonna have this arrow design to it. That arrow design is gonna help it be more aerodynamic to reduce that wind noise. Something else to help reduce wind noise is gonna be this weather strip at the very top. That's also gonna prevent any debris from getting in here or getting stuck.
What that's protecting is your T-channel. Your T-channel is gonna be a great use if you have any T-channel accessories you wanna mount up here. And someone might want to use a T-channel for it, maybe if you have some clamp on accessories that you don't like using, because maybe you don't have a lot of space underneath your roof. Or maybe you only have items that are T-channel compatible, where they're just kind of harder to put in place. And at the very end we're gonna have the tower.
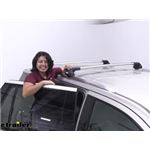
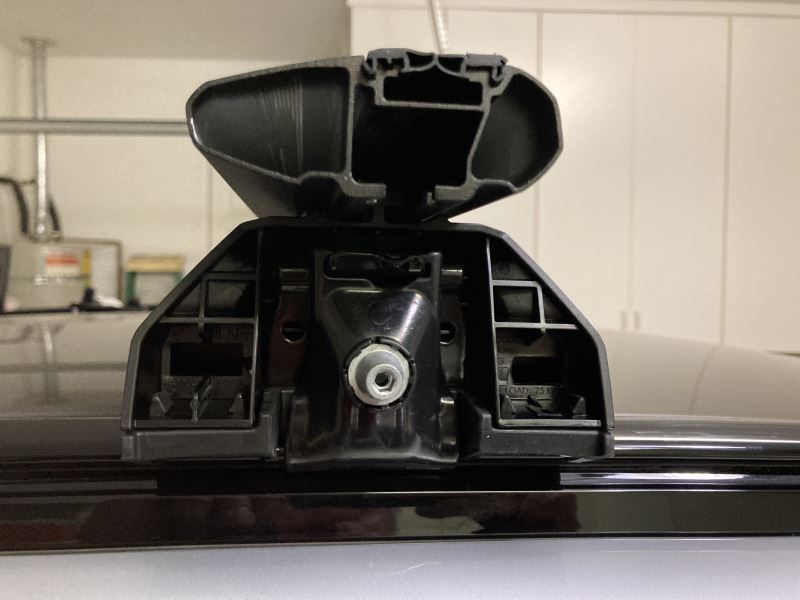
And the tower is gonna have all the hardware, or everything that holds your crossbar in place. And it's gonna give you more of this clean finish overall because we have this end cap. And right next to that end cap we're gonna have this plastic lock core. That plastic lock core is more of a placeholder for the time being. If someone really wanted to get in here, they could just get a flathead screwdriver and take that off. But you can get this replaced with a metal lock core along the way. So if you want that additional security, you'll have it. And underneath we're gonna have our fit kit. This is gonna be a fixed mounting system fit kit. And how this works is it grabs onto your tower or your entire rack, and holds it into place on top of your roof. And since this is a fixed mounting system, it's going to have one location that goes on your roof that's not gonna change at all. Now something I'm not a huge fan of with these fit kits is gonna be the distance underneath our fit kit itself 'cause usually this is designed to be flushed with these flush rails, so nothing can get underneath here. One thing that might be an issue with this is when driving down the road, some wind could go through here and potentially create some wind noise. Now if you're looking for something that's gonna solve that, I'd recommend a Yakima roof rack. It's gonna be completely flush with these flush rails, but the downside to that is it's gonna be much more difficult of an install. And I was talking about how this is a fixed mounting rack, but let me show you what the exact measurements are gonna be since this isn't gonna move it all. That's gonna be about 27 and a half, which is a pretty good distance. It's gonna be able to work with a ton of different accessories, and I think this distance fits our roof really nice. Now we do have a secondary point where you can push this rear crossbar back one space. I don't recommend that spot though because it's gonna be pretty wide for the roof that we have today and depending on what accessories you have up here, you might still get some clearance issues, either with your antenna or your back hatch. So this is what we're gonna be mainly talking about today because it's what we recommend and show during an installation process. But for the total height it's gonna add to our vehicle, if I go from the top of our roof to the top of the crossbar, that's gonna be about five inches, which isn't too bad, it's pretty good. What I recommend doing though is just taking the total height of our vehicle, our rack, and if we have any gear on top of that, include that too so you know what areas you can make it under, anywhere like a garage. Now for the distance underneath, that's gonna be just about three and a half inches. So that's something to really think about because that's still a decent amount of space you have, but if you do have a sunroof on your vehicle and it does extend up and you have some really thick clamps, you could run into some clearance issues there. They could make contact. It's just one of those things, just making sure you know what type of gear you have on top of here, and knowing what type of roof you have. Our weight capacity is gonna be 165 pounds, but what I recommend doing is just checking what your roof is rated for, and you can find that in your owner's manual. After when you've found that, I recommend just going from the low is rated component so you don't overload anything. But in my opinion, I think this is a great rack. I really like the design of it. It really matches the look of our roof. And the fact this is a flush rack, I think it really matches what we have today because we don't have a lot of space on the top of our roof and I don't think we need anything with a lot of overhang. As for the installation, I'm actually a big fan of it. It is a pretty quick and easy installation. If you're curious to see what I'm talking about, just stay tuned and I'll walk you through the process. To start off the installation, we're gonna lay everything out. So closest to me we're gonna have the crossbar itself, and further this away we're gonna have the towers. With the towers, we're gonna have your end caps. We're gonna have our fit kit in front of me with all three parts, and the bracket all the way to the other side. And the hardware to install them too. Behind that, we're gonna have our two included Allen keys. And what I recommend grabbing is a flathead screwdriver. The first thing we're gonna do is grab the bracket of our fit kit, some bolts, and install it on our flush rails. When we're on top of our roof, you'll notice we do have these two fasteners on our flush rails. To remove those is really easy. All we have to do is grab our flathead, push underneath it and apply pressure. I have to put my finger on top of it too to make sure that pressure is evenly dispersed, and then I can remove it. Now you're gonna do this on both sides. And for the rear side, you're gonna have an option to either choose a set of fasteners closer to your front rails, or further away. And that's just gonna depend on whatever gear you have. Once you have these out of your way, we can grab that bracket and those two bolts. The way we want to do this is we wanna make sure this bracket with this part that has that overhang is facing towards your rail. And we're gonna line this up with those two holes where the fasteners were. Once we've done that, we're just gonna put these bolts in, just about hand tight to begin with on both sides. Once this is all the way hand tight, then we can grab our Allen Key with the security end to it and tighten it down the rest of the way. Once we tighten this down all the way, we'll just make sure we tighten all our brackets down on top of our roof, and then we can move back down, getting our towers ready. The process to do this is you notice we have three parts to our fit kit, and they're gonna be labeled A, B, and C. So that's gonna be the ordering in which we put them on. So we're gonna grab clamp A, and line it up with the contours of our tower. It's gonna fit in just like this. These two tabs go on the very top, and that bolt goes through the center of that hole. With that in place, I'm gonna flip this around. We'll notice we have some holes on the bottom of these arms of the tower, and that's gonna line up with these, more like tabs or prongs, of the rubber adapter for our fit kit. So I'm gonna flip that around, line it up. Sometimes it can be a little bit tricky to get in place, and that's just be gonna be because we need to get it underneath this hook right here. Once everything feels pretty flush, then we're gonna hold off on installing the C clamp and put this on top of our tower. The process to do that is, you gonna notice we have this block right here. We wanna make sure we can get that hooked on into the center of our crossbar. If I pull up this weather strip, you're gonna see exactly this hole where I'm talking about. Right there, you want that block to line up with that area. So I'm gonna grab this and line it up with the hole underneath until it slides into place. You notice it doesn't wanna go underneath there, because what we need to do is apply pressure to the top of this block, push down until it fits. If this doesn't wanna push down enough, you gotta loosen up this bolt. The Allen Key we want to use to loosen this up is gonna be the one with the torque device in the end of it. Just loosen this up just a tad, and that's gonna extend where that spacer is at the very end of here. With that extended just a little bit out, we can try again. So we're gonna push it in place, push down on that block. And if you are having issues pushing down on that block, you can also just grab this tool, push down on that block until it gets under there. Now push it in the rest of the way and fully push this into place. And there you have it. You can see where that block is lined up with the hole now. Just make sure you repeat this process on both sides. Our crossbar is completely prepped now. We just gotta put it on top of our roof. Before I do that, I'd like to do a few things. So first I'd like to extend this tower all the way out. I'm just gonna make adjustments a little bit easier later on, and I'd like to make sure this is in the right orientation. So we're gonna have a thicker side, we want that to be facing to the front of the vehicle, and this thinner side towards the back. Once we've done that, we can line this up with the brackets that are on top of our roof and just roughly place it on top. Now this might not be a perfect fit when you get up here, but we can make our adjustments. So here what I want to do is make sure that hook on the back, it's gonna line up with this hole in the back of the bracket. So I'm just gonna push this in just a tad bit. Gonna line everything up, and everything's looking pretty good. I just need to do that on both sides. And when both sides are on, we can start installing our C clamps. When installing the C clamp, we're just lining up this top opening with this tab from clamp A. I had to put mine on at an angle, it just fits on there a little bit better. And push it in place, and that hole should line up with that bolt. We're gonna grab this other adapter. This is what's gonna cinch down your C clamp into place. You're gonna wanna make sure that threaded side is facing towards your bolt and line it up, and just hand tighten this into place. If you do have troubles lining everything up, you can put this on in an angle and just scoop up, align your bolt with this adapter. Once this is hand tight, you can repeat this process on the other side. The next step is just gonna be making sure that the clamps are fully engaged. So what we're looking for is that this clamp on the front and back is fully underneath and around your bracket. And if you're still kind of worried about it, you can just lift up on the tower, try to pick it up, and if it doesn't remove, you're good. What I like to do now at this point is just check that we have the same crossbar distance on both sides. So the way you're gonna do that is you'll notice we have these letters on top of the tower, and we just wanna make sure that both sides are on the same letters. So if yours is on A, you wanna make sure that both are on A. And how you adjust that is just by grabbing a tower, either pulling or pushing the crossbar. But ours is looking pretty good. So what I like to do is just tighten this now. You just grab that Allen key with the torque device on the back of it and tighten this down into place. This is gonna prevent your crossbar from moving anymore. Once this is fully tightened down, it'll let you know because you're hear clicking sound from here. And you notice this is kind of moving a little bit from where that line was sitting. So what I recommend is not fully tightening this down. I'd recommend tightening this down just a little bit and go to the other side and do the same. Just going back and forth until this is fully tightened down. Once the crossbar is secured all the way, we're gonna do the exact same thing for the nuts on your clamps. And when it clicks into place, I recommend just giving it a good shake test, make sure nothing's moving. It feels pretty good. And now we can install our end caps. And to do that's pretty straightforward. All you have to do is line this end cap with the contours of your tower until it kinda grabs on or clicks into place. You can come over here to that lock core, and just turn this so it secures down and won't fall off. And that will conclude the installation and some of the features of the Thule Roof Rack on top of our 2024 Jeep Compass. Thanks for watching.
Average Customer Rating: 4.8 out of 5 stars (19 Customer Reviews)
Replace a damaged crossbar or add another bar to your existing roof rack with this half kit. Aerodynamic crossbar clamps to Thule Edge feet. T-track with dual rubber strips lets you easily install channel-mount accessories - no trimming required.For XXX bucks I thought it would include the keys. Not plastic plugs. Instructions say it should have key. They even talk about how to store the key. My advice to anyone is buy it directly from dealer.
The website was easy to navigate. Placed 2 orders in the last 3 weeks. Delivered on time , with a notice of when it will be delivered. Items were in the box with all pieces. Great company and easy to deal with.
Initially I was worried that I good not get a good Roof Rack configuration to match my 2022 Kia Telluride. When I asked etrailer for some assistance on the configuration, Jon was quick to reply with an excellent solution. He definitely knew the products. Unfortunately, my initial shipment was damaged but Gwen and team quickly got me replacements in the mail. I have received and installed all components and couldn't be more satisfied.
We bought a new vehicle that we already had several Thule accessories for. Purchased the fit kit for our Tahoe along with the Flush Rail feet and they fit perfectly.

Niiiiiice! Is what we say when we see the car now. The roof rack is well built. Instructions were easy- the letter specification to tighten the rack were a bit much. We had to adjust based on how things looked and jived with the car. Some soft cushion edging would not flush over the roof indentation edge, so we had to re-loosen and tighten the rack few times until all settled well. Bottom line, we wanted a solid rack that did not have overhang, did what it is suppose to, was low profile, and make the car look hot- check!!!! We are very happy! Best part about the entire experience however is etrailer. I swear, one might never need customer service or any help with their purchase, until they do. And what a customer service it is. Wow. It’s worth returning to etrailer for more business, purely because you want this business to do well and to remain in business and to show them how much we appreciate their excellent customer service.
Very pleased with order. Shipped fast, not damaged, all parts accounted for. Easy install, very sturdy, and attractive design. Slight wind noise but that was expected compared to not having a roof rack.
Originally ordered a Yakima system, but availability everywhere was virtually nil. Switched to Thule and ran into some of the same shortages with the supply chain, likely due to Covid. Took about a week to receive and it was the perfect part for my BMW X3.
Great roof cross bars for the Lexus RX450h ! Better and beefier than the OEM cross bars. Yes, these are more expensive (wish they weren't! Locks should be included in the base cost) They are solid and planted the XXL roof carrier with ease. Took a bit to center the roof carrier- so we could open the rear door without crashing into it. Only took a 3 mpg hit with the racks and carrier on the roof (@ +5 mph over speed limit on the highway) I really like the way they look on the vehicle. We're probably going to keep them up for snowboarding season. Keep in mind once they're initially installed- they're a snap to take down as well.I made a mark on the inside on the rails to make reinstalling easier.

Do you have a question about this Roof Rack?
Info for this part was:
At etrailer.com we provide the best information available about the products we sell. We take the quality of our information seriously so that you can get the right part the first time. Let us know if anything is missing or if you have any questions.


Thank you! Your comment has been submitted successfully. You should be able to view your question/comment here within a few days.
Error submitting comment. Please try again momentarily.