
Custom RCP Fit Kit for 4 Rhino-Rack RC and RV Series Roof Rack Legs - Fixed Mounting Points
(1 reviews)
Price: $111.11
In Stock
Custom RCP Fit Kit for 4 Rhino-Rack RC and RV Series Roof Rack Legs - Fixed Mounting Points
Item # RR66QT
Our Price: $111.11
Will this fit?
To see if this custom-fit item will work for you please tell us what vehicle you'll use it with.
In Stock


Need help with installation?
Locate installers near me- All Info
- Reviews (1)
- Q & A (0)
- Videos (1)
- Photos
Rhino Rack Roof Rack - RR66QT
- Fit Kits
- Rhino Rack
- 4 Pack
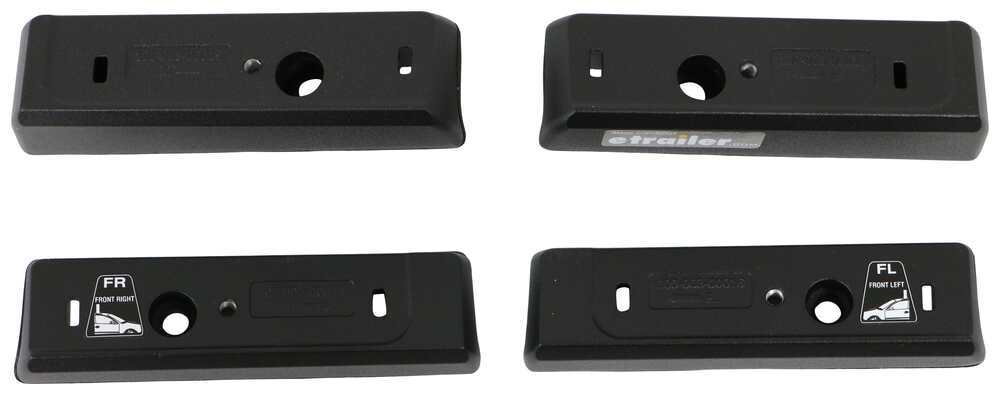
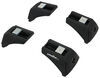
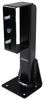
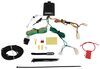
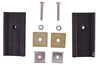
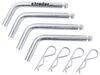
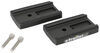
Custom fit kit lets you mount Rhino-Rack RC or RV series legs to a vehicle with fixed mounting points. Legs mount to vehicle with attachment studs. Molded inserts cover bases when the legs are removed. Includes 4 pads, covers, and mounting hardware.
Features:
- Custom fit kit allows you to mount 4 Rhino-Rack RC or RV series legs (sold separately) on your vehicle with fixed mounting points
- Threaded studs screw into fixed mounting points to provide attachment point for legs
- Legs slide onto studs and secure with hex bolts
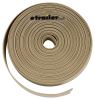
- Molded-rubber pads are designed to fit the contours of your roof
- Protect your roof from scratches and abrasions
- Precision-molded inserts cover bases when the legs are removed
Specs:
- Application: Rhino-Rack RCH, RCL, RVH, and RVL roof rack legs
- Quantity: 4 pads, 4 covers, and mounting hardware
- 5-Year limited warranty
RCP70-BK Custom RCP Fit Kit for Rhino Rack RCH, RCL, RVH, and RVL Series Roof Rack Legs - FMP
Installation Details


Video of Custom RCP Fit Kit for 4 Rhino-Rack RC and RV Series Roof Rack Legs - Fixed Mounting Points


Videos are provided as a guide only. Refer to manufacturer installation instructions and specs for complete information.

Video Transcript for Rhino-Rack Vortex Aero Roof Rack Installation - 2023 Toyota Highlander
Hi Matt with etrailer and today we're gonna be talk about the Rhino-Rack Vortex Aero Roof Rack System on the 2023 Toyota Highlander. Now this is gonna be a great option if you're kind of running outta space in the back of your vehicle and you need to put some additional accessories up top to kind of store some extra luggage. It's also gonna be great if you're going out camping and you need to put your additional camping gear up top as well. Our roof rack system's gonna have three components. The first one's gonna be our 49 inch arrow crossbars, that's gonna plug into our Rhino-Rack Towers and that's gonna sit on to our base. This is gonna have the capacity to hold up to 165 pounds but I'd always recommend checking what your vehicle can withstand for its roof as well.
And taking a closer look at that crossbar, this's gonna be in the shape of an arrow so this is gonna be tapered on both ends to reduce wind noise. We're also gonna have this vortex strip up top that kind of peels off and can be trimmed and we're gonna have one on the bottom as well that has a measuring strip on it. Now in our case today we don't have a measuring strip on the bottom since we keep this one in the shop, we use it a lot so we're just taking it off. Something to note, we can clamp accessories on here but if you don't want to clamp anything on you can actually peel this vortex strip off and place your accessories on this T track up here. And at the end of our crossbar we're gonna have this spot here and that's gonna be a lock so no one can come by and kind of take off any accessories you have up here.
But you can actually get this switched out and put a metal lock core that kind of matches the one down here so it's keyed alike. We can actually just remove that with our key here, this fit, kind of matching what it says here with the unlock symbol and then take it off real easy. That's gonna reveal this bolt that plugs into our base. That base is just gonna sit here, so everything's one unit. What I do like about these bases are the way these sit on our rails, can be very flush and fit very nice.
And even the back one kind of raises up a little bit differently just so our crossbars are level. Now, they are gonna be fixed at about 32 inches. So that is one of the downsides with it being fixed that it's only gonna be able to accommodate certain types of gears. But on the plus side, since they are fixed they're gonna be a lot easier to install. As for how it's gonna sit on the top of your Highlander, we're gonna get maybe just a little bit of overhang on the sides so it sits very flush with the vehicle.
If you'd like the low profile look of it this is a pretty good fit for the Highlander. For how far it's gonna sit up from the top of your roof, from the bottom of the crossbar to the top of the roof it's gonna be about two and a half inches. So that's pretty close to your roof but definitely still enough room to get a clamped accessory on there. And from the top of the roof to the top of the crossbar, it's gonna be about four inches. So that's something to factor in when you're adding gear to the top of your system, just adding that four inches plus the height of your vehicle plus the height of the gear to the system. So if you want to keep these on your roof for an extended of time, they're gonna be able to stand up to the test of time since they are made of a durable aluminum with a black powder coat finish. So that's just gonna help 'em stand up to weather conditions and less prone to rusting. And actually where they sit now is great because if you wanna leave them up all season long they're not gonna really interfere with your sunroof so they're gonna be far enough back where they sit in a very nice location. As for the installation process I thought it was pretty straightforward, especially with it being on fixed points, it makes it a lot easier. Really my biggest issue with it was just trying to tighten the crossbar down to the tower. It can be kind of difficult to reach underneath here and line everything up. We found a couple workarounds around that and if you're kind of getting snagged up on that too just stick around and we'll show you how to do it. The first thing you're gonna want to do is lay everything out. So we're gonna have our 49 inch crossbar, we're gonna have our bases and over here we're gonna have our towers, the hardware that goes with them and we're gonna have our included tools right over here and to additional keys and a tool for your crossbar. And what I recommend bringing as well, we're gonna recommend using a screwdriver, a 10 millimeter socket and wrench, a tape measure and some trim tools. And next up we're gonna move on to putting our bases on our roof. Before we can put our bases up there, we're gonna have to remove this piece that attaches to your rail and instead of using a screwdriver with some tape on the end we're gonna tape our rails so we don't damage it. We find it a little bit more helpful in this way rather than the screwdriver method. So I'm gonna just take my trim tool and I'm gonna stick it underneath that piece that sits there and I'm gonna try to push against these tabs and push up. It should start to kind of pry a little bit. And once I get one side up, I like to kind of move over to the other side, push that a little bit more up too and come back and finish the job just like that. You'll notice we only have two bases down here and that's just because we've already installed the back crossbar. And now we're gonna have our front right and our front left. We're gonna start by installing our front right now. To get that base up there, I'm just gonna make sure this hole here is lined up with this one here and I'm just gonna set it down. You'll notice we're gonna have the fatter side on the outside and the thinner side on the inside. Next up, I'm gonna take this bolt here, measure an Allen key and just kind of set it in there. Just hand thread it a little bit, make sure it's lined up right and now just take our included tool and tighten it down the rest of the way. And after when you've completed this on this side you can do the same thing on the other side. Now I'm gonna come over to our crossbar and I'm gonna flip it over so that the bottom's facing up and I'm gonna use the included tool that's specifically for our crossbar to remove the end cap. All you have to do is turn and twist and pull it off. And now I'm gonna just take our towers, making sure that middle block is facing down and I'm just gonna slide it through our channel at the bottom, just push it down some and I'll put our end cap on it real quick. Just gonna grab our included tool and tighten it down just somewhat, just enough where you can move it some but it's not gonna slide around very easy like that. And just do the same thing on the other side. Once everything secured on here you can lift it up and put it on your roof. You might need an extra pair of hands if you can't reach out that high. But once you get it up there, you just got the line up the back one so it fits into those tabs just like that. And you can let the other side drop and you might have to adjust it some. That's part of the reason why we didn't tighten it all the way. But once you have it where you need it to be then you can tighten it down the rest of the way. To tighten it down the rest of the way you can use our tool and just kind of come over underneath here and try to line it up. I find this a little bit difficult to try to do just 'cause it's kind of hard to find that hole and line everything up. So what I like to do is actually just remove our crossbars and since they've been tightened earlier not to slide around, we can actually do it on a flat surface on a table and just tighten 'em down that way. And when you have it tightened enough you can repeat the same process on the other side. Once everything's nice and tight and it's not gonna move around, you can lay it back up there and fit it back in to its spot just like so. And now we can tighten our towers to our bases. And to do that is pretty easy. All you have to do is take your included key and use it to take off your end cap just like so. You can put this off to the side and taking your bolts and washers, you can kind of just thread this through this hole here. What I like to do a lot of times too is put the bolt through beforehand just to make sure there's no, nothing in the threads like some of the black powder coat that can make it kind of harder to thread in. And once I've got it tightened down enough, I can use a socket and a wrench just to tighten it down the rest of the way. And once it's about tight enough for you, then you can put the end cap back on and repeat the process on the other side. Once everything's nice and tight and secure, just do a quick kinda shake test to make sure everything does fit right and after that you should be ready to hit the road. Overall I think this is a great option for the Highlander. I think it fits really low profile and it sits pretty flush with our vehicle and it makes for a pretty easy install. Now there is a few kind of like spots where it's a little bit difficult to maneuver especially trying to get underneath here and tighten that crossbar to your tower. But overall, I still really think this is a great fit for the Highlander. But if you've liked everything you've seen today that was just a look at that Rhino-Rack Roof Rack System on the 2023 Toyota Highlander.
Customer Reviews
Custom RCP Fit Kit for 4 Rhino-Rack RC and RV Series Roof Rack Legs - Fixed Mounting Points - RR66QT
Average Customer Rating: 5.0 out of 5 stars (1 Customer Reviews)
Custom fit kit lets you mount Rhino-Rack RC or RV series legs to a vehicle with fixed mounting points. Legs mount to vehicle with attachment studs. Molded inserts cover bases when the legs are removed. Includes 4 pads, covers, and mounting hardware.by: Gary04/24/2023
2023 Toyota Highlander
Great service and great it!!
1
1
See what our Experts say about this Rhino Rack Roof Rack
- Recommended Roof Rack for a 2023 Toyota HighlanderYes, we do have a roof rack that will fit the factory side rails of your 2023 Toyota Highlander. It is the roof rack by Rhino Rack and it includes the following parts: Rhino-Rack Vortex Aero Crossbars - Aluminum - Black - 49" Long - Qty 2 item # RRVA126B-2 RCH Legs for Rhino-Rack Crossbars and Pioneer Platforms - Fixed Mounting Points - Qty 4 item # RRRCH4 Custom RCP Fit Kit for 4 Rhino-Rack RC and RV Series Roof Rack Legs - Fixed Mounting Points item # RR66QT This aero bar roof rack...
view full answer...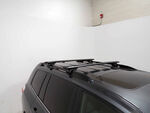

- Recommended Roof Rack for a 2023 Toyota Highlander w/ Flush RailsTo add a set of crossbars to the flush rails on your 2023 Toyota Highlander, you will need the following parts from Rhino-Rack: Rhino-Rack Vortex Aero Crossbars - Aluminum - Black - 49" Long - Qty 2 item # RRVA126B-2 RCH Legs for Rhino-Rack Crossbars and Pioneer Platforms - Fixed Mounting Points - Qty 4 item # RRRCH4 Custom RCP Fit Kit for 4 Rhino-Rack RC and RV Series Roof Rack Legs - Fixed Mounting Points item # RR66QT This aero bar roof rack system has a 165 lbs capacity. The included...
view full answer... - Low Profile Cargo Basket Option For A 2021 Toyota HighlanderHey Tami, so since your 2021 Toyota Highlander has the flush mount rails, your only option for adding a cargo basket will be to first add a roof rack with crossbars. I suggest going with a Rhino Rack Aero Bar roof rack, which will consist of the following parts: - Rhino-Rack Vortex Aero Crossbars # RRVA126B-2 - RCH Legs for Rhino-Rack Crossbars # RRRCH4 - Custom RCP Fit Kit # RR66QT From there you can add really any cargo basket of your choice. Our best low profile option is the Flint...
view full answer... - 2021 Toyota Highlander Parts Needed to Add Rhino-Rack Pioneer Platform RackTo add a Rhino-Rack Pioneer on your 2021 Toyota Highlander we will need to utilize the flush rails as there isn't a Backbone system for your vehicle. Here are the parts you'll need: 60"x 49" Pioneer Platform - # RR35TB RCH Legs - # RRRCH4 RCP Fit Kit - # RR66QT Attached is a video of a similar installation of the Rhino-Rack roof rack system on a 2018 Highlander so you can get an idea of how the fit kit and legs install on the rails.
view full answer... - Will The Yakima RuggedLine HD Mounting System Fit On A 2021 Toyota Highlander XLEHey Chris, The Yakima RuggedLine HD Mounting System for LockNLoad Platform # Y43DJ is not compatible with a 2021 Toyota Highlander unfortunately. If you have flush mounted rails that run from front to back then you could go with the following components for a Rhino-Rack Platform roof rack instead: Rhino-Rack Pioneer Platform Roof Tray # RR66AP RCH Legs for Rhino-Rack Crossbars and Pioneer Platforms # RRRCH4 Custom RCP Fit Kit for 4 Rhino-Rack RC and RV Series Roof Rack Legs # RR66QT
view full answer...
Do you have a question about this Roof Rack?
Info for this part was:

Expert Research:
Jameson C

Video Edited:
Joshua S

Updated by:
Wilson B

Edited by:
Daron K

Written by:
Alex H

Video by:
Ethan H

Test Fit:
Matthew B
At etrailer.com we provide the best information available about the products we sell. We take the quality of our information seriously so that you can get the right part the first time. Let us know if anything is missing or if you have any questions.
Product Experts Available Now!
Call 1-800-940-8924
Thank you! Your comment has been submitted successfully. You should be able to view your question/comment here within a few days.
Error submitting comment. Please try again momentarily.